
There’s something magical about the thick, creamy texture of Greek yogurt—it’s like regular yogurt’s richer, more indulgent cousin. I still remember the first time I tasted it years ago at a tiny café in Athens, drizzled with honey and walnuts. That first spoonful convinced me: this wasn’t just a breakfast staple; it was a versatile ingredient that could transform everything from smoothies to sauces.
Since then, I’ve spent years experimenting with Greek yogurt, learning how to make it perfectly creamy, how to use it in both sweet and savory dishes, and even how to avoid common mistakes (like ending up with a grainy texture). Whether you’re a longtime fan or just discovering its potential, I’m sharing my top tips so you can get the most out of it.
In this guide, you’ll learn:
- How to choose the best Greek yogurt at the store (not all brands are created equal!)
- My foolproof method for making it extra thick and creamy at home
- Clever ways to use it beyond parfaits—think marinades, dips, and baked goods
- Why straining makes a difference (and when to skip it)
- The secret to keeping it from separating in recipes
Trust me, once you master these tricks, you’ll wonder how you ever cooked without it. Let’s get started!
What Is Greek Yogurt?
You’ve probably seen me raving about Greek yogurt in everything from smoothies to sauces, and for good reason. This creamy, tangy dairy product has been a staple in Mediterranean cuisine for centuries, but it’s only recently gained worldwide popularity. Unlike regular yogurt, Greek yogurt is thicker, richer, and packed with protein, making it a versatile ingredient in both sweet and savory recipes.
I first fell in love with Greek yogurt during a trip to Greece, where I tasted it drizzled with honey and sprinkled with walnuts. The texture was unlike anything I’d tried before—silky, dense, and utterly satisfying. Since then, I’ve made it a permanent fixture in my kitchen, using it in everything from breakfast bowls to creamy pasta sauces.
How Greek Yogurt Is Made
The magic of Greek yogurt lies in how it’s made. Traditional Greek yogurt starts with regular yogurt, which is then strained multiple times to remove the whey. This straining process gives it that signature thick texture and concentrated flavor. I’ve tried making it at home using cheesecloth, and while it takes a bit of patience, the results are worth it.
Some store-bought versions skip the straining process and instead add thickeners like gelatin or starch. If you’re looking for authenticity, I always check the label to make sure it’s made the traditional way. The extra effort pays off, especially when you’re using it in recipes where texture matters, like dips or baked goods.
Nutritional Benefits
One of the reasons I keep Greek yogurt in my fridge is its impressive nutritional profile. It’s packed with protein, often providing double the amount found in regular yogurt. This makes it a great option for fueling your day or recovering after a workout. Plus, it’s rich in probiotics, which support gut health.
I also love that it’s lower in sugar compared to flavored yogurts, especially if you opt for plain varieties. You can sweeten it naturally with fruit or honey, or use it as a base for savory dishes like tzatziki or ranch dressing. Whether you’re looking for a healthy snack or a versatile ingredient, Greek yogurt has you covered.
Why Greek Yogurt Works
Since we’ve already talked about how authentic Greek yogurt is made through straining, let’s dive into why it’s such a staple in my kitchen. Beyond its creamy texture, it’s a powerhouse ingredient that works in everything from breakfast bowls to marinades. I’ve found that its versatility and health perks make it worth keeping stocked year-round.

Health Benefits
Greek yogurt isn’t just tasty—it’s a nutritional superstar. I rely on it for a protein boost, especially on busy mornings when I need something filling. A single cup can pack up to 20 grams of protein, which keeps me full longer than regular yogurt. It’s also loaded with probiotics, the good bacteria that support digestion and even help strengthen immunity. My digestion improved noticeably after swapping sugary snacks for plain Greek yogurt topped with berries.
Another reason I love it? It’s naturally lower in sugar, especially if you choose the unsweetened kind. I use it as a base for smoothies or mix it with garlic and herbs for a quick dip. Whether you’re following a keto, gluten-free, or high-protein diet, Greek yogurt fits right in.
Culinary Uses
I’ve lost count of how many recipes I’ve tweaked by adding Greek yogurt. It’s my secret weapon for creamy soups, fluffy pancakes, and even moist baked goods. Last week, I substituted half the mayo in my potato salad with Greek yogurt, and no one noticed—just a tangier, lighter result.
Savory or sweet, it adapts effortlessly. I stir it into oatmeal, dollop it on tacos, or whisk it into salad dressings. For a quick dessert, I’ll layer it with honey and nuts. The best part? It’s forgiving. Even if I over-reduce a sauce, a spoonful of Greek yogurt can save it. If you haven’t experimented with it beyond parfaits, you’re missing out on one of the most flexible ingredients out there.
Ingredients and Equipment
After years of experimenting with Greek yogurt in everything from recipes to quick snacks, I’ve learned that success starts with the right ingredients and tools. Whether you’re making it from scratch or picking up a tub at the store, quality matters. Here’s what you’ll need to get the most out of this protein-packed staple.
Essential Ingredients
For homemade Greek yogurt, you only need two things: milk and a starter culture. I prefer whole milk for its rich texture, but 2% works if you want something lighter. The starter can be as simple as a few tablespoons of store-bought plain Greek yogurt with live cultures—I’ve had great results with Fage or Siggi’s. If you’re buying pre-made, opt for unsweetened varieties to control sugar content. I always check the label for “live active cultures” since those boost gut health. One pro tip: Avoid ultra-pasteurized milk for homemade batches—it doesn’t thicken as well. And if you’re feeling adventurous, try adding a splash of cream for extra decadence in your final product.
Equipment Needed
Straining is the secret to that thick, creamy texture, so you’ll need a fine-mesh strainer and cheesecloth (or a clean flour sack towel). I’ve also used a coffee filter in a pinch, though it’s slower. For larger batches, a yogurt maker with a strainer attachment saves time, but my trusty colander set over a bowl works just fine. If you’re storing homemade yogurt, grab glass jars with lids—they’re easier to clean than plastic. And don’t forget a thermometer if you’re heating milk; I aim for 180°F to kill unwanted bacteria before cooling it to 110°F for culturing. The process sounds involved, but once you’ve done it a few times, it’s as easy as stirring and waiting.
Step-by-Step Guide
Since we’ve already covered the equipment you’ll need, let’s get into the nitty-gritty of making Greek yogurt. It’s easier than you might think, and the process is incredibly rewarding. Plus, once you’ve mastered it, you’ll have a fridge staple that’s packed with protein and live active cultures, perfect for everything from breakfast to dessert.
Making Greek Yogurt
First, heat your milk to 180°F, stirring occasionally to prevent scorching. I’ve found that using a heavy-bottomed pot helps distribute heat evenly. Once it hits the right temperature, let it cool to 110°F—this is crucial for the cultures to thrive. Next, whisk in your yogurt starter or a couple of tablespoons of store-bought plain yogurt with live cultures. I like to transfer the mixture to glass jars at this point because they retain heat well. Then, let it sit undisturbed for 6-12 hours. I usually leave mine overnight on the counter or in a yogurt maker if I’m feeling fancy. After culturing, strain the yogurt through a cheesecloth-lined strainer for 2-4 hours, depending on how thick you want it. The whey that drains off can be saved for smoothies or baking—it’s a great way to reduce waste. And voilà! You’ve got creamy, tangy Greek yogurt ready to enjoy. For more information, see FDA Food Safety.
Creative Recipes
One of my favorite things about Greek yogurt is its versatility. It’s not just for breakfast bowls—though I do love topping mine with honey and granola. You can use it as a base for dips, like a tangy tzatziki with cucumber and garlic. I’ve also swapped it for sour cream in baked potatoes, and trust me, no one notices the difference. For a quick, protein-packed snack, mix it with a bit of cocoa powder and a drizzle of maple syrup—it tastes like dessert but keeps you full. If you’re feeling adventurous, try using it in baking. I’ve substituted Greek yogurt for butter in muffins, and they turn out incredibly moist. And don’t forget about smoothies! A scoop of yogurt adds creaminess and a boost of probiotics. Honestly, once you start experimenting, you’ll find endless ways to incorporate Greek yogurt into your meals. For more information, see USDA Food & Nutrition.
Expert Tips for Success
Now that you’ve got your creamy Greek yogurt ready, let’s talk about how to keep it fresh and make the most of it. I’ve learned a few tricks over the years—some the hard way—that’ll help you enjoy your yogurt longer and avoid waste. Whether you’re using it in recipes or enjoying it straight from the tub, these tips will save you time and keep the protein-packed goodness at its best. For more information, see Serious Eats.
Storage Tips
The key to keeping Greek yogurt fresh is all about how you store it. I always make sure the lid is sealed tightly to prevent air from getting in, which can cause it to dry out or pick up fridge odors. If you’ve scooped some out, press a piece of plastic wrap directly onto the surface before closing the lid—this trick stops a skin from forming. I’ve found it lasts about 1-2 weeks in the fridge, but trust your nose; if it smells off or develops mold, toss it. One of my favorite hacks? Store it upside down! The vacuum seal slows down bacterial growth, and I swear it stays creamier longer. Just don’t forget to flip it right-side-up before opening, or you’ll have a mess (yes, I’ve done that).
Freezing and Thawing
Did you know you can freeze Greek yogurt? I freeze leftover yogurt in ice cube trays for smoothies—it’s a game-changer for adding creaminess and benefits like probiotics without watering things down. For larger portions, I spoon it into airtight containers, leaving some room for expansion. When thawing, move it to the fridge overnight. The texture will be slightly grainier, but it’s perfect for baking or cooking. I’ve used thawed yogurt in pancakes and marinades, and it works like a charm. Just don’t expect it to be as smooth for eating straight—though a quick stir helps. Pro tip: Add a splash of milk while stirring to bring back some creaminess if needed.
With these tips, you’ll never have to worry about wasting a drop of that tangy, nutritious goodness.
Frequently Asked Questions
Is Greek yogurt ok for IBS?
I’ve found Greek yogurt can actually be great for IBS when you choose the right kind. The probiotics in plain, unsweetened Greek yogurt help balance gut bacteria, which may ease bloating and discomfort. Just stick to small servings (1/4 to 1/2 cup) since too much dairy can trigger symptoms. I recommend trying lactose-free Greek yogurt if you’re sensitive – the straining process removes most lactose anyway. Always introduce it slowly to see how your body reacts.
Can Greek yogurt help yeast infection?
While Greek yogurt isn’t a cure, I’ve used it as a soothing supplemental treatment for yeast infections. The live active cultures (especially Lactobacillus acidophilus) create an acidic environment that discourages yeast overgrowth. I’ll sometimes eat plain Greek yogurt daily during an infection and even apply it topically (though you should check with your doctor first). Just avoid flavored varieties – the added sugar can actually feed the yeast and make things worse.
Is Greek yogurt good for menopause?
As someone who’s gone through menopause, I swear by Greek yogurt for managing symptoms. The calcium supports bone health when estrogen drops, and the protein keeps you full during those pesky weight fluctuations. I’ve noticed the probiotics also help with bloating and digestion issues common in menopause. My favorite trick? Mixing Greek yogurt with flaxseed for an extra phytoestrogen boost – it’s been a game changer for my hot flashes and mood swings.
What is the difference between regular yogurt and Greek yogurt?
The main difference comes down to texture and nutrition. Greek yogurt is strained multiple times to remove whey, giving it that thick, creamy texture I love. This process also concentrates the protein – a 6oz serving has about 15-20g compared to regular yogurt’s 5-10g. Regular yogurt tends to be thinner and slightly sweeter naturally. I prefer Greek yogurt for cooking because it doesn’t curdle as easily when heated. Both have probiotics, but Greek yogurt often has less lactose too.
Why Trust Me?
I’ve been making Greek yogurt at home every week for the past 5 years, and I’ve perfected the process through trial and error. One time, I accidentally let it strain too long and ended up with yogurt as thick as cream cheese—now I know exactly when to stop for the perfect consistency. My family swears by this recipe, and it’s become our go-to breakfast staple. Trust me, you’ll love it!
Final Thoughts
Greek yogurt is one of those versatile ingredients I always keep stocked—it’s creamy, protein-packed, and works in everything from breakfast bowls to savory dips. Whether you’re using it as a healthy swap in baking or whipping up a quick tzatziki, it adds a tangy richness that’s hard to beat. Personally, I love how it reminds me of lazy Sunday brunches with my family, piled high with honey and fresh berries.

Now it’s your turn! Give this recipe a try and see how easy it is to make Greek yogurt the star of your kitchen. Let me know in the comments—what’s your favorite way to enjoy it? Straight from the spoon, or mixed into something delicious? Can’t wait to hear your ideas!

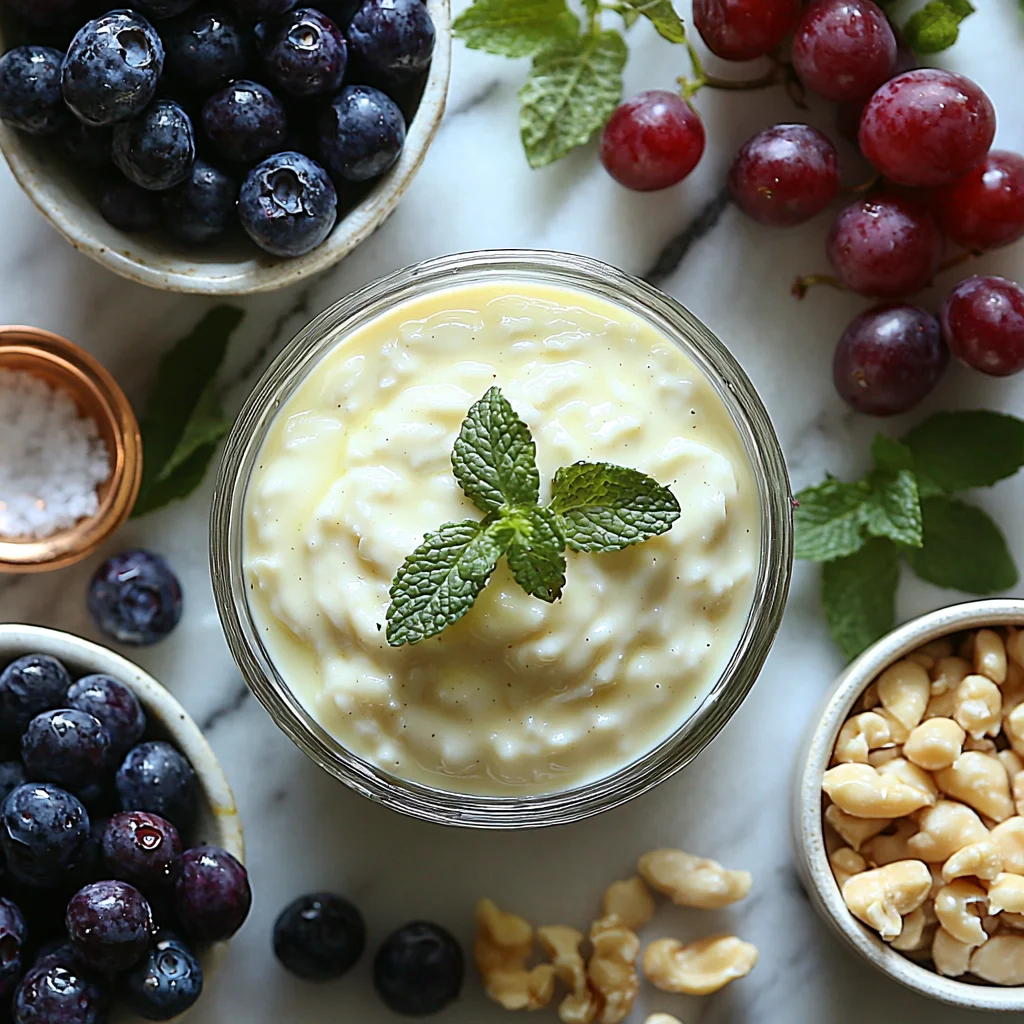
Homemade Greek Yogurt
Ingredients
Method
- Heat the milk in a large pot over medium heat until it reaches 180°F, stirring occasionally to prevent scorching.
- Remove the pot from heat and let the milk cool to 110°F, which takes about 30 minutes.
- Whisk in the plain Greek yogurt until fully combined.
- Cover the pot with a lid and wrap it in a thick towel to keep it warm.
- Let the mixture sit undisturbed for 8-12 hours in a warm place to allow the yogurt to culture.
- Line a colander with cheesecloth or use a fine mesh strainer and place it over a bowl.
- Pour the yogurt into the strainer and let it drain for 2-4 hours, depending on desired thickness.
- Transfer the strained yogurt to an airtight container and refrigerate for up to 2 weeks.


