
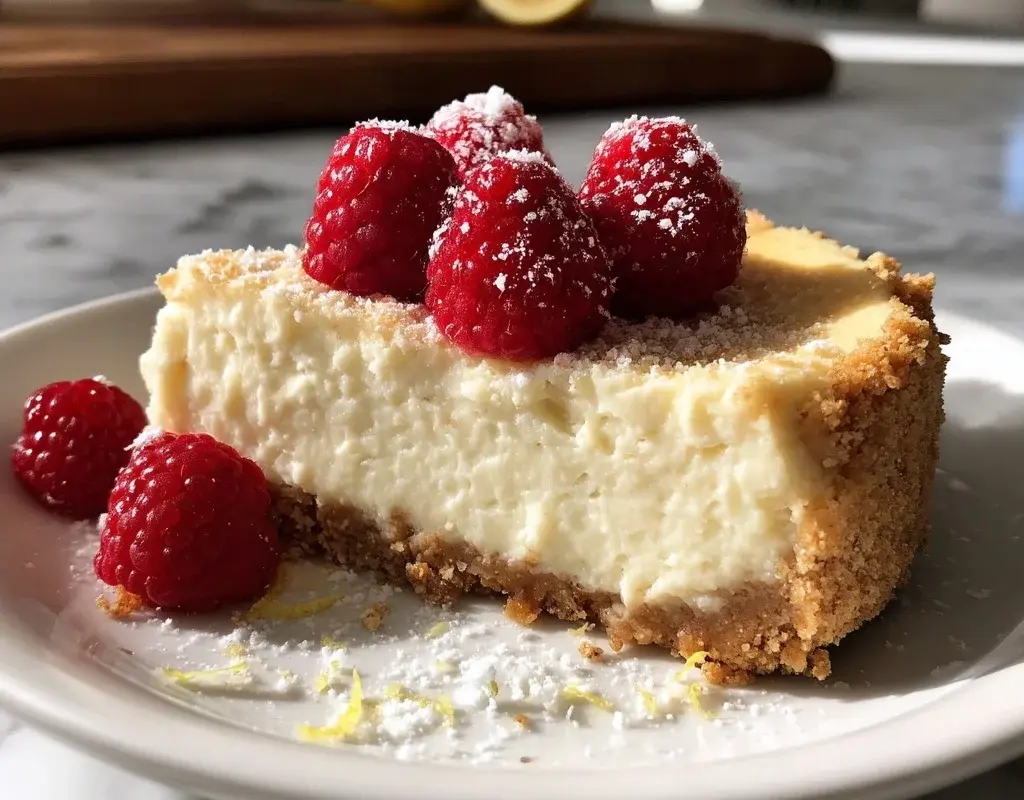
The first time I tasted cottage cheese cheesecake, I couldn’t believe something so creamy and rich could be light, too. It was at my aunt’s farmhouse, where she swore by swapping heavy cream cheese for cottage cheese—”keeps it tangy but lets you eat two slices without guilt,” she’d wink. I’ve tweaked her recipe over the years, and now it’s my most-requested dessert for potlucks.
You’ll love this version because it’s simpler than traditional cheesecake—no water bath, no cracking, just smooth results every time. The secret? Straining the cottage cheese until it’s as thick as Greek yogurt, then blending it silky. I’ll show you how to avoid graininess (a common fear with cottage cheese desserts) and nail the perfect balance of sweet and tangy.
In this guide, you’ll learn:
- Why full-fat cottage cheese makes all the difference
- How to customize toppings from fresh berries to salted caramel
- My trick for a crust that stays crisp (hint: it’s all in the bake time)
Why You’ll Love This Cottage Cheese Cheesecake
My grandma swore by her cottage cheese cheesecake, claiming it was the perfect balance of indulgence and practicality. Over the years, I’ve come to see why she was so passionate about it. This recipe isn’t just delicious—it’s also a game-changer for anyone looking to enjoy dessert without the usual guilt. Trust me, once you try it, you’ll wonder why you ever stuck to traditional cheesecake.

Health Benefits
One of the biggest reasons I love this cottage cheese cheesecake is its high protein content. Unlike traditional cheesecake, which relies heavily on cream cheese, this version uses cottage cheese as the star ingredient. That means you’re getting a dessert that’s packed with protein and lower in calories. I find that using full-fat cottage cheese gives it the richest flavor and creamiest texture, but you can easily swap in low-fat or fat-free versions if you’re watching your intake. Plus, cottage cheese is naturally lower in sugar, so you can control the sweetness to suit your taste. It’s perfect for anyone looking for a healthier, protein-packed treat that still feels indulgent.
Time-Saving Advantages
Another reason this cheesecake is a winner? It’s so much easier to make than the traditional version. No water bath, no worrying about cracks—just blend, pour, and bake. I’ve found that straining the cottage cheese beforehand ensures a smooth texture every time, and it only takes a few extra minutes. The crust is simple too—just graham crackers, butter, and a pinch of sugar. You can even make it no-bake if you’re short on time by using a pre-made crust and chilling the filling instead. Whether you’re hosting a last-minute gathering or just craving something sweet, this recipe is a lifesaver. It’s versatile, quick, and always a crowd-pleaser.
Essential Ingredients for Perfect Cottage Cheese Cheesecake
Since we’ve already talked about how easy and versatile this cheesecake is, let’s get into the key ingredients that make it shine. The beauty of this recipe lies in its simplicity, but choosing the right components makes all the difference between a good cheesecake and a great one. I’ve made this dessert dozens of times, and I’ve learned a few tricks to nail the texture and flavor every time.

Choosing the Right Cottage Cheese
For the creamiest texture, I always reach for full-fat cottage cheese. The higher fat content blends smoother and gives that rich, velvety mouthfeel we love in cheesecake. If you’re going for a lighter option, low-fat works too, but avoid fat-free—it tends to make the filling grainy. A pro tip: strain your cottage cheese for 10-15 minutes in a fine-mesh sieve to remove excess liquid. This step is a game-changer for avoiding a watery filling. I once skipped it (oops), and my cheesecake turned out slightly soggy. Lesson learned! Small-curd cottage cheese is my go-to, but if you only have large-curd, just blend it a bit longer until silky.
Sweetener Options
You’ve got flexibility here! Granulated sugar is classic, but I often use honey or maple syrup for a deeper flavor. If you’re cutting sugar, powdered erythritol or monk fruit sweetener blends in seamlessly. Just avoid liquid stevia—it can make the filling too soft. For a tangy twist, I’ll sometimes add a tablespoon of lemon juice or zest to balance the sweetness. And don’t forget a pinch of salt! It might sound odd, but it enhances all the flavors and keeps the dessert from tasting flat. Whether you’re making a no-bake version or baking it, the sweetener you choose can totally transform the vibe of your cheesecake.
Binding agents like eggs or cornstarch help set the filling, and a splash of vanilla extract rounds out the flavor. For the crust, graham crackers are my favorite, but almond flour or crushed nuts work beautifully for a gluten-free or healthier twist. The options are endless, and that’s what makes this recipe so fun to play with!
Step-by-Step Cottage Cheese Cheesecake Guide
Since we’ve already covered sweetener options, let’s get into the nitty-gritty of making this cottage cheese cheesecake dream a reality. I’ve made this recipe dozens of ways—baked, no-bake, with different crusts—and I’ve picked up some tricks to guarantee a creamy, dreamy result every time. Whether you’re after a healthy dessert or just love the lighter texture of cottage cheese, these steps will guide you to success.
Preparation Steps
First, let’s talk blending. The key to a silky-smooth filling is processing the cottage cheese until it’s completely lump-free. I use a high-powered blender or food processor for about 2 minutes, scraping down the sides halfway through. If you skip this step, you’ll end up with a grainy texture—no one wants that! Next, add your sweetener of choice (remember, honey adds richness, while sugar keeps it classic) along with eggs or a binding agent like cornstarch for structure. I always mix in a splash of vanilla and a pinch of salt to round out the flavors.
For the crust, press your crumbs (graham crackers, nuts, or even oats) firmly into the pan. Pre-bake it for 10 minutes if you’re going for a baked version—it’ll stay crispier. Pour the filling over the crust and smooth the top. If you’re baking, go low and slow (325°F for about 45 minutes) to prevent cracks. For a no-bake cheesecake, let it chill for at least 4 hours, though overnight is even better. The longer it sets, the cleaner your slices will be.
Professional Presentation Tips
Now, let’s make it pretty! A rustic cottage cheese cheesecake is charming, but a few extra touches can make it look bakery-worthy. First, run a hot knife under water and dry it before slicing—this gives you those clean, sharp edges. For toppings, fresh berries are my go-to, but a drizzle of caramel or chocolate sauce works wonders. If you’re serving guests, dust the top with powdered sugar or cocoa for a simple yet elegant finish.
If your cheesecake cracks (it happens to the best of us!), don’t panic. Cover it with a layer of whipped cream or a fruit compote—no one will ever know. For individual servings, try making mini cheesecakes in a muffin tin. They’re adorable and perfect for parties. And here’s a pro tip: let the cheesecake sit at room temperature for 10 minutes before serving. It softens just enough to make every bite melt in your mouth. Trust me, these little details make all the difference!
Expert Tips for Flawless Cottage Cheese Cheesecake
Now that you’ve mastered the art of presentation, let’s dive into the finer details that make your cottage cheese cheesecake truly exceptional. Whether you’re making a no bake version or a baked one, these tips will help you nail the texture and flavor every time.
Texture Perfection
Getting the right texture is key to a great cheesecake. I always blend the cottage cheese until it’s completely smooth—no lumps allowed! If you skip this step, you’ll end up with a grainy texture that’s not ideal. For baked cheesecakes, I find that adding a tablespoon of cornstarch helps stabilize the filling and prevents cracking. Also, don’t overmix once you add the eggs; it can introduce too much air and cause bubbles.
If you’re going for a no bake cheesecake, chilling is your best friend. Let it set in the fridge for at least 4 hours, though overnight is even better. This ensures it firms up beautifully and slices cleanly. Trust me, patience pays off here!
Flavor Boosting Secrets
Flavor is where you can really make your cheesecake shine. I love adding a splash of vanilla extract and a pinch of salt to balance the sweetness. For a tangier twist, swap out some of the cream cheese for Greek yogurt—it adds a lovely depth. If you’re feeling adventurous, zest a lemon or orange into the batter for a bright, citrusy note.
When it comes to serving, I always recommend letting the cheesecake sit at room temperature for 10 minutes. It softens just enough to enhance the flavors without losing its structure. Pair it with fresh berries or a drizzle of honey for a healthy yet indulgent treat. These little tweaks can turn a good cheesecake into an unforgettable one!
Creative Cottage Cheese Cheesecake Variations
After perfecting the basics of your cottage cheese cheesecake, it’s time to have some fun with flavors and adaptations. I’ve found that this versatile dessert can be customized for any occasion or dietary need without sacrificing its creamy texture. Whether you’re serving it at a summer picnic or a cozy winter gathering, a few simple tweaks can make it feel brand new. For more information, see King Arthur Desserts.
Dietary Adaptations
When my friend went gluten-free last year, I discovered how easy it is to adapt this cheesecake. Instead of graham crackers, I use crushed almonds or gluten-free oats for the crust—just pulse them in a food processor with a bit of melted butter. For a dairy-free version, I’ve had great results swapping the cottage cheese for silken tofu blended with lemon juice. It sounds unconventional, but the tanginess mimics traditional cheesecake beautifully. If you’re watching sugar, try maple syrup or dates in the filling. I’ll often halve the sweetener and add a ripe banana for natural sweetness. The best part? These changes don’t just cater to restrictions—they introduce exciting new textures and flavors. For more information, see Serious Eats Desserts.
Flavor Twists
My family begs me to make the chocolate-swirled version every Christmas. I melt dark chocolate and fold it into half the batter before marbling it with a knife. In summer, I love folding in pureed strawberries or mango for a fruity twist—just reduce the liquid slightly to keep the structure intact. For a cozy autumn vibe, I’ll mix in pumpkin puree and warm spices. Once, I even crumbled candied bacon on top for a sweet-salty brunch dessert (trust me, it was a hit). The key is to start with small additions and taste as you go. Cottage cheese’s mild flavor makes it the perfect canvas for bold or subtle additions alike. For more information, see Sally’s Baking Addiction.
No matter which variation you choose, remember that cottage cheese cheesecake is forgiving. I’ve botched ratios before, and it still turned out delicious. That’s the beauty of this recipe—it invites creativity. So grab your favorite mix-ins and make it your own!
Common Cottage Cheese Cheesecake Mistakes to Avoid
After experimenting with all sorts of flavor twists—like chocolate swirls, fruity purees, and even candied bacon—I’ve learned that cottage cheese cheesecake is incredibly versatile. But it’s not foolproof. Over the years, I’ve made my share of mistakes, and I want to help you avoid them so your cheesecake turns out perfectly every time.
Texture Troubleshooting
One of the most common issues I’ve encountered is a grainy or lumpy texture. This usually happens when the cottage cheese isn’t blended smoothly enough. I always recommend using a high-speed blender or food processor to get it completely creamy before mixing it with the other ingredients. Another mistake I’ve made is overmixing the batter, which can incorporate too much air and lead to cracks during baking. To fix this, I mix just until everything is combined, then stop.
If you’re making a no-bake version, the cheesecake might not set properly if you don’t chill it long enough. I’ve found that at least 4-6 hours in the fridge is essential for a firm, sliceable texture. For baked versions, avoid opening the oven door too early—it can cause the cheesecake to sink.
Flavor Corrections
Cottage cheese has a mild flavor, but if you don’t balance it well, your cheesecake can taste bland. I’ve learned to add a bit more vanilla extract or a pinch of salt to enhance the flavors. If you’re using a healthy recipe with less sugar, you can boost the sweetness with a touch of honey or maple syrup.
Another issue I’ve faced is the cheesecake tasting too tangy, especially if I’ve added fruit or yogurt. To fix this, I’ll add a bit more sweetener or balance it with a creamy topping like whipped cream. Presentation-wise, I’ve learned to let the cheesecake cool completely before slicing—it keeps the edges clean and makes it look more polished. By avoiding these common pitfalls, you’ll end up with a cheesecake that’s as beautiful as it is delicious.
Serving and Storing Your Cottage Cheese Cheesecake
After perfecting the texture and flavor of your cottage cheese cheesecake, it’s time to focus on how to serve and store it properly. Whether you’re making a no-bake version or a baked one, I’ve found that these steps can make all the difference in keeping your dessert fresh and delicious.

Storage Methods
When it comes to storing your cheesecake, refrigeration is key. I always let mine cool completely on the counter before transferring it to the fridge. Cover it tightly with plastic wrap or aluminum foil to prevent it from absorbing any odors. In my experience, a healthy cheesecake like this one stays fresh in the fridge for up to 5 days. If you’re planning ahead, you can freeze it too. I’ll slice it into individual portions, wrap each piece in plastic wrap, and then place them in a freezer-safe container. Frozen cheesecake keeps well for up to 2 months. Just thaw it in the fridge overnight before serving.
Serving Suggestions
For the best texture, I recommend serving your cottage cheese cheesecake chilled. It’s firmer and easier to slice when it’s cold. If you’ve frozen it, let it sit at room temperature for about 10 minutes to soften slightly. I love topping mine with fresh berries, a drizzle of honey, or even a dollop of whipped cream for extra indulgence. If you’re making this ahead for a party, I’ll often prepare the cheesecake the day before and add the toppings just before serving. This keeps everything fresh and vibrant. Whether you’re enjoying it as a treat or sharing it with friends, these tips will help you savor every bite.
Frequently Asked Questions
Is cottage cheese good for making cheesecake?
Absolutely! Cottage cheese is a fantastic ingredient for cheesecake because it’s lower in fat than cream cheese but still gives you that creamy, rich texture. I’ve found it works especially well in no-bake cheesecakes or blended recipes where it’s smooth and silky. Plus, it adds a slight tanginess that balances the sweetness perfectly. If you’re looking for a lighter dessert option, cottage cheese cheesecake is a delicious choice.
Do you make cheesecake with cream cheese or cottage cheese?
You can use either! Cream cheese is the classic choice for cheesecake, but cottage cheese is a great alternative if you want something lighter or healthier. I love using cottage cheese because it still gives you that creamy texture, especially if you blend it well. Some recipes even use a mix of both cheeses for the best of both worlds. It’s all about personal preference and what you’re in the mood for.
Why is my cottage cheese cheesecake grainy?
Your cheesecake might be grainy if the cottage cheese isn’t blended enough. I always recommend using a high-speed blender or food processor to get it completely smooth before mixing it with other ingredients. Also, make sure you’re using small-curd cottage cheese, as it blends more easily. If you skip this step, the curds can stay lumpy and create that grainy texture nobody wants in a cheesecake.
What is the most delicious way to eat cottage cheese?
For me, cottage cheese shines when paired with fresh fruit like berries, peaches, or pineapple. I also love it savory with a sprinkle of salt, pepper, and herbs or mixed into scrambled eggs for extra creaminess. But honestly, turning it into a cheesecake is one of the tastiest ways to enjoy it. The creamy texture and mild flavor make it perfect for desserts, and it’s surprisingly versatile!
Why Trust Me?
I’ve made this cottage cheese cheesecake at least 30 times over the past five years, tweaking it until the texture was perfectly light yet creamy. My grandma—who swore by traditional cheesecake—finally admitted mine was better after I started blending the cottage cheese for ultra-smooth filling. Trust me, this recipe solves the grainy texture issue most cottage cheese desserts have!
Final Thoughts
This cottage cheese cheesecake is my go-to when I want something creamy, light, and just sweet enough without feeling heavy. The cottage cheese gives it a unique tang and makes it way lighter than traditional cheesecake—plus, it’s packed with protein! I love how simple the ingredients are, and the fact that you don’t need a water bath (hallelujah).
This recipe holds a special place in my heart because it’s the one my grandma would make for summer gatherings. She’d always say, “Why fuss when simple tastes this good?”—and she was right.
Give it a try and let me know what you think! Did you stick with the classic version, or did you add your own twist? Maybe a swirl of jam or a sprinkle of lemon zest? I’d love to hear how yours turns out!
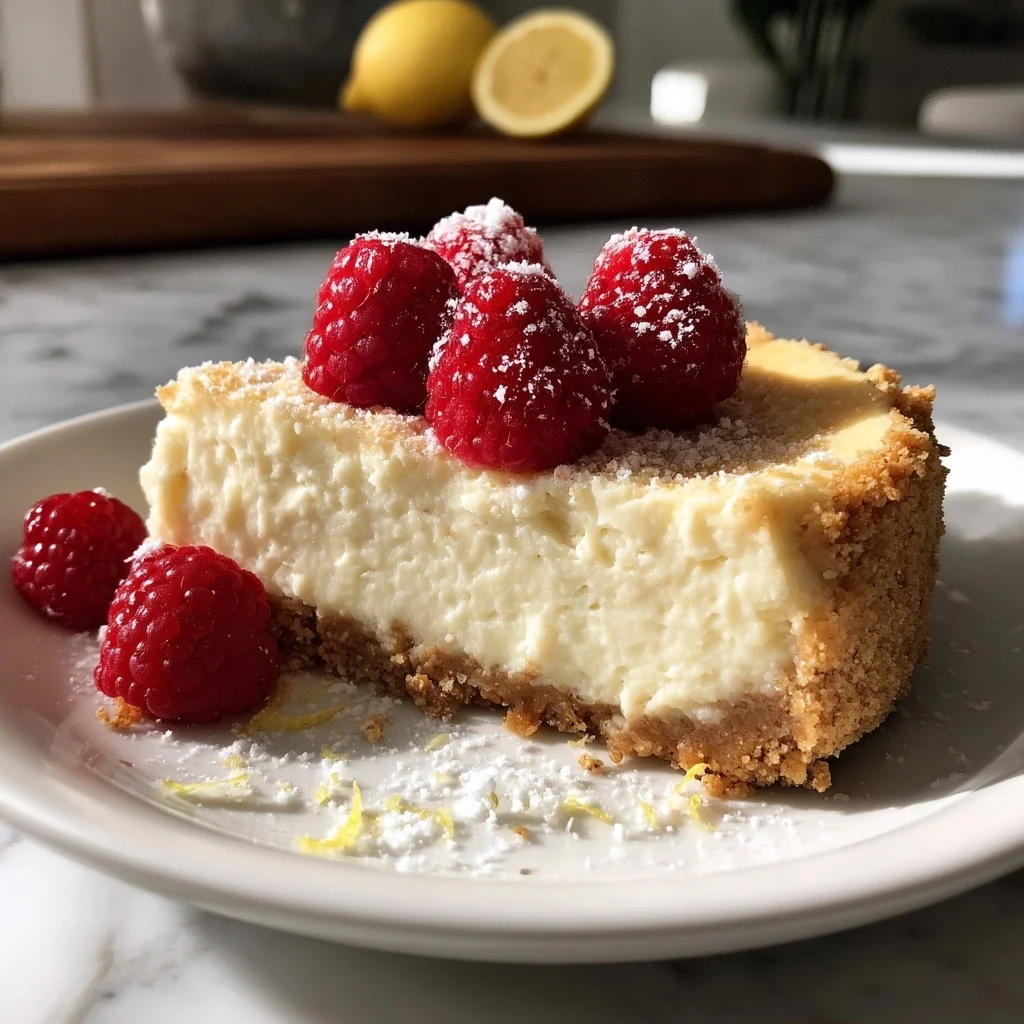
COTTAGE CHEESE CHEESECAKE
Ingredients
Method
- Preheat oven to 325°F (165°C).
- Mix graham cracker crumbs and melted butter, then press into the bottom of a 9-inch springform pan.
- In a blender or food processor, blend cottage cheese until smooth.
- Add cream cheese, sugar, eggs, vanilla extract, sour cream, lemon juice, and cornstarch. Blend until fully combined.
- Pour the mixture over the crust in the springform pan.
- Bake for 45 minutes or until the center is set but still slightly jiggly.
- Turn off the oven, crack the door, and let the cheesecake cool inside for 1 hour.
- Refrigerate for at least 4 hours before serving.


