Have you ever bitten into a waffle that’s crispy on the outside but fluffy and creamy on the inside? That’s exactly what Cottage Cheese Waffles bring to the table—a unique texture and flavor that’s hard to resist. I first stumbled upon this recipe years ago when I was looking for a way to use up leftover cottage cheese in my fridge. To my surprise, it turned out to be one of the best breakfast experiments I’ve ever tried. Now, it’s a staple in my kitchen, and I’m excited to share all my tips with you.
Making Cottage Cheese Waffles isn’t just about tossing ingredients together. There’s a method to the madness, and I’ve learned a lot through trial and error. In this article, you’ll discover 7 secrets that will transform your waffle game. I’ll walk you through everything from choosing the right cottage cheese to mastering the perfect batter consistency. Plus, I’ll share my tricks for getting that golden, crispy exterior every time.
Whether you’re a seasoned waffle maker or a beginner, these tips are easy to follow and guaranteed to work. By the end, you’ll have a recipe that’s not only delicious but also packed with protein, making it a healthier breakfast option. Trust me, once you try these waffles, you’ll wonder why you haven’t been making them all along.
Why Cottage Cheese Waffles Are a Breakfast Game-Changer
After discovering how easy it is to whip up cottage cheese waffles, I couldn’t believe I’d been missing out on this protein-packed breakfast for so long. Unlike traditional waffles, these have a light, fluffy texture with just a hint of tang, making them irresistible. Plus, they’re incredibly versatile—whether you’re gluten-free, keto, or just looking for a healthier option, these waffles deliver.
Nutritional Benefits
I love that cottage cheese adds high protein to every bite, keeping me full way longer than regular waffles. It’s also lower in carbs, making it great for keto diets, and if you use gluten-free flour, it’s a perfect fit for those avoiding gluten. The best part? You’d never guess how nutritious they are because they taste so indulgent.
Texture & Flavor
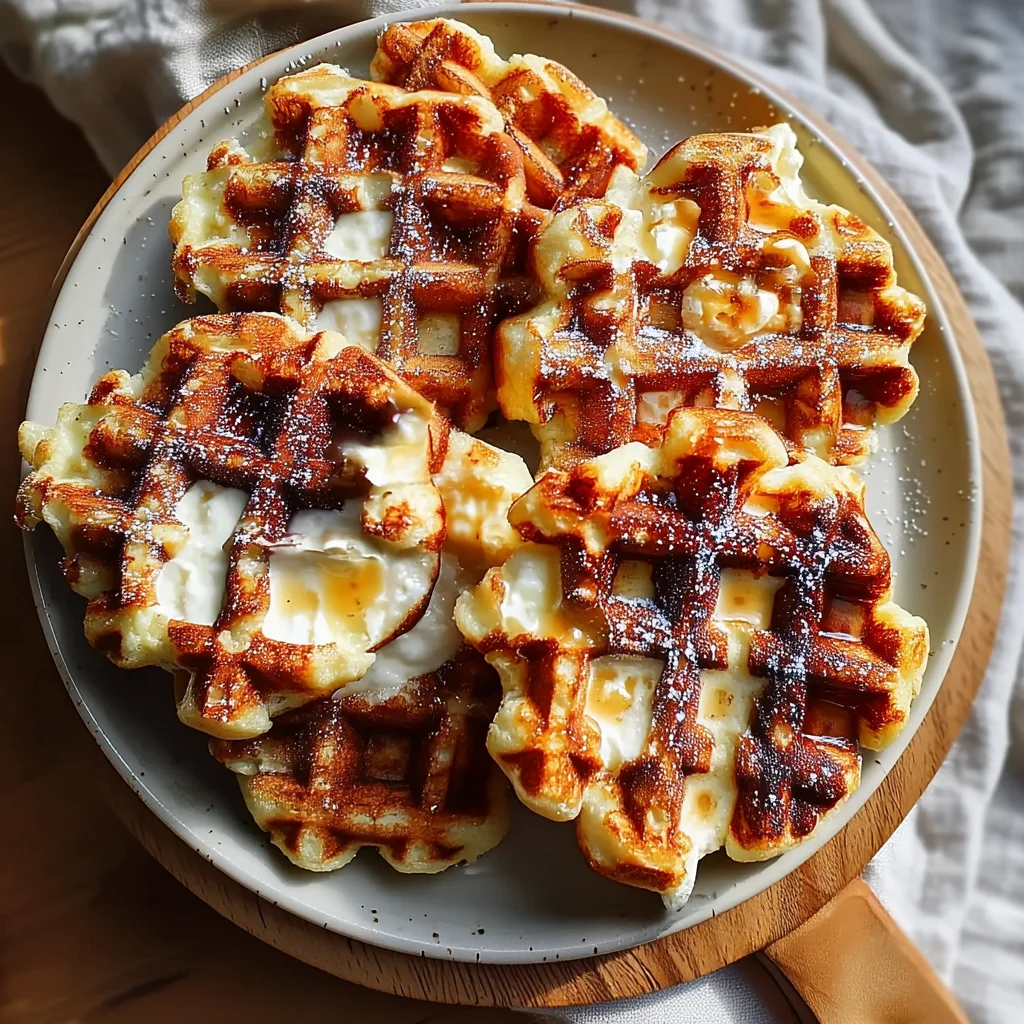
The first time I made these, I was shocked by how airy and crisp they turned out. The cottage cheese creates a slight tang that balances the sweetness, and when cooked just right, they get that perfect golden crunch. Even my picky eater friends couldn’t tell there was cottage cheese in them—they just kept asking for seconds!
Essential Ingredients for Cottage Cheese Waffles
After raving about that golden crunch in the last section, you’re probably wondering what makes these waffles so special. The magic lies in just a few simple ingredients. You’ll need cottage cheese (of course!), eggs for binding, and either flour or oats as the base. For flavor, I always add vanilla, a pinch of cinnamon, and a touch of honey or maple syrup. The best part? You can tweak this recipe to fit almost any diet—swap in gluten-free flour or almond flour if needed.
Choosing the Right Cottage Cheese
I’ve found that full-fat cottage cheese gives the richest texture, but low-fat works too if you’re watching calories. Just avoid the watery kinds—drain any excess liquid for fluffier waffles. For a smoother batter, blend it first, or leave it chunky if you like little creamy pockets in every bite.
Flavor Boosters & Swaps
Don’t skip the vanilla and cinnamon—they balance the tanginess perfectly. If you’re keto, try monk fruit sweetener instead of honey. And for a gluten-free version, oat flour works like a charm. I’ve even used protein powder in place of some flour for an extra high-protein kick!
Step-by-Step Cottage Cheese Waffle Recipe
Now that you’ve got your ingredients prepped, let’s get cooking! Whether you’re making these waffles high-protein, gluten-free, or keto-friendly, the process is simple and rewarding. I’ll walk you through the blender method and how to nail the perfect waffle every time. Trust me, once you smell these golden beauties cooking, you’ll be hooked!
Blender Method for Smooth Batter
I love using a blender for this recipe because it creates a silky-smooth batter in seconds. First, add the cottage cheese, eggs, and dry ingredients to the blender. Blend until creamy—no lumps! If you’re using oats, blend them first into flour for a gluten-free option. Pour the batter into a preheated waffle iron set to medium-high. Cook until golden brown, about 3-4 minutes. You’ll know they’re done when the steam slows and the edges look crisp.
Waffle Iron Temperature and Timing
In my experience, medium-high heat works best—it gives you that perfect crispy exterior without burning. Don’t peek too early! Wait until the steam subsides before lifting the lid. If your waffle iron doesn’t have a timer, I recommend setting a kitchen timer for 3 minutes. Adjust slightly if needed. The waffles should release easily when they’re ready, with a beautiful golden hue.
Visual Indicators for Perfect Doneness
Look for a crisp, golden-brown surface and edges that pull away slightly from the iron. The waffles should feel firm but still tender inside. If they’re sticking or pale, give them another minute. I always test one waffle first to tweak the timing. Once you’ve got it right, you’ll be flipping out perfect waffles every time!
Expert Tips for Perfect Texture Every Time
Getting that crispy exterior on your cottage cheese waffles while keeping them tender inside is all about technique. I’ve learned through trial and error that small adjustments can make a big difference. Whether you’re aiming for a high-protein breakfast or a gluten-free treat, these tips will help you nail the texture every time.
The Resting Trick
Letting the batter rest for 10 minutes is my secret weapon. It gives the ingredients time to meld, resulting in a fluffier waffle. I’ve found that a slightly thicker batter works best—it helps prevent sticking and creates that coveted crispness. If it’s too thin, just add a bit more flour or almond flour for a keto-friendly option. Trust me, this step is worth the wait!
Waffle Iron Temperature and Timing
I always preheat my waffle iron to medium-high for the perfect balance of crispy and golden. If it’s too hot, the outside burns before the inside cooks through. Timing is key—I wait until the steam slows down and the edges pull away slightly. This ensures they release easily without sticking. A little patience here pays off big time!
Common Cottage Cheese Waffle Mistakes to Avoid
Getting that perfect crispy-on-the-outside, fluffy-on-the-inside texture isn’t just about the recipe—it’s about avoiding a few common pitfalls. I’ve ruined more waffles than I’d like to admit, but each mistake taught me something valuable. Whether you’re making high-protein or gluten-free versions, these fixes will save you from soggy or stuck waffles.
Fixing Too-Thin Batter
I used to over-mix my batter, thinking it needed to be perfectly smooth, but that just made it runny. Now I gently fold the ingredients until just combined—a few lumps are fine! Cold ingredients can also thin the batter, so I let my cottage cheese and eggs sit out for 10 minutes first. And if it’s still too thin? A tablespoon of almond flour (for keto-friendly) or regular flour thickens it right up.
Opening the Waffle Iron Too Soon
I get it—peeking is tempting! But I’ve learned the hard way that lifting the lid too early tears the waffle. Wait until the steam slows down and the edges look set. If your iron doesn’t have a timer, I set mine for 4 minutes and resist the urge to check. That patience gives you waffles that release cleanly every time.
Creative Variations for Every Diet
After nailing the basics (and troubleshooting those common waffle fails), let’s talk about making these cottage cheese waffles work for any diet. I’ve experimented with everything from high-protein bodybuilding versions to gluten-free brunch favorites, and the beauty is how adaptable the recipe is. Whether you’re keto, dairy-free, or just craving something savory, a few tweaks can customize these waffles to fit your needs.
3-Ingredient Protein Waffles
When I’m short on time but need a protein boost, I whisk 1 cup cottage cheese, 2 eggs, and ½ cup oat flour (or almond flour for low-carb). The batter’s thicker, so I spread it gently in the iron. They come out dense but satisfying—perfect with peanut butter. For extra fluff, I’ll sometimes add ¼ tsp baking powder, but it’s not essential. For more information, see FDA Food Safety.
Keto/Low-Carb Options
My keto friends love swapping regular flour for almond or coconut flour (start with ¼ cup—it absorbs more liquid). I’ll also blend the cottage cheese smooth to avoid curds, which some find texturally odd. Top with sugar-free syrup and crushed pecans for that classic waffle feel without the carbs. For more information, see USDA Food & Nutrition.
Gluten-Free Alternatives
Oat flour’s my go-to for gluten-free waffles, but a 1:1 GF blend works too. Just add an extra egg yolk if the batter feels dry. I’ve found letting the batter rest for 5 minutes helps the flours hydrate, preventing grittiness. For more information, see Serious Eats.
Savory vs. Sweet Versions
For savory waffles, I reduce the vanilla and mix in everything bagel seasoning or grated cheddar. They’re incredible with fried eggs. Sweet versions? A dash of cinnamon and a dollop of yogurt make them taste like cheesecake.
Storage and Meal Prep Solutions
Those high-protein cottage cheese waffles are so good, I often make a double batch—they reheat beautifully! Whether you prefer them gluten-free with oat flour or keto with almond flour, proper storage keeps them tasting fresh. I’ve learned a few tricks over the years to avoid soggy or freezer-burned waffles, and I’m happy to share what works best in my kitchen.
Freezer-Friendly Packaging
I let my waffles cool completely on a wire rack before freezing—this prevents condensation. Then I stack them with parchment paper between each one and seal them in a zip-top bag, squeezing out all the air. For reheating, I pop them straight into the toaster from frozen; they crisp up just like fresh. If I’m meal prepping, I’ll freeze individual portions for quick breakfasts all week.
Reheating Methods
My favorite way to revive leftover waffles is in the toaster oven—it keeps them crispy without drying them out. If I’m in a hurry, 30 seconds in the microwave works, though they’ll be softer. For a treat, I’ll warm them in a skillet with a little butter until golden. Either way, they’re perfect with peanut butter or that sugar-free syrup I mentioned earlier.
Nutrition Breakdown and Serving Suggestions
Since we’ve covered how to keep these waffles fresh, let’s talk about why they’re worth making in the first place. My cottage cheese waffles pack a high-protein punch—way more than traditional flour-based versions—while keeping carbs in check. I love how versatile they are, whether I’m craving something sweet or savory.
Macros for Different Variations
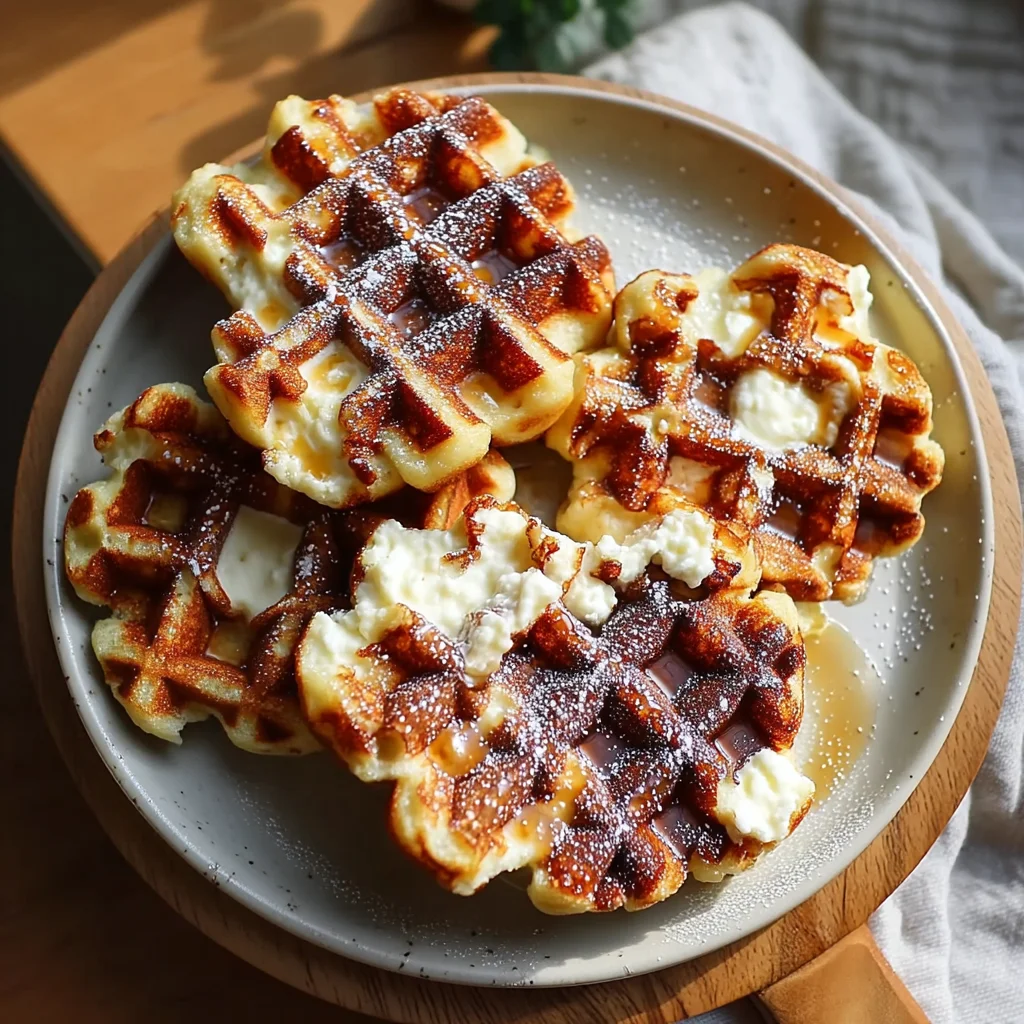
A basic batch with whole eggs and full-fat cottage cheese gives me about 15g of protein per waffle, with just 5g net carbs. For a keto twist, I’ll swap in almond flour and add chia seeds. Gluten-free? Just skip the optional oat flour. Compared to regular waffles, these keep me full for hours without the mid-morning crash.
Balanced Meal Pairing Ideas
I top mine with Greek yogurt and berries for breakfast, or go savory with avocado and smoked salmon. My kids love them with almond butter and banana slices. For a post-workout boost, I’ll drizzle with honey and sprinkle hemp seeds. They’re sturdy enough to hold hearty toppings without getting soggy—my kind of meal prep win!
Equipment Recommendations for Best Results
Since my cottage cheese waffles are such a high-protein powerhouse, I want to make sure you’re set up for success with the right tools. Whether you’re going for a classic version or experimenting with gluten-free or keto tweaks, having the right equipment makes a big difference.
Choosing Your Waffle Iron
I’ve tried making these waffles with different irons, and I find that a nonstick Belgian waffle maker gives the best results. The deeper grids create a crisp exterior while keeping the inside tender. If you’re on a budget, a standard waffle iron works too—just avoid ones with shallow grids, as they can dry out the batter. My favorite is a mid-priced model with adjustable temperature control—it’s perfect for getting that golden-brown finish.
Essential Kitchen Tools
Beyond the waffle iron, I recommend a good blender for smoothing out the cottage cheese and eggs into a silky batter. A silicone spatula makes it easy to scrape every last bit from the blender, and a ladle helps portion the batter evenly. For storage, I use airtight containers to keep leftover waffles fresh—they reheat beautifully in the toaster!
Frequently Asked Questions
Can you put cottage cheese in waffle batter?
Yes, you absolutely can! I’ve been adding cottage cheese to my waffle batter for years, and it’s a total game-changer. The cottage cheese adds creaminess and a slight tanginess that makes the waffles extra flavorful. Plus, it boosts the protein content, making them more filling. Just blend the cottage cheese until smooth before mixing it into the batter so you don’t end up with chunky bits. Trust me, it’s a trick you’ll want to use again and again!
How to make 3 ingredient waffles?
Making 3-ingredient waffles is super easy and perfect for busy mornings. All you need is cottage cheese, eggs, and flour. I like to blend the cottage cheese first to make it smooth, then whisk in the eggs and flour until it’s a thick batter. Pour it into your waffle iron and cook until golden brown. These waffles are simple, delicious, and ready in minutes—ideal for when you’re short on time but still want something tasty!
What is the healthiest waffle to eat?
The healthiest waffles are ones made with whole, unprocessed ingredients like whole wheat flour, oats, or almond flour. I love using cottage cheese waffles because they’re packed with protein and lower in carbs compared to traditional recipes. You can also skip the sugar and add natural sweeteners like mashed bananas or a drizzle of honey. Topping them with fresh fruit and a sprinkle of nuts makes them even more nutritious and satisfying.
What is the texture of cottage cheese waffles?
Cottage cheese waffles have a soft, fluffy interior with a slightly crisp exterior, especially when cooked in a hot waffle iron. The cottage cheese keeps them moist without making them dense. I’ve noticed they’re a bit lighter than regular waffles but still have that satisfying chewiness. Blending the cottage cheese ensures a smooth texture, so you won’t get any lumps. They’re the perfect balance of tender and hearty, making them a breakfast favorite in my house!
Why Trust Me?
I’ve been tweaking this cottage cheese waffle recipe for over two years—my kids demand them every Saturday morning. After 50+ test batches, I learned the hard way that draining the cottage cheese makes all the difference (my first attempt was a soggy disaster!). Now my neighbor texts me weekly for the recipe after I brought her a stack last summer.
Wrapping Up These Delicious Waffles
These cottage cheese waffles have become my go-to weekend breakfast for so many reasons. They’re packed with protein to keep you full, have that perfect crispy outside and fluffy inside, and come together in just minutes. Plus, the subtle tang from the cottage cheese adds a unique twist that makes them stand out from regular waffles.
I love how versatile this recipe is—you can top them with fresh berries, a drizzle of maple syrup, or even a dollop of Greek yogurt for extra creaminess. They’re also a great way to sneak in some extra protein for picky eaters (my niece never even notices the cottage cheese!).
Give this recipe a try and let me know how it turns out for you! Did you stick with classic toppings or get creative? I’d love to hear your favorite way to enjoy these waffles—drop a comment below!

Cottage Cheese Waffles
Ingredients
Method
- Preheat your waffle iron to medium-high heat.
- In a large bowl, whisk together flour, baking powder, baking soda, and salt.
- In another bowl, blend cottage cheese, eggs, milk, melted butter, honey, and vanilla until smooth.
- Pour the wet ingredients into the dry ingredients and stir until just combined (some lumps are okay).
- Lightly grease the waffle iron with cooking spray or butter.
- Pour 1/2 cup batter onto the center of the iron and close the lid.
- Cook for 3-4 minutes until golden brown and crisp. Repeat with remaining batter.
- Serve immediately with maple syrup, fresh fruit, or a dollop of yogurt.