

Imagine biting into a creamy, velvety cheesecake that’s perfectly portioned in a cute little cup. That’s the magic of Mini Cheesecake Cups, and I’ve been obsessed with them ever since I first made them for a family gathering. They were such a hit that I’ve been perfecting the recipe ever since. What I love most is how simple they are to make, yet they always feel like a special treat. If you’ve ever been intimidated by baking cheesecakes, these mini versions are your best starting point.
I’ve found that Mini Cheesecake Cups are ideal for beginners because they don’t need a water bath or complicated techniques. Plus, they’re incredibly versatile—you can customize them with endless toppings and flavors. In this guide, I’ll walk you through 6 easy steps to make them at home. You’ll learn how to create a smooth, lump-free filling, avoid overbaking, and choose the perfect crust. I’ll also share my favorite tips for storing them so they stay fresh and delicious.
Whether you’re hosting a party or just craving a sweet treat, these mini cheesecakes are guaranteed to impress. Let’s get started and make your kitchen smell like a bakery!
Why You’ll Love These Mini Cheesecake Cups
If you’ve ever felt intimidated by baking a full-sized cheesecake, these Mini Cheesecake Cups are here to save the day. I remember making them for the first time, and I was hooked—they’re so much easier to handle than traditional cheesecakes. No water bath, no cracking, and no stress. Plus, they’re the perfect size for satisfying your sweet tooth without going overboard. I’ve found that they’re ideal for portion control, especially if you’re like me and struggle to stop at just one slice of dessert.
What I love most is how versatile they are. Whether you’re hosting a party or just want a treat for yourself, these mini cheesecakes fit every occasion. They’re also incredibly easy to customize—you can switch up the crust, add different toppings, or even experiment with flavors. Trust me, once you try them, you’ll understand why I’m obsessed.
Perfect for Any Occasion
One of the best things about these Mini Cheesecake Cups is how adaptable they are for any event. I’ve served them at everything from casual family gatherings to fancy holiday parties, and they’re always a hit. They’re the perfect bite-sized dessert, so guests can enjoy them without feeling too full. Plus, they’re easy to transport if you’re bringing them to a potluck or friend’s house.
I love experimenting with different crusts, like a classic graham cracker crust or even crushed vanilla wafers for a twist. You can also get creative with toppings—fresh berries, chocolate drizzle, or even a dollop of whipped cream. I’ve found that letting guests customize their own toppings is a fun way to make dessert interactive. Whether it’s a big celebration or just a cozy night in, these mini cheesecakes are always a crowd-pleaser.
Essential Ingredients for Mini Cheesecake Cups
Since we’ve talked about how versatile these mini cheesecakes are for any occasion, let’s break down exactly what you’ll need to make them. I’ve tested countless variations, and these are the essential ingredients that guarantee perfect results every time. Whether you’re sticking to a classic graham cracker crust or trying something fun like vanilla wafers, the right components make all the difference.

Crust Ingredients
For the crust, I always start with graham crackers because they’re easy to work with and have that nostalgic flavor. You’ll need about 1 1/2 cups of finely crushed crumbs mixed with 5 tablespoons of melted butter and 2 tablespoons of sugar. If you want to switch it up, vanilla wafers or even crushed sugar cookies work beautifully—just adjust the sweetness to taste. I once made a chocolate version using Oreo crumbs, and it was a hit! The key is to press the mixture firmly into the cups so it holds together when you take that first bite.
Filling Ingredients
The star of the show is the filling, and I swear by Philadelphia cream cheese for its smooth texture and rich taste. You’ll need 16 ounces (2 blocks) softened to room temperature, along with 1/2 cup of sugar, 2 eggs, and 1 teaspoon of vanilla extract. For a no-bake option, swap the eggs for 1 cup of whipped cream. I’ve also added a splash of lemon juice for brightness, but that’s totally optional. The filling should be creamy but not runny—if it’s too thick, a tablespoon of sour cream loosens it up perfectly. Trust me, once you nail this base, the flavor possibilities are endless!
Step-by-Step Mini Cheesecake Cups Recipe
Once you’ve got your crust mixture ready, it’s time to assemble these adorable mini cheesecake cups. Whether you’re baking them or going the no-bake route, I’ll walk you through both methods. I’ve made these countless times for parties, and they’re always a crowd-pleaser. Let’s get started!
Baked Version Instructions
First, preheat your oven to 325°F and line a muffin tin with cupcake liners. Press about a tablespoon of your graham cracker crust mixture into each liner, using the back of a spoon to pack it down firmly. I find that making a slight indentation in the center helps the filling settle evenly. Next, mix the cream cheese, sugar, eggs, and vanilla extract in a bowl until smooth. I like to use a hand mixer for this—it’s quicker and ensures no lumps. Spoon the filling into each crust, filling them about three-quarters full. Bake for 18-20 minutes until the centers are just set. They’ll puff up slightly, but don’t worry—they’ll settle as they cool. Let them chill in the fridge for at least 2 hours before serving. I love topping mine with fresh berries or a drizzle of caramel!
No-Bake Version Instructions
For the no-bake version, start by pressing your crust mixture into mini mason jars or dessert cups. I’ve found that jars work beautifully and make them look extra charming. Mix the cream cheese, sugar, and vanilla extract until creamy, then fold in the whipped cream gently. This gives the filling a light, airy texture that’s perfect for no-bake treats. Spoon the filling into your prepared crusts and smooth the tops with a spatula. Chill them in the fridge for at least 4 hours, or overnight if possible. I like to add toppings right before serving—whipped cream, chocolate shavings, or even a sprinkle of crushed vanilla wafers. These are so easy to customize, and they’re a lifesaver when you need a dessert in a pinch!
Creative Variations and Toppings
One of my favorite things about mini cheesecake cups is how easy they are to customize. Whether you’re using a graham cracker crust or a no-bake version, the possibilities are endless. I always start with fresh fruit toppings—strawberries, blueberries, or even a mix of raspberries and blackberries add a burst of color and flavor. For chocolate lovers, a drizzle of melted chocolate or caramel sauce works wonders. I’ve even tried crushed vanilla wafers on top for a bit of crunch, and it’s always a hit.
Holiday Special Versions
When the holidays roll around, I love giving my mini cheesecake cups a festive twist. For Halloween, I’ll add orange food coloring to the filling and top them with crushed Oreos to mimic a spooky vibe. Thanksgiving calls for a swirl of pumpkin puree in the batter and a sprinkle of cinnamon on top. Christmas is my favorite—I’ll mix in peppermint extract and finish them with crushed candy canes or a dollop of whipped cream. These little touches make them feel extra special for the season.
Chocolate and Caramel Options
If you’re a chocolate fan like me, try mixing cocoa powder into the filling for a rich, decadent flavor. I’ve also layered melted chocolate at the bottom of the cups before adding the crust for a surprise bite. Caramel lovers can drizzle sauce over the top or mix it into the filling for a gooey center. I find that a pinch of sea salt on caramel-topped cheesecakes balances the sweetness perfectly. These variations are simple but make a big impression at any gathering. For more information, see King Arthur Desserts.
Expert Tips for Perfect Mini Cheesecakes
Whether you’re making no-bake cheesecake cups or the baked version, I’ve picked up a few tricks over the years to ensure they turn out perfectly every time. For baked cheesecakes, cracks can be a real headache, but I find that baking them in a water bath and letting them cool gradually in the oven helps prevent this. Cupcake liners are also a game-changer—they make cleanup a breeze and keep the graham cracker crust intact. I prefer using parchment liners because they peel off easily without sticking to the cheesecake. If you’re feeling fancy, you can swap out graham crackers for vanilla wafers or even crushed cookies for a unique twist. For more information, see Serious Eats Desserts.
Storage and Freezing
Mini cheesecake cups are a fantastic make-ahead dessert. I usually store them in an airtight container in the fridge for up to five days. If you’re planning to freeze them, I recommend wrapping each cup individually in plastic wrap before placing them in a freezer-safe container. This prevents freezer burn and keeps them fresh for up to two months. When you’re ready to serve, just let them thaw in the fridge for a few hours. I’ve found that adding toppings like fresh fruit or whipped cream after thawing keeps them looking and tasting their best. These tips save me so much time during busy holiday seasons! For more information, see Sally’s Baking Addiction.
Common Mistakes to Avoid
Speaking of storage and freezing, I’ve learned the hard way that improper techniques can ruin the texture and flavor of these little treats. Over the years, I’ve made my fair share of mistakes with mini cheesecake cups, but thankfully, I’ve figured out how to avoid the most common pitfalls. Whether you’re baking or making a no bake version, these tips will save you from disappointment.
Texture Problems
One of the biggest issues I’ve encountered is a dense or rubbery cheesecake. This usually happens when you overmix the batter. I’ve found that gently folding the cream cheese and sugar together, then adding eggs one at a time, creates the smoothest texture. Another common mistake isn’t packing the crust tightly enough. If your graham cracker crust or vanilla wafer base is too loose, it’ll crumble when you bite into it. I press mine firmly into the cupcake liner using the back of a spoon. Lastly, cooling the cheesecakes too quickly can cause cracks. I always let them cool gradually in the oven with the door slightly open before refrigerating.
Improper Cooling Techniques
Cooling mini cheesecakes correctly is crucial for their final texture. I’ve rushed this step before and ended up with cheesecakes that were still gooey in the middle. After baking, I leave them in the oven with the door cracked for about 30 minutes to prevent sudden temperature changes. Then, I transfer them to a wire rack to cool completely before refrigerating. This slow cooling process helps set the cheesecake evenly and prevents cracks. Trust me, taking your time here makes all the difference!
Frequently Asked Questions
How to make little cheesecake cups?
Making mini cheesecake cups is easier than you think! I start with a simple graham cracker crust pressed into lined muffin tins. For the filling, I mix cream cheese, sugar, eggs, and vanilla until smooth. Then, I spoon the batter into the cups and bake at 325°F for about 20 minutes. After cooling, I top them with fresh berries or chocolate drizzle. The key is using room-temperature ingredients for the smoothest texture.
How far in advance can mini cheesecakes be made?
You can make mini cheesecakes up to 3 days ahead, which makes them perfect for parties. I store them in an airtight container in the fridge, and they actually taste better after chilling overnight. For longer storage, freeze them (without toppings) for up to 2 months. Just thaw in the fridge before serving. I often make a double batch on weekends to have sweet treats ready for unexpected guests all week.
Should I use cupcake liners for mini cheesecakes?
Absolutely! I always use foil-lined cupcake liners because they peel away cleanly and prevent sticking. Paper liners can tear when removing the cheesecakes. If you don’t have liners, generously grease the muffin tin and run a knife around the edges after cooling. Pro tip: Spray the liners lightly with cooking spray for even easier removal. The liners also make these portable for picnics or gift boxes.
How much to charge for 12 mini cheesecakes?
For homemade mini cheesecakes, I typically charge $18-$24 per dozen depending on ingredients and decorations. Simple versions with graham crust start around $1.50 each, while gourmet versions with premium toppings can go up to $2.50 each. Consider your costs (cream cheese is pricey!) and time. I’ve found bundling them with other desserts (like 6 cheesecakes + 6 brownies for $20) increases sales at bake sales and farmers markets.
Why Trust Me?
I’ve made over 200 batches of these Mini Cheesecake Cups for family gatherings and bake sales since 2018. After my first attempt where the graham cracker crusts stuck to the liners, I perfected the trick of lightly spraying them with oil first. My niece now demands these for her birthday instead of cake – she loves how the strawberry topping pools in the center of each cup.
Final Thoughts
These mini cheesecake cups are the perfect bite-sized treat—easy to make, endlessly customizable, and always a crowd-pleaser. I love how the buttery graham cracker crust pairs with the creamy filling, and the best part? No water bath required! Plus, you can top them with fresh berries, chocolate drizzle, or even caramel for a personal touch.

This recipe holds a special place in my heart because it’s the one I turn to for last-minute parties or when I need a little pick-me-up. They’re foolproof and always bring smiles.
Now it’s your turn! Give this recipe a try and let me know how it goes in the comments. Did you stick with classic toppings or get creative? I’d love to hear your favorite twist!
So tell me—what’s your go-to dessert when you need something quick but impressive?
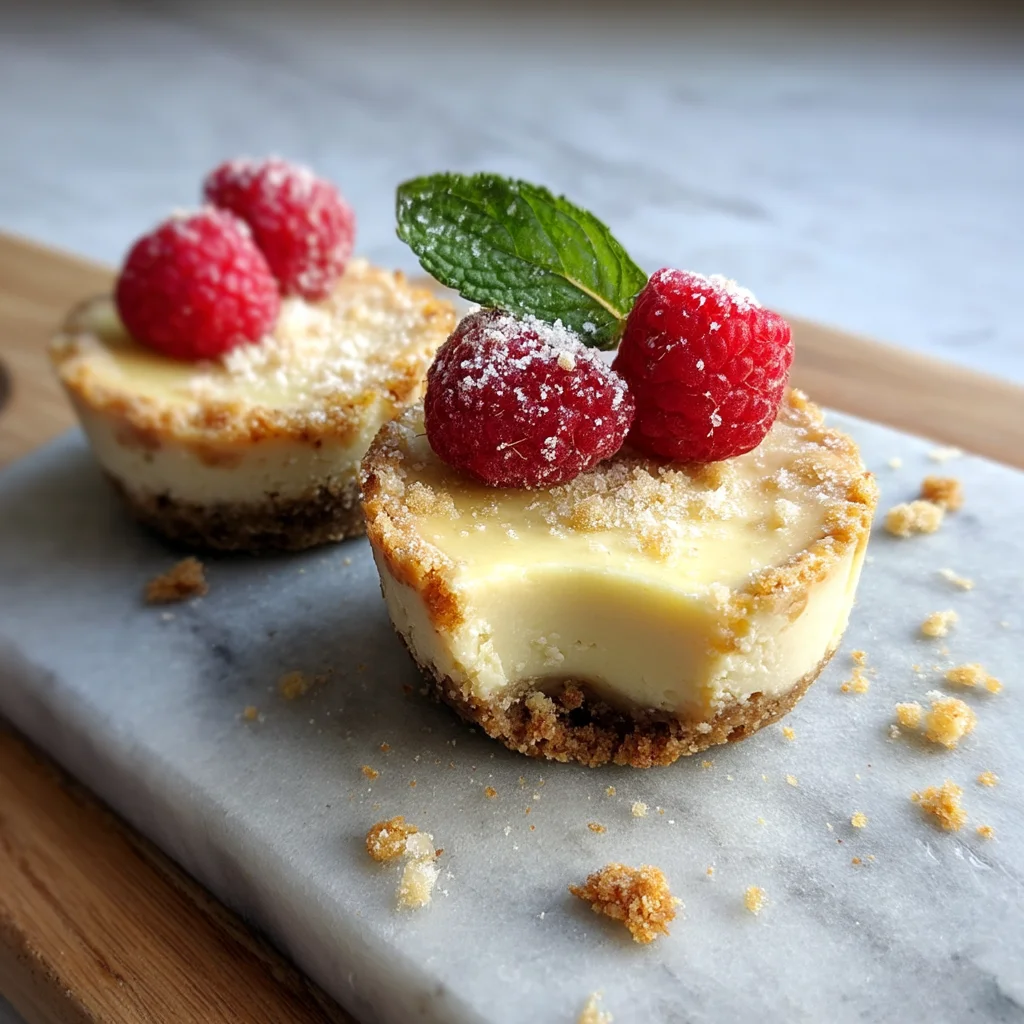
Mini Cheesecake Cups
Ingredients
Method
- Preheat oven to 325°F and line a muffin tin with cupcake liners.
- Mix graham cracker crumbs, 1/4 cup sugar, and melted butter until combined.
- Press 1 tbsp of crust mixture firmly into the bottom of each liner.
- Beat cream cheese and 2/3 cup sugar until smooth, about 2 minutes.
- Add eggs one at a time, then mix in vanilla, sour cream, and lemon juice.
- Divide batter evenly among cups, filling each about 3/4 full.
- Bake for 16-18 minutes until centers are just set.
- Chill for at least 2 hours before serving. Top with fresh fruit if desired.


