The smell of warm peanut butter and vanilla wafting through your kitchen—that’s the first sign you’re about to bite into something truly special. I’ve been baking peanut butter protein blondies for years, tweaking the recipe until I landed on a version that’s chewy, packed with protein, and doesn’t taste like cardboard. My biggest breakthrough? Discovering that the right blend of ingredients and techniques makes all the difference between a dry brick and a melt-in-your-mouth treat.
In this guide, I’m sharing the 7 secrets that transformed my blondies from mediocre to irresistible. You’ll learn why swapping traditional flour for oat flour keeps them tender, how to avoid overmixing (the #1 mistake), and my trick for getting that perfect fudgy center without underbaking. Plus, I’ll reveal the protein powder that blends seamlessly without grittiness.
Whether you’re meal prepping for the week or craving a post-workout snack, these blondies deliver on flavor and nutrition. No weird ingredients or complicated steps—just simple, foolproof methods that actually work. Let’s get baking!
What Are Peanut Butter Protein Blondies?
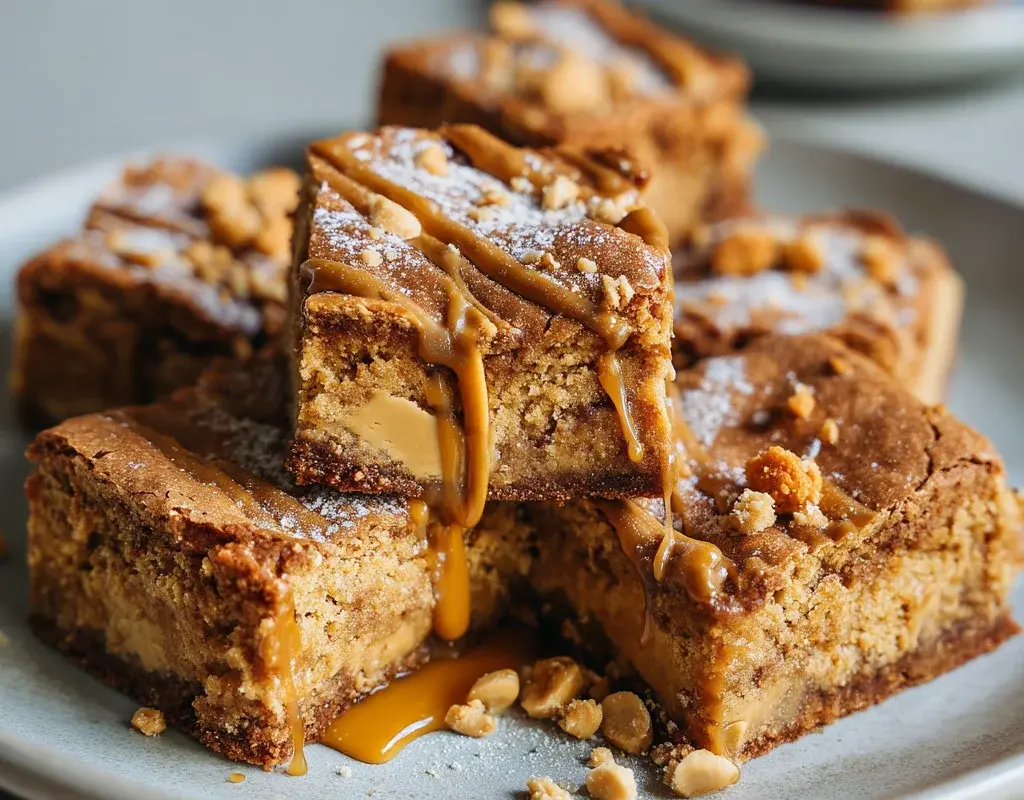
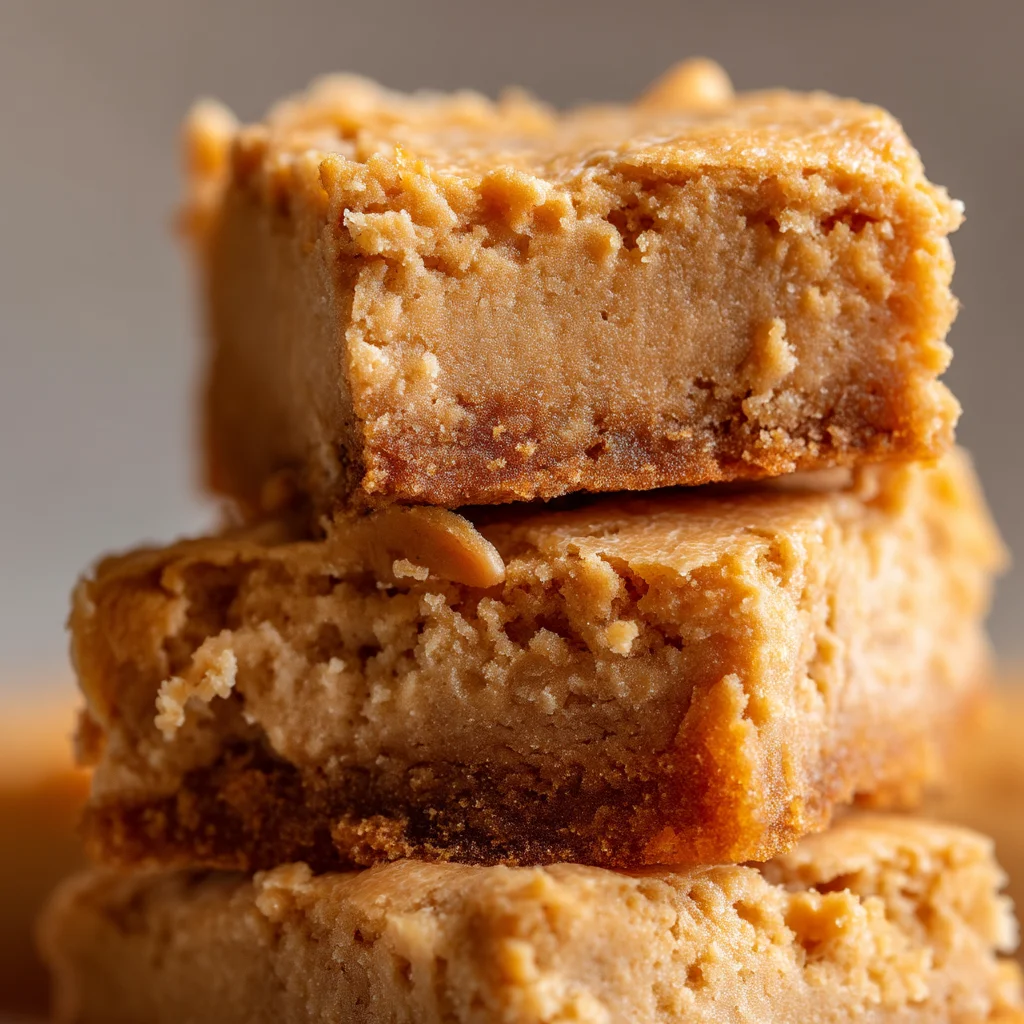
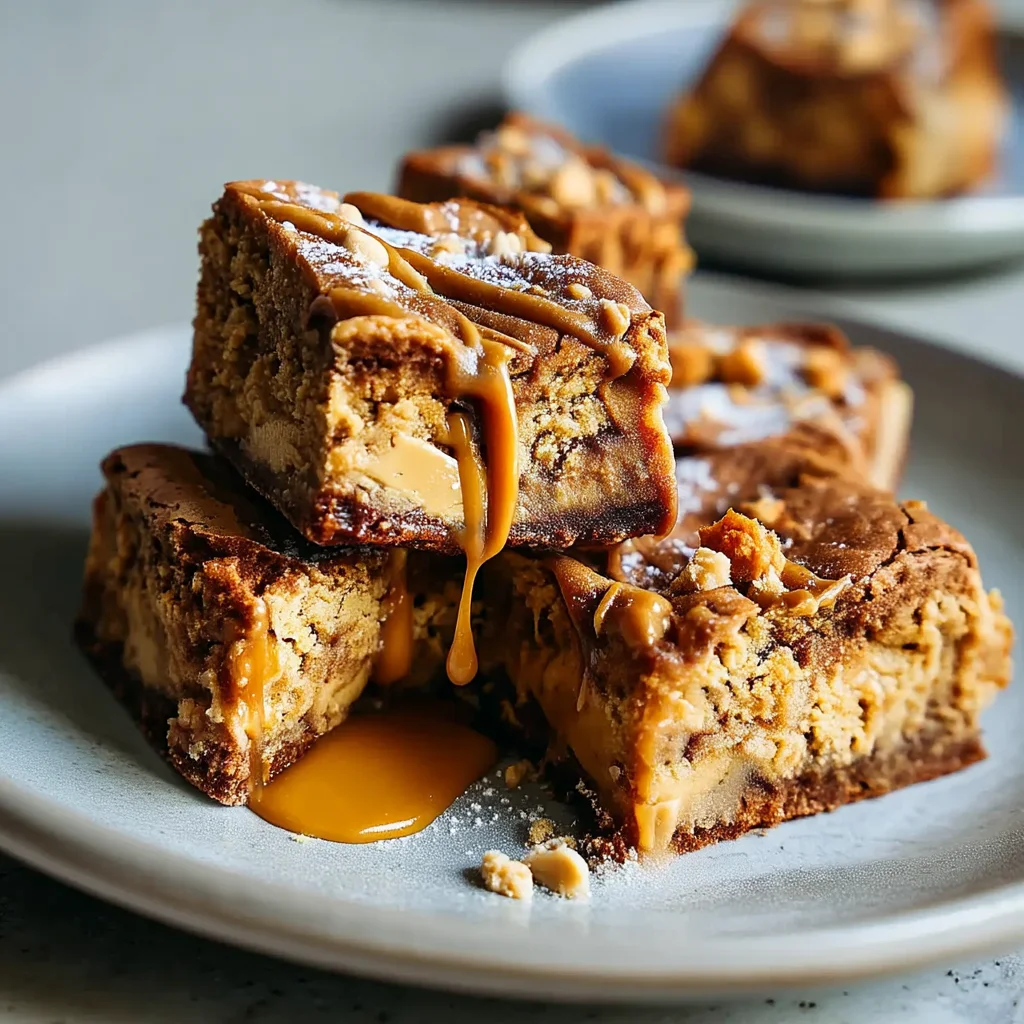
That perfect fudgy center I mentioned earlier? It’s what makes peanut butter protein blondies stand out from regular blondies. Think of them as the lovechild of a classic blondie and a protein bar—chewy, slightly sweet, and packed with healthy fuel. Unlike traditional desserts loaded with refined sugar, these use protein powder, natural peanut butter, and whole-food ingredients to create a low-calorie treat that actually satisfies.
I first started making these when I needed a post-workout snack that didn’t taste like chalk. The magic lies in balancing moisture (thanks to peanut butter) with structure (hello, oat flour) so they hold together without drying out. They’re dense but not heavy, sweet but not cloying—and they keep you full for hours.
Key Ingredients
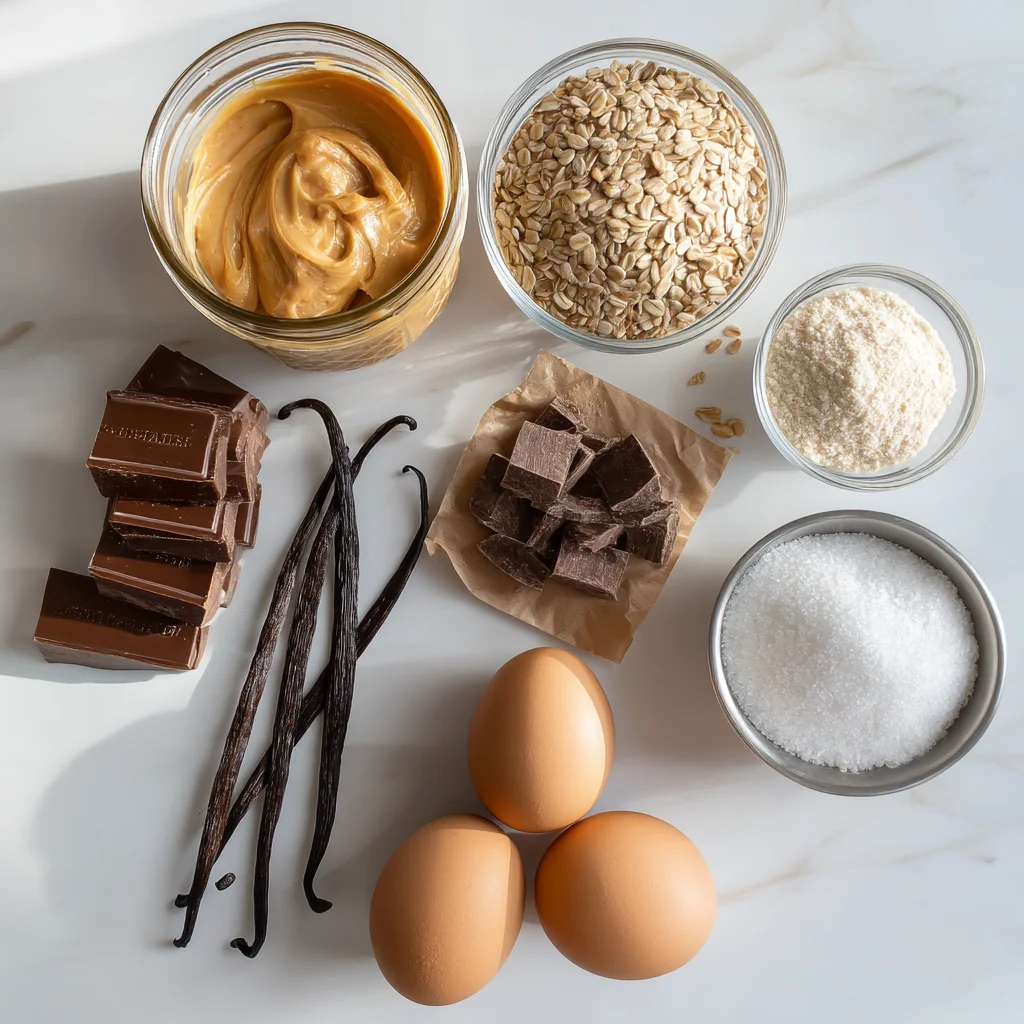
My go-to blend includes creamy peanut butter for richness, vanilla protein powder (whey or plant-based), and a touch of maple syrup instead of refined sugar. Oat flour keeps them tender, while eggs bind everything without making them cakey. I’ve found that a dash of cinnamon deepens the flavor, and dark chocolate chips add pockets of melty goodness. Every ingredient pulls double duty for both taste and nutrition.
Why They’re Healthier
Regular blondies can leave you crashing an hour later, but these pack 15g of protein per serving thanks to the protein powder and peanut butter. They’re also lower in sugar since I rely on natural sweeteners. I love that I can enjoy one as a quick breakfast or afternoon pick-me-up without guilt. Plus, they freeze beautifully—I always stash a batch for busy days.
Why Peanut Butter Protein Blondies Work
What I love most about these blondies is how they’re both indulgent and nourishing. Unlike traditional desserts that leave you feeling sluggish, these peanut butter protein blondies are packed with ingredients that fuel your body. They’re the perfect treat for anyone balancing a sweet tooth with health goals. Plus, they’re incredibly easy to whip up—no fancy techniques or hard-to-find ingredients required.
Health Benefits
These blondies are a powerhouse of protein, making them ideal for post-workout recovery or a satisfying snack. I’ve found that the combination of peanut butter and protein powder keeps me full longer without the sugar crash. They’re also low-calorie compared to regular blondies, so I don’t feel guilty grabbing one whenever I need a pick-me-up. The oat flour adds fiber, which helps with digestion, while the natural sweeteners keep things balanced.
Why They’re Healthier
Traditional blondies are loaded with refined sugar and butter, but these are a smarter choice. I use maple syrup instead of white sugar, which adds a subtle sweetness without spiking my blood sugar. The protein powder and peanut butter provide about 15g of protein per serving, which is perfect for supporting muscle repair. I also love that they’re freezer-friendly—I often make a double batch so I always have a healthy treat on hand.
Ingredients You Need
Since these peanut butter protein blondies are all about balancing flavor and nutrition, choosing the right ingredients makes all the difference. I’ve tweaked this recipe over the years to nail that perfect chewy texture while keeping it healthy and packed with protein.
Essential Ingredients
You’ll need creamy peanut butter (the natural kind without added sugar works best), vanilla protein powder (I prefer whey, but plant-based works too), and oat flour for a fiber boost. For sweetness, I swear by maple syrup—it adds depth without being overpowering. Don’t forget eggs to bind everything and a splash of vanilla extract for that warm, cozy flavor. If you’re out of oat flour, almond flour or whole wheat flour are great substitutes.
Substitutions & Tips
For a low-calorie option, swap maple syrup with sugar-free syrup or mashed banana. If you’re vegan, flax eggs work perfectly instead of regular eggs. I’ve even used almond butter when I ran out of peanut butter, and it turned out delicious. Just remember: the better the quality of your protein powder, the richer the flavor. Cheap powders can leave a chalky aftertaste, so I splurge on a brand I trust.
Step-by-Step Guide to Making Peanut Butter Protein Blondies
Using creamy peanut butter and vanilla protein powder as the base for these blondies keeps them healthy while delivering that irresistible chewy texture. Let’s get into the process so you can whip up a batch in no time.
Mixing the Batter
First, preheat your oven to 350°F and line an 8×8 baking pan with parchment paper. In a large bowl, combine the peanut butter, maple syrup, and eggs, whisking until smooth. I find using a hand mixer helps here, but a sturdy spatula works too. Next, add the protein powder, oat flour, and vanilla extract, stirring until everything comes together into a thick batter. Don’t overmix—just fold until it’s evenly combined. Pour the batter into the prepared pan, smoothing the top with a spatula.
Baking and Cooling
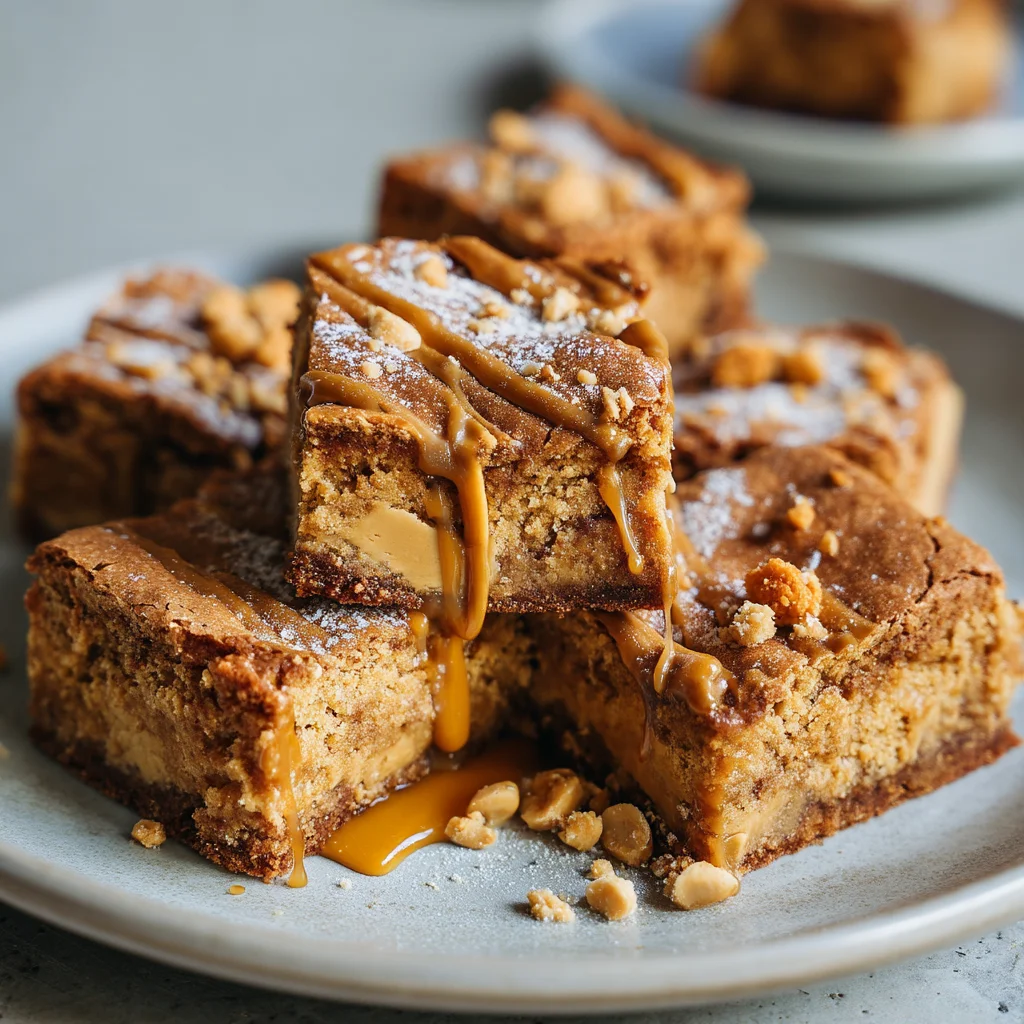
Pop the pan into the oven and bake for 18-20 minutes. I always check at the 18-minute mark—the edges should be golden, and the center should feel slightly firm but still soft. Overbaking can make them dry, so keep an eye on it. Once done, let the blondies cool completely in the pan. Trust me, cutting them too soon will make them crumble. For the best texture, I refrigerate them for 30 minutes before slicing into squares. Serve them as-is or with a drizzle of melted peanut butter for extra indulgence.
Expert Tips for Success
Getting those peanut butter protein blondies just right comes down to a few simple tricks I’ve learned through trial and error. Since we just talked about mixing the batter, let’s focus on what happens next—because even the best ingredients won’t save you if the texture’s off.
Achieving the Perfect Texture
I’ve found the key is balancing moisture. Too much protein powder can make blondies dry, so I always sift mine to avoid clumps. If your batter feels stiff, add a splash of almond milk—just 1-2 tablespoons max. Underbaking slightly keeps them fudgy, while overmixing leads to toughness. For healthy blondies that still satisfy, I swap half the oat flour for almond flour sometimes. It adds richness without weighing them down. For more information, see FDA Food Safety.
Baking and Cooling
Here’s where patience pays off. I bake mine on the middle rack to prevent uneven cooking, and I rotate the pan halfway through. Letting them cool completely is non-negotiable—I once cut into a batch too soon and ended up with crumbly squares. For low-calorie versions, I skip the peanut butter drizzle and top with crushed raspberries instead. They keep best in the fridge, but 10 seconds in the microwave brings back that just-baked softness. For more information, see USDA Food & Nutrition.
Common Mistakes to Avoid
Getting the ingredients right is only half the battle—I’ve ruined more batches than I’d care to admit by making simple execution errors. The worst was when I served rock-hard blondies at a potluck because I didn’t realize how quickly protein powder can turn tender treats into dry bricks. For more information, see Serious Eats.
Avoiding Overbaking
I learned the hard way that blondies continue cooking as they cool. Now I pull mine from the oven when the edges are just golden but the center still looks slightly underdone. If you wait for the whole surface to brown, you’ll lose that fudgy texture we all crave. My foolproof test? Press the center gently—it should spring back slightly but leave a faint indentation.
Choosing the Right Protein Powder
Not all powders behave the same way in baking. Whey protein tends to dry out faster, so I prefer plant-based blends for healthy blondies. Once I used a vanilla-flavored whey isolate, and the result tasted oddly chalky. Now I stick to unflavored pea protein or brown rice protein, which blend seamlessly into the batter without altering the peanut butter flavor.
Skipping the Cooling Step
I get it—waiting is torture when your kitchen smells like warm peanut butter. But cutting into blondies too soon guarantees crumbles. I let mine cool completely in the pan, usually about 45 minutes, before transferring to a wire rack. For low-calorie versions, this resting time helps the structure set properly so you don’t need extra binding agents. Patience rewards you with perfect squares every time.
Variations and Substitutions
Since we just talked about how protein powder choices affect texture, let’s dive into ways to customize these blondies for different diets. I’ve made this recipe with everything from almond flour to oat flour for gluten-free friends, and honestly, they never guess it’s healthy. The key is keeping that fudgy center while swapping ingredients.
Vegan Options
For plant-based versions, I use flax eggs (1 tbsp ground flax + 3 tbsp water per egg) and vegan protein powder. My favorite combo is unflavored pea protein with a splash of almond milk to keep things moist. Once, I added mashed banana instead of eggs, and the blondies turned out surprisingly low-calorie but still dense. Just skip the honey and use maple syrup to keep it fully vegan.
Alternative Add-Ins
Protein powder flavors can transform these—chocolate peanut butter or cinnamon roll varieties work great. I’ll sometimes fold in dark chocolate chips or swirl almond butter on top before baking. For crunch, a handful of chopped peanuts or cacao nibs adds texture without messing with the bake time. The best part? These tweaks don’t sacrifice that irresistible peanut butter richness.
Frequently Asked Questions
How do you make peanut butter protein blondies without flour?
I’ve made flourless peanut butter blondies dozens of times, and the secret is using oat flour or almond flour instead. Just blend rolled oats into a fine powder if you don’t have store-bought oat flour. The peanut butter and eggs provide enough structure that you won’t miss regular flour. I like adding 1/4 cup of coconut flour too – it soaks up moisture beautifully. You’ll get fudgy bars that hold together perfectly without any wheat flour.
What’s the best protein powder for peanut butter blondies?
Through lots of trial and error, I’ve found vanilla whey protein powder works best – it blends seamlessly into the batter without making things gritty. Plant-based powders can work too, but they often need extra liquid. My favorite is Quest Nutrition’s vanilla because it’s not overly sweet. Avoid unflavored powders unless you want to add extra sweetener. And always sift the powder to prevent clumps – nobody wants chalky bites in their blondies!
Can I use natural peanut butter in protein blondies?
Absolutely! I actually prefer natural peanut butter because it has that real roasted peanut flavor. Just make sure to stir it well first since the oil separates. The only adjustment is you might need slightly less sweetener since natural PB isn’t pre-sweetened. I’ve found the drippy texture helps keep the blondies moist too. If your natural peanut butter is super runny, you can reduce other liquids in the recipe by a tablespoon or two.
Why are my peanut butter protein blondies dry?
This happened to me constantly until I figured out the perfect ratios! The main culprits are usually too much protein powder or overbaking. Protein powder absorbs moisture like crazy, so never exceed 1/2 cup per batch. Also, pull them out when the center looks just set – they’ll firm up as they cool. I always add an extra tablespoon of peanut butter or applesauce to my batter for insurance against dryness.
Why Trust Me?
I’ve been perfecting these peanut butter protein blondies for 2 years, making them weekly for my post-workout snack. After 50+ batches, I learned the hard way that overmixing makes them tough—now I fold the batter gently for that perfect fudgy texture. My gym buddies beg me to bring these every time we meet, and my sister stole half the pan last time I made them!
Final Thoughts
These peanut butter protein blondies are my go-to when I need a quick, satisfying treat that doesn’t derail my healthy eating. They’re packed with creamy peanut butter flavor, have just the right amount of sweetness, and give you a protein boost to keep you full longer. Plus, they’re so easy to make—no fancy equipment or baking skills required!
I love this recipe because it’s the perfect balance of indulgence and nutrition. Whether I’m craving dessert or need a post-workout snack, these blondies never disappoint.
Give them a try and let me know what you think! Did you add any fun mix-ins like chocolate chips or chopped nuts? I’m always looking for new ways to switch up this recipe. Happy baking!
Peanut Butter Protein Blondies
Ingredients
Method
- Preheat oven to 350°F and line an 8×8 baking pan with parchment paper.
- In a large bowl, whisk together peanut butter, maple syrup, and brown sugar until smooth.
- Add eggs and vanilla extract, mixing until fully incorporated.
- In a separate bowl, combine protein powder, oat flour, baking soda, and salt.
- Gradually fold dry ingredients into wet ingredients until just combined.
- Gently stir in chocolate chips, reserving some for topping if desired.
- Spread batter evenly into prepared pan and bake for 16-18 minutes until edges are golden.
- Let cool completely before slicing into 9 squares.


