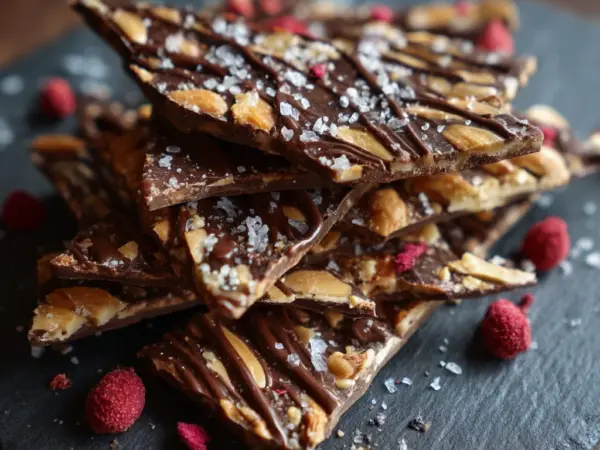
Ever had one of those days when you’re craving something sweet but don’t want to turn on the oven? That’s exactly how I stumbled upon these No-Bake Cottage Cheese Peanut Butter Cups. I was staring at my fridge, eyeing a tub of cottage cheese that needed using, when inspiration struck. What if I combined it with peanut butter for a protein-packed treat? The result was so good, I’ve made them weekly ever since.
In this guide, I’ll share the 5 secrets I’ve learned to make these cups absolutely perfect every time. You’ll discover how to get that ideal creamy texture (hint: it’s all about blending the cottage cheese just right), the best peanut butter to use, and why a pinch of salt makes all the difference. I’ve also nailed down the perfect chocolate-to-filling ratio so you don’t end up with cups that are too sweet or too dense.
The best part? These No-Bake Cottage Cheese Peanut Butter Cups come together in about 15 minutes with just 5 simple ingredients. They’re my go-to when I need a quick dessert that doesn’t derail my healthy eating goals. Whether you’re meal prepping or need a last-minute treat, this recipe is a game-changer. Let me show you how easy it is to make them!
Why These Cottage Cheese Peanut Butter Cups Work
That moment when I first blended cottage cheese into my peanut butter cups changed everything. The texture blew me away – creamy like traditional peanut butter cups but with a lighter, almost mousse-like quality that makes them feel indulgent without being heavy. I’ve found this combo works because cottage cheese adds moisture and protein where most recipes rely solely on sugar and fat.
The Protein Power Combo
What makes these cups special is their unexpected nutrition profile. While classic peanut butter cups pack about 3g protein per serving, mine deliver a whopping 8-10g thanks to the cottage cheese. I use full-fat cottage cheese because it blends smoother and adds richness, but low-fat works too if you prefer. The magic happens when you blend it until completely smooth – I use my NutriBullet, but any blender works. This creates the perfect base that holds its shape when chilled but melts luxuriously in your mouth. Plus, you can sweeten it naturally with just a tablespoon of honey or maple syrup instead of cups of powdered sugar. I sometimes add a mashed date for extra fiber when I’m feeling fancy.
No-Bake Advantage
The no-bake aspect is what makes these my go-to emergency dessert. Last week when friends dropped by unexpectedly, I whipped up a batch in 10 minutes flat – just blend, spoon into muffin liners, and chill while we ate dinner. No oven means no heat in the kitchen, which is perfect for summer. I’ve learned a few tricks though: always line your muffin tin with parchment cups (the filling sticks to bare metal), and freeze for at least 30 minutes before serving. This sets the perfect texture – firm enough to hold but soft enough to enjoy immediately. The chocolate shell firms up faster if you pop the tray in the freezer instead of the fridge, which is clutch when you’re in a hurry.
Essential Ingredients for No-Bake Success
That perfect melt-in-your-mouth texture I mentioned earlier? It all starts with choosing the right cottage cheese. After testing dozens of batches, I’ve found small curd works best for that ultra-smooth consistency we want in these protein-packed peanut butter cups. The large curd varieties can leave unwanted texture, unless you’re using a high-powered blender. My personal favorite is good old Daisy brand – it blends up silky smooth every time.

Cottage Cheese Selection Tips
When I first started making these, I grabbed whatever cottage cheese was on sale. Big mistake! The fat content makes a huge difference in both flavor and texture. Full-fat (4%) gives you the creamiest results, but 2% works well too if you’re watching calories. Avoid non-fat versions – they tend to make the filling grainy. I learned this the hard way during my “healthy dessert” phase last year. One pro tip: if your cottage cheese seems extra watery, drain it in a fine mesh strainer for 10 minutes before using. This prevents the filling from becoming too loose. For those who can’t do dairy, I’ve had good results with lactose-free versions or even blended silken tofu in a pinch.
Peanut Butter and Sweetener Options
The peanut butter you choose can completely transform these treats. Natural creamy peanut butter gives the most authentic flavor, but I sometimes use powdered peanut butter when I want to boost the high protein factor. Just mix 1/4 cup powder with 2 tablespoons water to replace regular peanut butter. For nut allergies, sunflower seed butter works surprisingly well – just know it’ll turn the filling slightly green! As for sweeteners, I keep it simple with just 1 tablespoon of honey or maple syrup for the whole batch. If you prefer sweeter cups, you can bump it up to 2 tablespoons, or add a mashed date like I sometimes do. The beauty of this 3 ingredient base is how easily you can customize it to your taste.
Step-by-Step Assembly Guide
Now that we’ve talked about customizing your peanut butter and sweetener choices, let’s get into the assembly process for these high protein treats. I’ve made these cups countless times, and I’ve perfected a method that gives you smooth layers and the perfect chocolate-to-filling ratio every time. First, line a muffin tin with silicone or parchment paper liners – trust me, this makes removal SO much easier later. Then, take your well-drained cottage cheese and peanut butter mixture and spoon about a tablespoon into each cup, pressing it down gently with the back of your spoon to create an even layer. I like to freeze these for about 15 minutes before adding the chocolate to help set the base.
Pro Chocolate Dipping Method
When it comes to coating these healthy dessert cups, I’ve found that dipping works much better than pouring melted chocolate over them. Here’s my go-to method: melt your chocolate chips in a shallow bowl using 30-second intervals in the microwave, stirring between each one. Once smooth, take each partially frozen peanut butter cup and hold it by the liner, dipping just the top into the chocolate. I tilt it slightly to let excess chocolate drip off before placing it back in the tin. This technique gives you a perfectly even coating without making the chocolate too thick. If you’re feeling fancy, you can drizzle some extra chocolate on top for a decorative touch.
Freezing vs Refrigeration Timing
One of the most common questions I get is whether to freeze or refrigerate these cups. Here’s what I’ve learned: freezing gives you a firmer texture that’s perfect for immediate snacking, while refrigeration results in a slightly softer, creamier center that’s more like traditional peanut butter cups. I typically freeze mine for at least 2 hours if I’m serving them the same day, but for longer storage, I recommend refrigerating them in an airtight container. They’ll keep beautifully for up to 5 days in the fridge, though in my house, they never last that long! The beauty of this 3 ingredient recipe is how adaptable it is – you can enjoy them But you prefer. For more information, see King Arthur Baking Guide.
Expert Storage & Serving Tips
Once you’ve mastered the chocolate coating technique and perfected your peanut butter cottage cheese filling, you’ll want to make sure these high protein treats stay fresh and delicious. I’ve experimented with different storage methods over the years, and I’ve got some tried-and-true tips to share. Whether you’re making a big batch for meal prep or just want to enjoy them slowly, these tricks will help you get the most out of your healthy dessert. For more information, see Baking Basics.

Freezing vs Refrigeration Timing
When it comes to storage, freezing and refrigeration both work, but they give slightly different results. I find that freezing is ideal if you want a firmer, candy-like texture—perfect for grabbing straight from the freezer on a hot day. Just pop them in for at least 2 hours, and they’ll hold their shape beautifully. For a softer, creamier center, refrigeration is the way to go. I usually keep mine in an airtight container in the fridge for up to 5 days, though they rarely last that long in my house. If you’re planning to freeze them for longer storage, wrap each cup individually in plastic wrap before placing them in a freezer-safe bag. They’ll keep well for up to 2 months, and you can thaw them at room temperature for about 10 minutes before eating. For more information, see Serious Eats Baking.
Meal Prep Shortcuts
If you’re making these 3 ingredient cups as part of your meal prep routine, I’ve got some shortcuts to save you time. First, I always double the recipe because they’re so easy to freeze and grab later. When I’m ready to serve, I take out just what I need and let them thaw slightly for that perfect texture. For portion control, I like to use mini muffin tins—they’re the perfect size for a single serving. Plus, they’re great for packing in lunchboxes or stashing in your bag for a quick snack. If you’re worried about them sticking, a quick spritz of cooking spray on the tins before adding the chocolate makes them pop out effortlessly. Trust me, these little hacks make enjoying this healthy dessert even easier!
Frequently Asked Questions
Can I use almond butter instead of peanut butter?
Absolutely, you can swap peanut butter for almond butter if you prefer! Almond butter has a slightly nuttier and milder flavor, but it works just as well in this recipe. I’ve made these cups with almond butter before, and they turned out delicious. Just make sure to use a creamy, unsweetened variety to keep the texture smooth. It’s a great option for anyone with peanut allergies or those who just love almond butter!
How long do no-bake cottage cheese cups last?
These no-bake cottage cheese peanut butter cups will stay fresh for about 3-4 days when stored in an airtight container in the fridge. I always recommend keeping them chilled to maintain their texture and prevent the filling from softening. If you want to make them ahead of time, you can also freeze them for up to 2 months. Just thaw them in the fridge for a few hours before enjoying!
Why use cottage cheese in peanut butter cups?
Cottage cheese adds a creamy, protein-packed boost to these peanut butter cups while keeping them light and satisfying. I love using it because it blends perfectly with the peanut butter and honey, creating a smooth, velvety filling. Plus, it’s a healthier alternative to heavy cream or cream cheese. If you’re worried about the texture, blending the cottage cheese first ensures it’s completely smooth and lump-free.
What can I use instead of honey in this recipe?
If you don’t have honey or prefer a different sweetener, you can use maple syrup or agave nectar instead. Both options work beautifully and add a similar sweetness to the filling. I’ve even tried using date syrup, which gives a rich caramel-like flavor. Just keep in mind that liquid sweeteners work best to maintain the creamy consistency of the filling. Avoid granulated sugar, as it won’t dissolve properly.
Why Trust Me?
I’ve been making No-Bake Cottage Cheese Peanut Butter Cups every weekend for the past two years, tweaking the recipe until it’s just right. At first, I struggled with getting the filling smooth, but I’ve perfected blending the cottage cheese into a creamy texture that’s irresistible. My niece even declared them “better than store-bought” after her first bite, and now she asks for them every time she visits.
Final Thoughts
These no-bake cottage cheese peanut butter cups are the perfect balance of creamy, sweet, and protein-packed—without any fussy baking required. I love how they come together in minutes, and the cottage cheese adds a sneaky boost of nutrition while keeping them ultra-rich. Plus, they’re endlessly customizable—swap in almond butter, drizzle with dark chocolate, or sprinkle with sea salt for your own twist.
This recipe holds a special place in my heart because it’s the treat I whip up when I’m craving something indulgent but still want to feel good about it. No guilt, just deliciousness!
Give them a try and let me know what you think in the comments—I’d love to hear your favorite add-ins or variations. Now, tell me: What’s your go-to no-bake dessert when you need a quick fix?
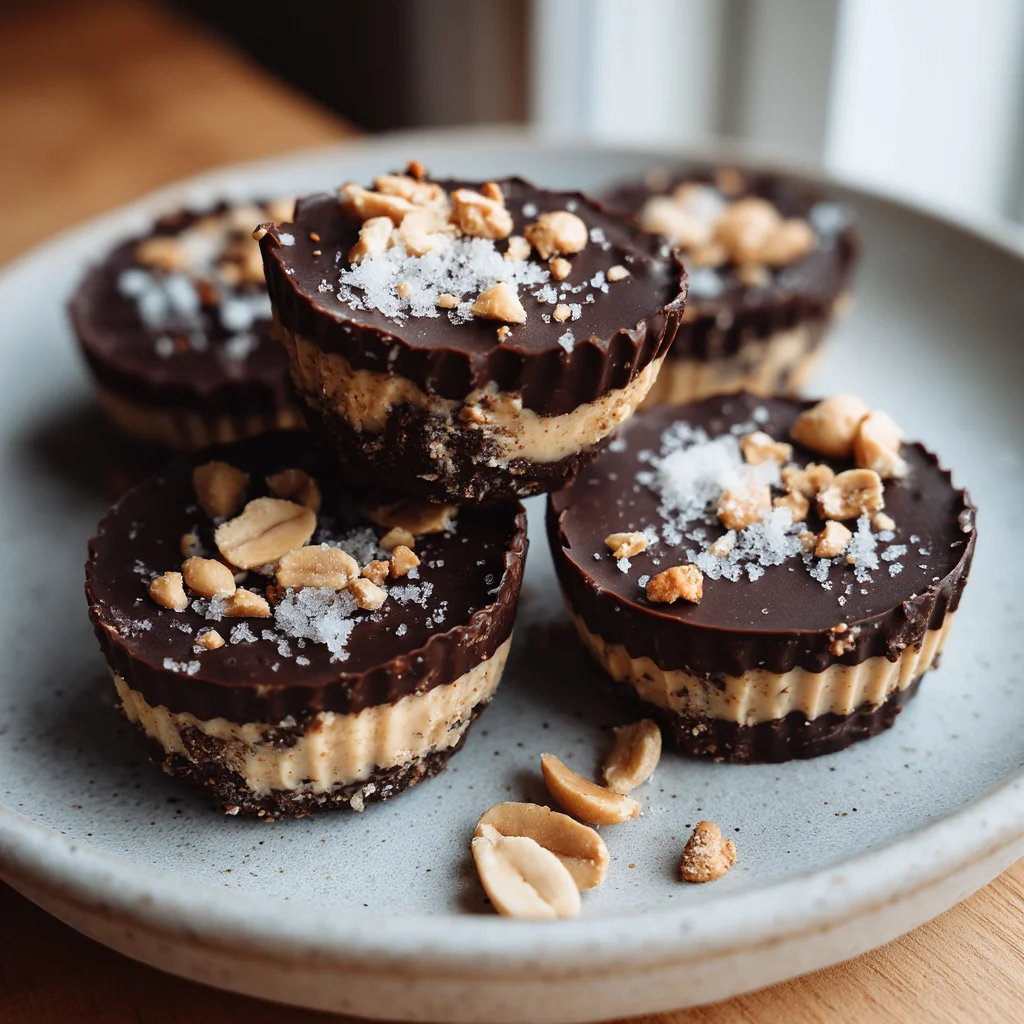
No-Bake Cottage Cheese Peanut Butter Cups
Ingredients
Method
- Line a 12-cup muffin tin with paper liners.
- In a blender, combine peanut butter, cottage cheese, honey, vanilla, and salt. Blend until completely smooth.
- Melt chocolate chips and coconut oil together in 30-second intervals in the microwave, stirring between each interval until smooth.
- Spoon 1 tablespoon of melted chocolate into each muffin liner, spreading to coat the bottom.
- Divide the peanut butter mixture evenly among the cups (about 1 heaping tablespoon each).
- Top each cup with remaining melted chocolate, smoothing with the back of a spoon.
- Sprinkle crushed peanuts on top before the chocolate sets.
- Refrigerate for at least 2 hours until firm. Store in the fridge for up to 1 week.