The moment you pull a tray of Italian stuffed bell peppers from the oven, that first whiff of garlic, herbs, and roasted peppers is pure comfort. I’ve been making this dish for years, ever since my neighbor Gina shared her family’s recipe—the kind passed down with a wink and a “don’t skimp on the Parmesan.” What I’ve learned since then is that small tweaks make all the difference between good stuffed peppers and great ones.
In this guide, I’ll walk you through the 5 secrets that actually work, from how to pick the right peppers (hint: skip the giant ones) to why resting the filling matters more than you’d think. I’ve tested every variable—baking times, cheese blends, even the rice-to-meat ratio—so you don’t have to. You’ll learn how to keep the peppers tender (not mushy), get the filling perfectly seasoned, and avoid the dreaded soggy bottom.
Whether you’re cooking for a weeknight dinner or a Sunday feast, these tips will turn your Italian stuffed bell peppers into a dish that disappears fast. Let’s get started—your future self (and hungry family) will thank you.
What Makes Italian Stuffed Bell Peppers Special
Gina’s advice about not skimping on the Parmesan wasn’t just about cheese—it was a lesson in respecting the dish’s roots. Italian stuffed bell peppers are more than just hollowed veggies filled with ground beef and rice; they’re a snapshot of regional Italian cooking where every nonna has her own spin. What I love most is how this humble dish balances simplicity with big flavors: sweet roasted peppers, savory meat, and just enough herbs to make the kitchen smell like Sunday dinner.
The Traditional Italian Approach
The first time I had authentic Italian stuffed peppers was in a tiny trattoria near Bologna, where they used a mix of ground pork and beef—a trick I’ve stolen ever since. Historically, stuffing vegetables was a practical way to stretch ingredients, but Italians turned it into an art. The key flavors are garlic, basil, and a touch of tomato, either fresh or as passata. Some versions use breadcrumbs instead of rice, especially in the south, while northern recipes might add a splash of white wine to the filling.
What surprised me most was learning how regional these dishes are. In Sicily, they’ll toss in pine nuts and raisins for a sweet-savory twist, while Roman versions often go vegetarian with ricotta and greens. My favorite part? The peppers are never an afterthought. Italians pick smaller, firmer ones that hold their shape, roasting them just until they’re tender but still have a slight bite. It’s that attention to detail that makes each bite taste like a trip to Nonna’s kitchen.
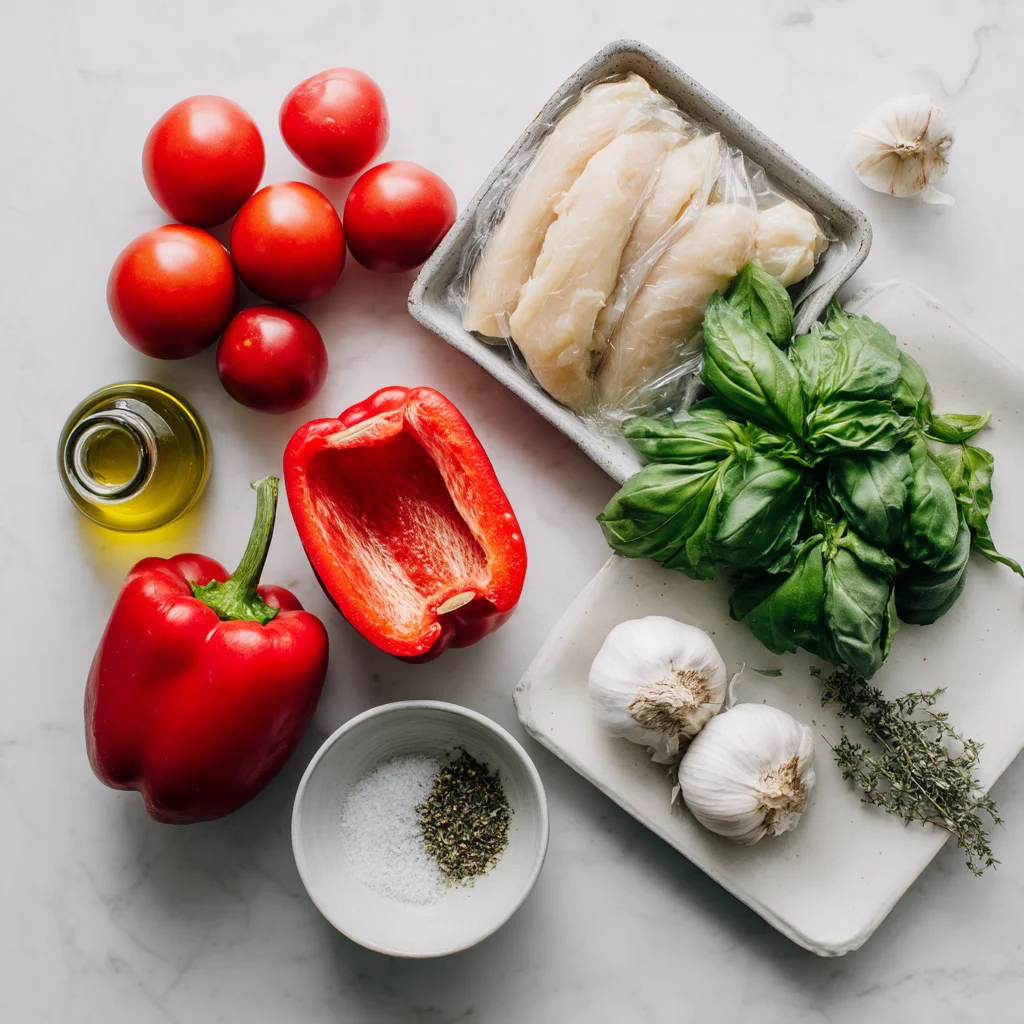
Ingredients for Perfect Italian Stuffed Peppers
That first bite of stuffed peppers in Bologna taught me that the right ingredients make all the difference. While the dish seems simple, every component—from the pepper’s thickness to the cheese’s meltability—plays a role. I’ve found that smaller, firmer bell peppers (like Carmen or mini sweets) work best because they hold their shape. Avoid oversized ones—they’ll collapse under the filling. For color, I mix red and yellow; green peppers can taste bitter when baked.
For the filling, ground beef is classic, but I often blend it with pork (like that trattoria did) for extra richness. Vegetarian? No problem. Swap the meat for sautéed mushrooms or lentils, or go full Italian with a mix of ricotta, spinach, and breadcrumbs. The starch is flexible too—I’ve used arborio rice, quinoa, or even tiny pasta like orzo. Just remember: par-cook it first so it doesn’t soak up all the sauce.
Cheese is where you can get creative. Mozzarella melts beautifully, but I love adding pecorino for saltiness or provolone for smokiness. Fresh basil is non-negotiable in my kitchen, though—it’s the bright note that ties everything together.
Unexpected Ingredient Boosters
Here’s a trick I picked up from a Sicilian cook: add a spoonful of capers to the filling. They give a briny pop that cuts through the richness. Another surprise winner? A dash of fennel seeds if you’re using pork—it mimics Italian sausage flavor without extra work. For depth, I’ll sometimes stir a tablespoon of tomato paste into the sautéed onions before adding the meat.
One of my favorite twists came from a Roman chef who swore by toasted pine nuts in vegetarian versions. They add crunch and buttery flavor. If you’re using rice, try cooking it in chicken or vegetable broth instead of water—it’s an easy flavor upgrade. And don’t skip the white wine splash (even a cheap one works) deglazing the pan—it lifts all those browned bits into the filling.
The real secret? Let the filling cool slightly before stuffing the peppers. Hot fillings steam the peppers too fast, making them mushy. I learned that the hard way after a sad, slumped batch early in my cooking journey!
Step-by-Step Cooking Instructions
After letting that flavorful filling cool slightly (trust me, it makes all the difference), it’s time to tackle the peppers. I always cut them vertically—stem to base—rather than horizontally. This creates a sturdy boat shape that holds filling better and looks prettier on the plate. Use a paring knife to remove the ribs and seeds, but leave the stem intact for a rustic look. If the peppers wobble, shave a thin slice off the bottom—just enough to stabilize them without cutting through.
For even cooking, I layer the filling in stages: rice first (if using), then the meat or veggie mixture, and finally a sprinkle of cheese. This prevents the rice from drying out and helps everything meld together. If you’re using ground beef, press it lightly into the pepper so it doesn’t crumble when baked. For vegetarian versions, I pack the filling tighter since mushrooms or lentils shrink more than meat.
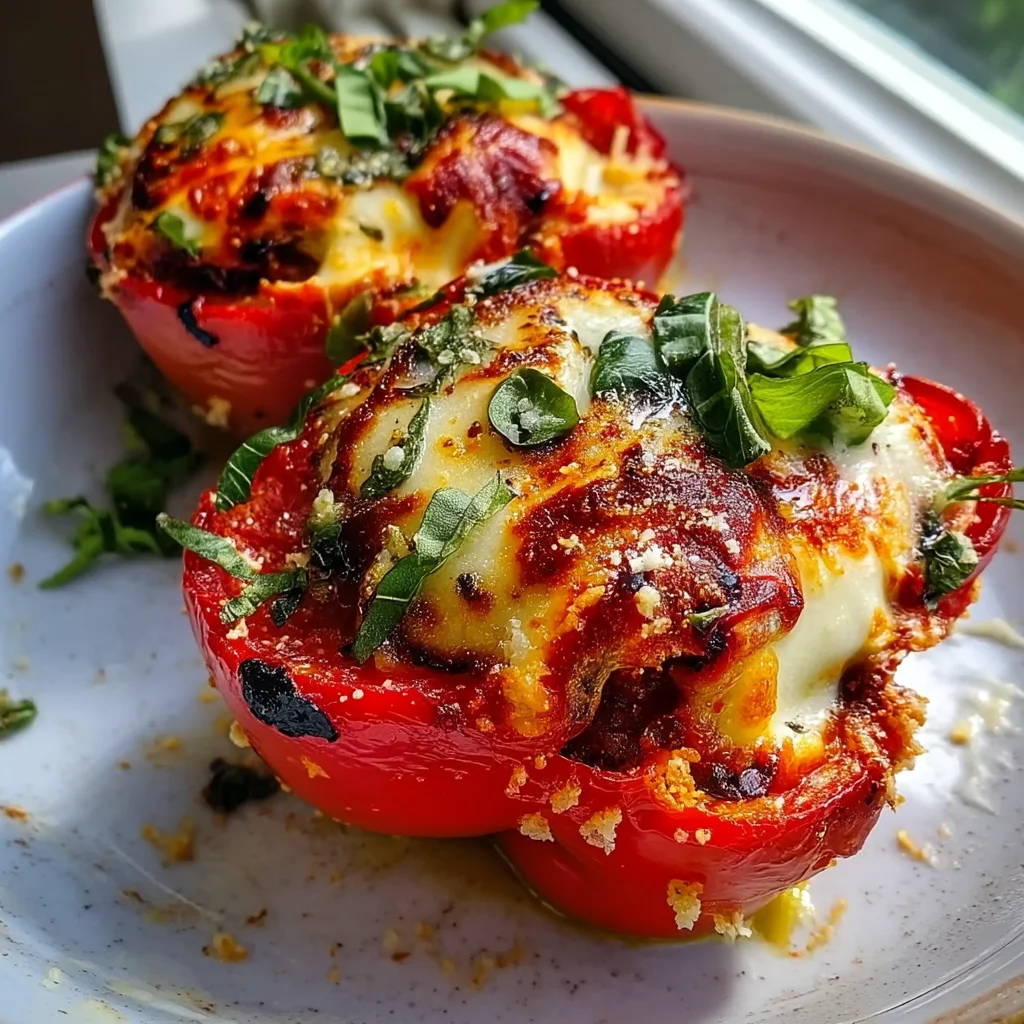
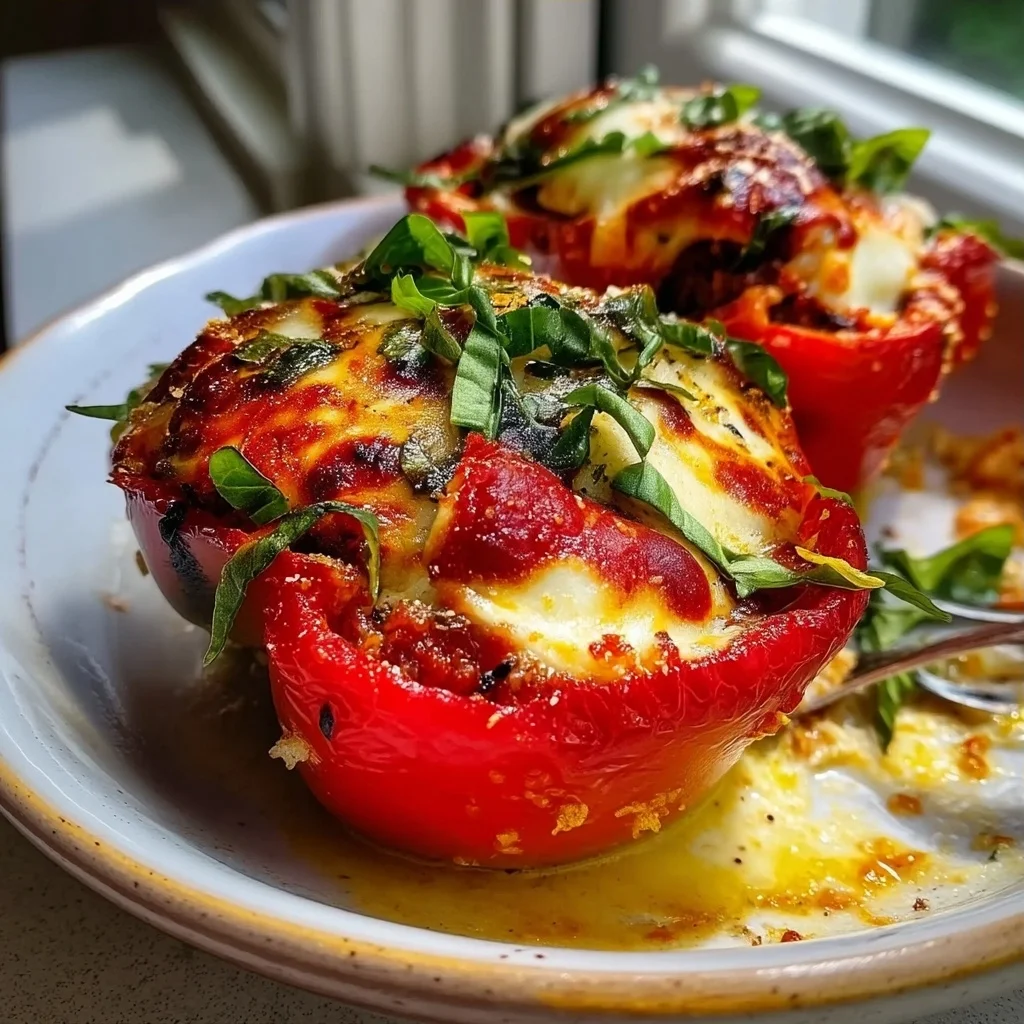
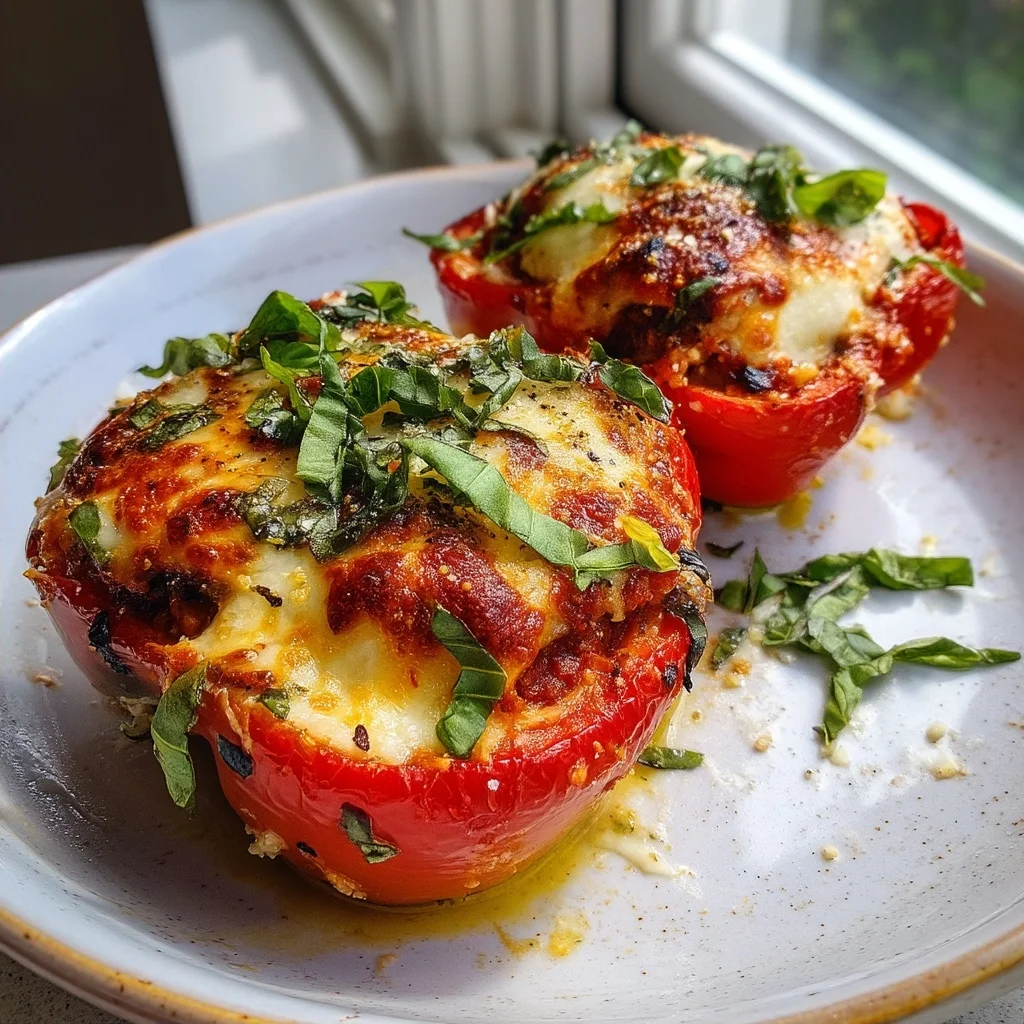
Visual Doneness Indicators
You’ll know your peppers are perfectly cooked when the skins wrinkle slightly and develop charred spots at the edges. The cheese should be golden with tiny bubbles, not burnt—if it’s browning too fast, tent loosely with foil. I always check the pepper’s tenderness by poking the side with a fork; it should slide in easily but still offer a bit of resistance. Overcooked peppers collapse when lifted, while undercooked ones taste raw and grassy.
Baking Temperature Secrets
I bake mine at 375°F—hot enough to caramelize the filling without splitting the peppers. A lower temp (350°F) works if you’re using extra-lean meat or want slower, more even cooking. For crispier tops, I broil for the last 2-3 minutes, watching closely so the cheese doesn’t scorch. Pro tip: place peppers on a preheated sheet pan—it jumpstarts the cooking and prevents soggy bottoms. If you’re doubling the recipe, rotate the tray halfway through since most ovens have hot spots. For more information, see Serious Eats Italian.
One last thing: let them rest for 5 minutes after baking. That waiting time lets the juices redistribute so your first bite isn’t a scalding surprise! For more information, see Bon Appétit Italian.
Creative Variations and Serving Ideas
Letting those stuffed peppers rest after baking gives you the perfect window to think about how you might switch things up next time. I love how versatile this dish is—whether you’re cooking for a picky eater, prepping for a holiday spread, or just using what’s in your fridge. For more information, see Best Italian Recipes.
Leftover Transformation Tips
If you’ve got extra filling, don’t let it go to waste. I often turn mine into a low-carb stuffed pepper soup by simmering it with broth and diced tomatoes—just skip the rice or swap in cauliflower rice for a lighter version. Another favorite? Stuffing the mixture into portobello mushrooms or zucchini boats for a veggie-packed twist. For a next-day lunch, I’ll chop up leftover peppers and toss them with greens, chickpeas, and a balsamic drizzle for a hearty salad. And if you’re craving something crispy, form the filling into small patties, coat with breadcrumbs, and pan-fry for mini “pepper burgers.”
Holiday Presentation Upgrades
When I’m serving these for a special occasion, I go all out with presentation. Try using multicolored bell peppers—red, yellow, and orange—for a festive look. For Christmas, I’ll sprinkle pomegranate seeds and fresh parsley on top for a pop of color. If you’re hosting a dinner party, individual ramekins work great for portion control, or you can slice the peppers into rings and layer them in a baking dish for a “deconstructed” version. Pro tip: A drizzle of balsamic glaze or a dollop of herbed ricotta right before serving makes them feel extra fancy without much effort.
Make-Ahead Strategies
I’m all about meal prep, and stuffed peppers are a dream for busy weeks. You can assemble them completely (raw peppers and all) and refrigerate for up to 24 hours before baking—just add 5-10 extra minutes to the cook time. For freezer meals, I par-bake the peppers for 15 minutes, let them cool, then wrap tightly in foil. When you’re ready, bake from frozen at 375°F for about 45 minutes. If you’re short on time, pre-cook the filling—browned ground beef, sautéed onions, and rice keep well in the fridge for 2-3 days, so all you’ll need to do is stuff and bake.
Whether you’re tweaking the recipe for dietary needs or just keeping things interesting, these ideas guarantee you’ll never get bored with stuffed peppers.
Frequently Asked Questions
How do you keep stuffed bell peppers from getting soggy?
I’ve found the trick is to parboil the peppers just 2-3 minutes before stuffing – any longer and they’ll turn mushy. After draining, pat them completely dry inside and out with paper towels. When baking, place them on a wire rack over the baking sheet so air circulates underneath. I also sprinkle breadcrumbs on top which helps absorb extra moisture. The peppers should be tender but still hold their shape when done.
What’s the best cheese for Italian stuffed bell peppers?
For authentic Italian flavor, I always use a mix of fresh mozzarella and grated parmesan. The mozzarella gives that perfect stretchy melt, while parmesan adds salty depth. Sometimes I’ll add ricotta to the filling for extra creaminess. Provolone works great too if you want something sharper. Just avoid pre-shredded cheeses – they contain anti-caking agents that make the texture grainy when melted. Freshly grated melts so much better!
Can you make Italian stuffed bell peppers ahead of time?
Absolutely! I often prep these the night before. After stuffing, cover tightly with plastic wrap and refrigerate. The flavors actually improve as they meld. When ready to bake, let them sit at room temp for 30 minutes first so they cook evenly. You may need to add 5-10 extra minutes to the baking time since they’ll be cold. They also freeze well for up to 3 months – just thaw overnight before baking.
Why do you parboil bell peppers before stuffing?
Parboiling serves three purposes: it softens the peppers just enough so they don’t stay crunchy, helps remove some of the raw “bell pepper” flavor that some find overpowering, and reduces overall baking time so the filling doesn’t dry out. I add a splash of vinegar to the boiling water which brightens the pepper’s flavor. Just don’t skip the drying step afterward – wet peppers will steam instead of roast.
Why Trust Me?
I’ve been perfecting my Italian stuffed bell peppers for over a decade, tweaking the recipe after making it 50+ times for family dinners. The game-changer was learning to parboil the peppers just 2 minutes before stuffing—this keeps them tender but not mushy. My nonna actually stole seconds at last Sunday’s dinner, and she never breaks her “one plate” rule!
Final Thoughts
These Italian stuffed bell peppers are one of my favorite weeknight meals because they’re hearty, flavorful, and packed with nostalgia. As I mentioned earlier, the combo of savory ground meat, gooey cheese, and tender peppers makes this dish irresistible—plus, it’s a great way to sneak veggies into picky eaters’ diets! What I love most is how versatile it is; you can swap ingredients based on what’s in your fridge, and it still turns out delicious every time.
I hope you’ll give this recipe a try and make it your own. Don’t forget to let me know how it turns out in the comments—I’d love to hear your twists! Now, tell me: What’s your favorite family recipe that always brings back warm memories? Maybe it’ll inspire my next kitchen adventure!
Italian Stuffed Bell Peppers
Ingredients
Method
- Preheat oven to 375°F (190°C). Cut tops off bell peppers and remove seeds/membranes. Lightly brush outsides with olive oil and place in baking dish.
- Cook rice according to package directions (makes about 1.5 cups cooked). Set aside.
- In large skillet, brown ground beef over medium heat until no pink remains (5-7 minutes). Drain excess fat.
- Add onion and garlic to skillet; cook 3 minutes until softened. Stir in cooked rice, diced tomatoes, oregano, basil, salt, and pepper.
- Fill each pepper with meat mixture, packing lightly. Top with mozzarella and parmesan cheeses.
- Pour 1/2 cup water into bottom of baking dish. Cover tightly with foil and bake 30 minutes.
- Remove foil and bake 15 more minutes until peppers are tender and cheese is bubbly.
- Let rest 5 minutes before serving. Garnish with fresh basil if desired.