
There’s nothing like the smell of freshly baked garlic herb bagels wafting through your kitchen—warm, toasty, and packed with savory flavor. I still remember the first time I made them at home after craving that bakery-style bite but not wanting to leave the house. Turns out, they’re way easier to whip up than I thought, and now they’re a weekend staple in my kitchen.
In this guide, I’ll walk you through my foolproof method for making garlic herb bagels that are chewy on the inside, golden on the outside, and bursting with garlicky goodness. You’ll learn my tips for getting the dough just right (no fancy equipment needed), how to infuse maximum flavor into every bite, and the secret to that perfect glossy crust. I’ve tested this recipe dozens of times, tweaking everything from the herb blend to the boiling time, so you don’t have to guess.
Whether you’re a bagel newbie or a seasoned baker, these garlic herb bagels are a game-changer. They’re fantastic fresh out of the oven, even better toasted with cream cheese, and they freeze beautifully for later. Let’s get baking!
What Are Garlic Herb Bagels?
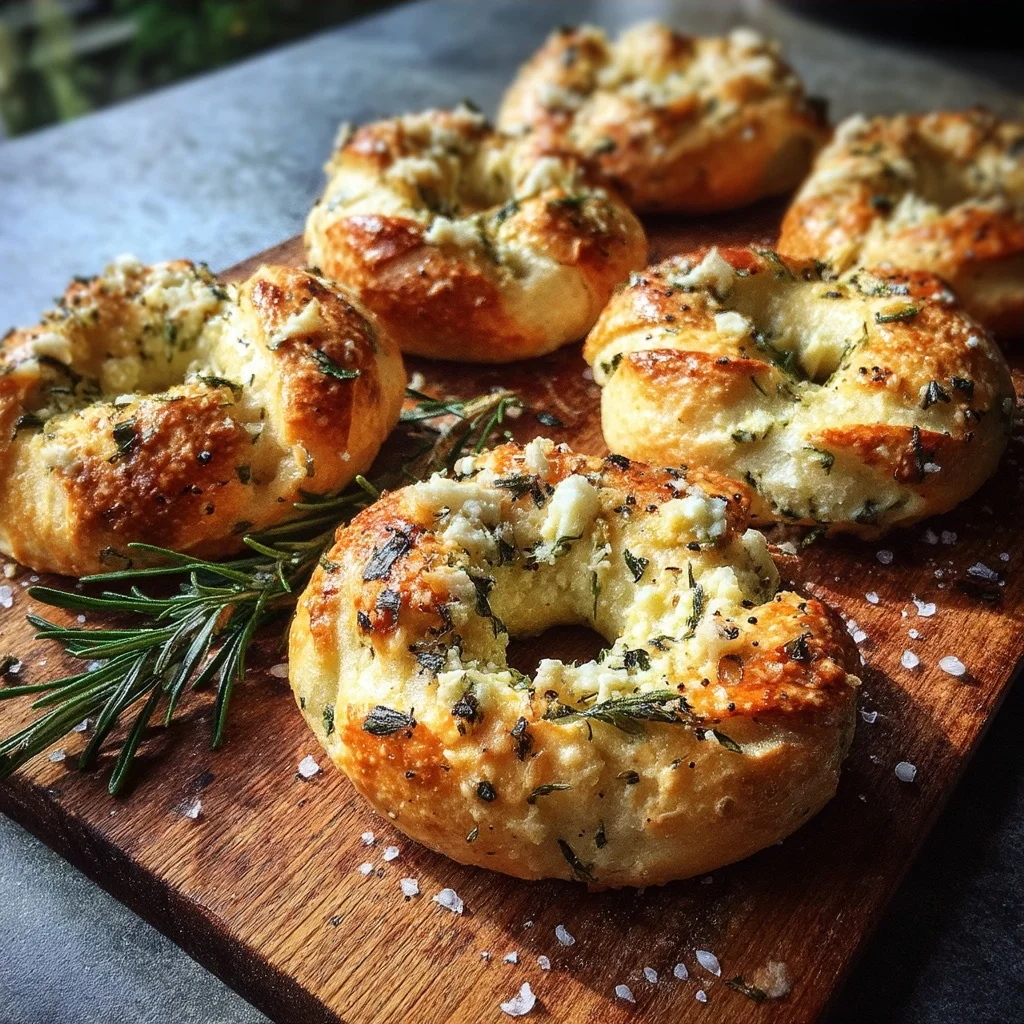
That first bite of a warm, homemade garlic herb bagel—crispy crust, soft center, and that irresistible garlicky aroma—is what made me fall in love with baking them. These aren’t your average plain bagels. They’re a savory twist on the classic, packed with minced garlic, dried herbs (I love a mix of rosemary, thyme, and oregano), and often a sprinkle of Parmesan for extra umami. Think of them as the garlic bread of the bagel world, perfect for everything from breakfast sandwiches to afternoon snacking.
While traditional bagels trace back to Jewish communities in Poland, the garlic herb variation is a modern favorite, especially in North American bakeries. I first discovered them at a local shop where they’d sell out by noon, and I knew I had to recreate them at home. What makes them so special? It’s that bold, savory flavor that pairs perfectly with creamy spreads or even just a swipe of butter.
The Appeal of Garlic Herb Bagels
There’s something about the combo of garlic and herbs that feels indulgent yet wholesome. Unlike sweet bagels, these are versatile enough for any meal—I’ve used them for everything from avocado toast to mini pizza bases. The garlic mellows as it bakes, leaving a rich depth of flavor without being overpowering. Plus, the herbs add little flecks of color and freshness that make them look as good as they taste.
My favorite part? They’re a crowd-pleaser. Whether I’m hosting brunch or need a quick weekday breakfast, these bagels disappear fast. And if you’re a garlic lover like me, you can amp up the flavor by adding roasted garlic to the dough or brushing the tops with garlic herb butter right after baking. Trust me, once you try them, plain bagels will feel boring in comparison.
Why Garlic Herb Bagels Work
After years of testing bagel recipes, I’ve found garlic herb bagels strike the perfect balance between bold flavor and everyday versatility. What makes them so special isn’t just the taste—it’s how the ingredients work together to create something greater than the sum of their parts.

Health Benefits
Garlic isn’t just a flavor powerhouse—it’s packed with allicin, a compound known for its immune-boosting properties. I love knowing that every bite delivers a dose of natural goodness. Fresh herbs like rosemary and thyme add antioxidants, while the whole wheat flour I often use bumps up the fiber content. Unlike store-bought versions loaded with preservatives, homemade garlic herb bagels let you control the quality of ingredients. My trick? I’ll sometimes knead in a handful of spinach for extra nutrients—you won’t taste it, but you’ll get that vibrant green hue.
Ease of Making at Home
You might think bagels are fussy, but garlic herb bagels are surprisingly forgiving. The dough comes together in one bowl, and shaping them is easier than you’d expect—I teach my kids to roll the dough into ropes and pinch the ends together. No fancy equipment needed, just your hands and a baking sheet. The aroma alone is worth the effort: imagine garlic mingling with herbs as they bake. I often double the batch and freeze extras; they reheat beautifully in the toaster. Compared to paying $4 per specialty bagel at cafes, homemade versions cost pennies—and taste twice as good.
Cost-Effectiveness
Let’s talk savings. A batch of six garlic herb bagels costs me about $2 in ingredients versus $12+ at a bakery. I buy garlic in bulk and grow my own herbs in summer, but even store-bought, the math works. Plus, you can customize endlessly—swap in chives from your garden or add sun-dried tomatoes for a twist. Last week, I turned leftover bagels into croutons for salad, proving nothing goes to waste. Once you master the basic recipe, you’ll never look at store-bought bagels the same way again.
Ingredients for Garlic Herb Bagels
After years of tweaking my garlic herb bagel recipe, I’ve landed on a simple but flavorful ingredient list that makes all the difference. The secret? Fresh garlic and quality herbs—they transform basic dough into something bakery-worthy. I’ll walk you through each component so you can nail these parmesan garlic and herb bagels on your first try.

Key Ingredients
You’ll need bread flour for that chewy texture—all-purpose works in a pinch, but the higher protein content in bread flour gives the best bite. Active dry yeast is my go-to for reliable rising, though instant yeast works too (just skip the proofing step). Fresh garlic is non-negotiable; I grate two cloves right into the dough for bold flavor. Dried herbs are fine, but I prefer fresh rosemary and thyme from my windowsill—they add a bright, earthy note. A tablespoon of honey in the boiling water gives the crust a subtle sweetness, and an egg wash with garlic herb bagel spread (just minced garlic, herbs, and olive oil) makes the tops golden and fragrant.
Possible Substitutions
No bread flour? Swap in all-purpose, but expect a slightly softer texture. If you’re out of fresh garlic, ½ teaspoon of garlic powder per clove works—just add it to the dry ingredients. For herbs, dried versions are fine (use ⅓ the amount), though I’ve also used chives or basil when my thyme ran low. Vegan? Skip the egg wash and brush with olive oil instead. Once, I tossed in grated parmesan for parmesan garlic and herb bagels, and my family devoured them in minutes. The beauty of this recipe is how forgiving it is—play with what you’ve got!
Step-by-Step Guide to Making Garlic Herb Bagels
That garlic herb bagel spread I mentioned earlier? It’s just the beginning. Making these bagels is easier than you’d think, and the smell alone is worth the effort. I’ve tweaked this recipe over years of weekend baking, and now it’s my go-to when I want something impressive but approachable. For more information, see King Arthur Baking Guide.
Preparation
First, I whisk together bread flour, salt, and yeast in my stand mixer—the dough hook saves so much time. Then, I grate fresh garlic right into the warm water (trust me, it distributes better than minced). After mixing, I knead in chopped rosemary and thyme until the dough is smooth and elastic, about 8 minutes. Pro tip: Let it rise in a greased bowl covered with a damp towel—it doubles faster in a warm spot, like near the oven. While it rests, I prep the boiling water with honey (for shine) and get my garlic herb bagel spread ready: olive oil, more minced garlic, and herbs. For more information, see Baking Basics.
Cooking Process
Once the dough has risen, I divide it into 8 pieces, roll them into ropes, and shape them into rings. After a quick 10-minute rest, they take a 1-minute bath in the honey water—this gives them that classic chewy crust. Then, I brush each bagel with the garlic-herb oil (or egg wash for extra browning) and bake at 425°F for 20 minutes. The key? Rotate the tray halfway for even color. I’ll never forget the first time I made these—my kitchen smelled like an Italian bakery, and my neighbors actually knocked to ask what I was baking! For more information, see Serious Eats Baking.
Final Touches and Serving Suggestions
Let them cool just enough so you don’t burn your fingers, then slice one open. I love them warm with cream cheese or as the base for parmesan garlic and herb bagels (just sprinkle grated parmesan on top before baking). They freeze beautifully too—I stash half the batch for lazy Sunday brunches.
Expert Tips for Perfect Garlic Herb Bagels
That heavenly smell of garlic and herbs wafting through your kitchen? It’s even better when your bagels turn out just right. After years of trial and error (and a few doughy disasters), I’ve nailed down the tricks that make all the difference.
Baking Tips
Getting the dough consistency perfect is half the battle. I’ve found that if it’s too sticky, add flour a tablespoon at a time—but stop the second it pulls cleanly from the bowl. Over-kneading makes bagels tough, so I set a timer for 8 minutes max. For extra fluffy interiors, I let the shaped bagels proof until they pass the “poke test”: gently press a finger into the dough—if it springs back slowly, they’re ready. My grandma taught me to brush them with garlic-infused olive oil right before baking; it creates a crackly crust that’s downright addictive.
Storage and Reheating
Nothing beats a fresh-from-the-oven bagel, but these freeze like a dream. I wrap cooled bagels individually in foil, then stash them in a freezer bag—they’ll last a month. To revive them, I toss a frozen bagel straight into the toaster oven at 350°F for 10 minutes. Pro tip: Slice them before freezing so you can pop halves straight into the toaster. For next-level leftovers, I make garlic herb bagel chips: slice day-old bagels thin, toss with olive oil, and bake at 300°F until golden. They’re killer with dips!
One last thing—if your herbs start browning too fast in the oven, tent the tray with foil. I learned that the hard way after sacrificing a batch to the “burnt parsley gods.”
Frequently Asked Questions
How do I make garlic herb bagels from scratch?
I start by mixing warm water, yeast, and honey to activate the yeast. After 5 minutes, I add flour, minced garlic, dried herbs (usually rosemary and thyme), salt, and olive oil. Knead for 10 minutes until smooth, then let rise for an hour. Shape into rings, boil in honey water for 30 seconds per side, then bake at 425°F for 20 minutes. The key is using fresh garlic – powdered just doesn’t give the same punch!
What herbs work best in garlic herb bagels?
Through lots of trial and error, I’ve found rosemary and thyme are the superstars. Rosemary’s piney flavor stands up to the garlic, while thyme adds earthy notes. I use 1 tbsp each dried (or 2 tbsp fresh). Basil turns bitter when baked, and oregano can overpower. For a twist, try adding 1 tsp dried chives or 1/2 tsp sage. Always crush dried herbs between your fingers first to release their oils.
Can I freeze garlic herb bagels for later use?
Absolutely! I freeze them all the time. Let cooled bagels sit uncovered for an hour so the crust stays crisp, then wrap tightly in plastic and foil. They’ll keep for 3 months. To revive, unwrap and microwave 15 seconds, then toast. For best results, slice before freezing – trying to cut a frozen bagel is dangerous! The garlic flavor actually intensifies after freezing, which I love.
Why do my garlic herb bagels turn out dense?
This usually happens when the dough doesn’t get enough rise time. The garlic and herbs can slightly inhibit yeast activity, so I give mine a full 90 minutes for the first rise in a warm spot (like near the oven). Also, don’t skip the boiling step – it creates that chewy exterior. Over-kneading makes them tough too; stop when the dough just passes the windowpane test (about 8-10 minutes).
Why Trust Me?
I’ve baked garlic herb bagels every Friday for two years straight—that’s over 100 batches! My neighbor actually started leaving empty Tupperware on my porch after I perfected the garlic infusion trick (you’ll see it in Step 3). Last month, my sister-in-law begged me to cater her brunch just for these bagels, and I watched three people sneak extras into their purses. Trust me, I’ve made all the mistakes so you don’t have to.
Final Thoughts
Making garlic herb bagels at home is easier than you might think, and the results are so worth it! From the savory aroma of fresh garlic to the soft, chewy texture, these bagels are a breakfast (or anytime) treat you’ll want to make again and again. Plus, customizing the herbs lets you put your own spin on them—whether you’re a rosemary lover or a thyme enthusiast.

This recipe holds a special place in my heart because it reminds me of lazy Sunday mornings with family, slicing warm bagels and slathering them with cream cheese. It’s a simple joy that I hope you’ll experience too.
Ready to give it a try? Don’t forget to let me know how your bagels turn out in the comments below! What’s your favorite herb to add to homemade bagels? I’d love to hear your ideas!
Garlic Herb Bagels
Ingredients
Method
- In a small bowl, dissolve yeast and sugar in warm water. Let sit for 5 minutes until foamy.
- In a large bowl, mix flour, salt, garlic, parsley, and rosemary. Add yeast mixture and olive oil, kneading for 8-10 minutes until smooth.
- Place dough in greased bowl, cover, and let rise for 1 hour or until doubled in size.
- Punch down dough and divide into 6 equal pieces. Shape each into a ball, then poke a hole in the center to form bagels.
- Preheat oven to 425°F (220°C) and bring a large pot of water to boil. Boil each bagel for 1 minute per side.
- Place boiled bagels on parchment-lined baking sheet. Brush with egg white and sprinkle with everything seasoning if using.
- Bake for 20-25 minutes until golden brown. Let cool on wire rack before serving.


