

Ever tried cottage cheese ice cream? If not, you’re missing out on the creamiest, protein-packed frozen treat that somehow feels indulgent and healthy at the same time. I first stumbled on this idea when I needed a quick dessert fix but wanted something lighter than traditional ice cream. After blending cottage cheese with a few pantry staples, I was shocked by how rich and satisfying it tasted—no fancy equipment needed.
In this guide, I’ll walk you through my foolproof method for making cottage cheese ice cream in just 5 simple steps. You’ll learn how to:
“The key is using full-fat cottage cheese—it whips up smoother and gives that luxurious mouthfeel you crave in ice cream.”
I’ve tested this recipe dozens of times, tweaking ratios to nail the perfect balance of sweetness and tang. Whether you’re looking for a high-protein snack or a dessert that won’t leave you sluggish, this version won’t disappoint. Plus, it’s endlessly customizable—toss in fresh fruit, cocoa powder, or even cookie crumbles. Ready to ditch the store-bought pints? Let’s get blending!
Why Cottage Cheese Ice Cream is a Game-Changer
That moment I first whipped up cottage cheese ice cream in my blender, I knew I’d stumbled onto something special. What started as a lazy experiment turned into my go-to dessert—creamy, satisfying, and packed with protein. Unlike traditional ice cream that leaves me crashing an hour later, this version keeps me full and energized. Plus, it’s ridiculously easy: just blend cottage cheese with a touch of honey and vanilla, then freeze.
Nutritional Benefits
I love that this ice cream gives me 20 grams of protein per serving—way more than the 4 grams in most store-bought pints. The cottage cheese base means you skip heavy cream but still get that lush texture. My fitness-obsessed friend calls it “cheat code dessert” because it fits her keto and high-protein goals.
“Full-fat cottage cheese works best—it blends smoother and mimics premium ice cream’s richness,” says my nutritionist pal.
The Viral Trend Explained
TikTok blew this recipe up last summer, and I get why. It’s 3-ingredient magic that takes minutes to make. My kids beg for the strawberry-swirl version, and I’ve even fooled guests into thinking it’s gourmet. Whether you use a Ninja Creami or just a basic blender, the result is always luxuriously thick.
Diet-Friendly Flexibility
What seals the deal? How easily it adapts. I’ve made it dairy-free with almond milk cottage cheese (yes, that exists!) and sugar-free with monk fruit. One batch, endless spins—perfect for my picky family. Trust me, once you try it, you’ll never look at cottage cheese the same way again.
Essential Ingredients for Perfect Cottage Cheese Ice Cream
What makes this dessert so diet-friendly and versatile? It all starts with the right ingredients. Since my first batch, I’ve learned that choosing high-quality cottage cheese is key. I always go for full-fat cottage cheese because it blends smoother and gives that creamy richness we all crave in ice cream. My favorite brands are Good Culture and Muuna—they’re super creamy and don’t have that gritty texture some others do. Plus, they’re packed with high-protein goodness, making this treat guilt-free.
Sweeteners are where you can get creative. I’ve tried everything from honey to maple syrup, but my go-to is dates—they add natural sweetness and blend beautifully. If you’re watching your sugar intake, monk fruit or stevia works wonders too. And don’t forget the flavor add-ins! I love tossing in cocoa powder for chocolate ice cream or fresh berries for a fruity twist. My kids go wild when I swirl in peanut butter or protein powder for an extra boost.
The 3-Ingredient Base
The beauty of this recipe lies in its simplicity. All you need is cottage cheese, a sweetener, and a splash of milk (or a dairy-free alternative). I’ve found that almond milk works just as well as regular milk if you’re going dairy-free. Blend it all in a Ninja Creami or a high-speed blender until smooth, and you’re done. It’s seriously that easy.
“The key is blending long enough to eliminate any lumps—take your time,” advises my friend who’s a pro at this recipe.
Flavor Add-Ins and Variations
Once you’ve mastered the base, the fun begins. I’ve experimented with everything from dark chocolate chunks to vanilla bean paste. My personal favorite is adding a handful of frozen mango and a squeeze of lime for a tropical vibe. If you’re feeling fancy, toss in some crushed cookies or swirl in caramel sauce. The possibilities are endless, and every batch feels like a new dessert adventure.
With just a few simple ingredients, you can whip up a treat that’s creamy, satisfying, and totally customizable. Whether you’re craving something indulgent or keeping it high-protein, this recipe has you covered.
Step-by-Step Cottage Cheese Ice Cream Recipe
After playing with all those delicious flavor add-ins, let’s get down to the basics of making this high-protein treat. I’ve made this recipe dozens of ways, and the method matters just as much as the ingredients. Whether you’re using a Ninja Creami or a regular blender, the goal is that dreamy, scoopable texture.

Blending Method
I always start by blending the cottage cheese first—just 30 seconds alone breaks down those curds into a silky base. Then I add the other 3 ingredients (usually milk and sweetener) and blend again until it’s completely smooth, scraping the sides as needed. If you’re using a high-speed blender, pulse it a few times first to avoid splatters. My trick? Let the mixture sit for 5 minutes after blending—this gives any stubborn lumps time to soften before a final quick blitz.
“A rubber spatula is your best friend here,” says my chef friend Sarah. “Get every bit of mixture from the edges for maximum creaminess.”
Freezing Process
For Ninja Creami fans, pour the blended mix straight into the pint container and freeze for 24 hours—no pre-chilling needed. If you’re using a traditional ice cream maker, chill the mixture in the fridge for 2 hours first, then churn it for 20-25 minutes until it’s thick like soft-serve. Either way, I’ve found that a 2-hour “hardening” freeze in an airtight container after churning gives the perfect scoopable texture. Pro tip: Press parchment paper directly onto the surface before freezing to prevent ice crystals.
The beauty of this recipe? It’s forgiving. Even if you over-blend or under-freeze, you’ll still end up with something creamy and delicious. Just don’t skip the blending patience—that’s the real secret.
7 Flavor Variations to Try
Since we’ve covered the freezing process—whether you’re using a Ninja Creami or traditional ice cream maker—let’s talk about the fun part: flavor twists! One of my favorite things about cottage cheese ice cream is how easily it adapts to different tastes. I’ve experimented with everything from rich chocolate to tangy fruit swirls, and the texture stays dreamily creamy every time. Here are the variations I make most often, all starting with that same simple 3-ingredient base.
Chocolate Cottage Cheese Ice Cream
For a high-protein chocolate fix, I blend 2 tablespoons of unsweetened cocoa powder into the cottage cheese mixture before freezing. Dutch-process cocoa gives a deeper flavor, but regular works too—just add a pinch of salt to balance it. My friend Jake, a personal trainer, swears by this version: “I stir in a scoop of chocolate protein powder instead of cocoa for post-workout recovery. It’s like eating frosting straight from the bowl.” If you’re keto, swap the honey for monk fruit sweetener and use extra-dark cocoa. Pro tip: Fold in sugar-free chocolate chips after churning for crunch.
Fruit-Infused Options
When berries are in season, I mash 1/2 cup of strawberries or raspberries into the base for a naturally sweet twist. Frozen mango or pineapple works great too—just thaw and drain excess juice first to avoid icy spots. For a tropical vibe, I’ll add a splash of coconut extract and toasted coconut flakes. The fruit not only adds flavor but also keeps the ice cream extra soft, even straight from the freezer. My kids love when I layer this version with graham crackers for a healthy “cheesecake” ice cream.
Protein Powder & Keto Tweaks
Vanilla or unflavored protein powder blends seamlessly into the base—just reduce the honey slightly since many powders are already sweetened. For a keto-friendly option, I use powdered erythritol and a teaspoon of vanilla. A dash of cinnamon or instant espresso powder can make it feel indulgent without added carbs. One reader told me she adds a tablespoon of peanut butter powder for a Reese’s-inspired treat. The possibilities are endless, and since cottage cheese is so mild, it lets whatever mix-ins you choose shine.
Expert Tips for Perfect Texture
Since cottage cheese ice cream is naturally high in protein and uses just a few simple ingredients, getting the texture right is key. I’ve found that achieving that creamy, scoopable consistency depends on a few factors: how you blend it, the temperature you serve it at, and the equipment you use. If you’ve ever ended up with icy or grainy results, don’t worry—I’ve been there too, and I’ve got solutions. For more information, see King Arthur Desserts.

Texture Troubleshooting
The most common issue I hear about is icy or crumbly ice cream. To avoid this, make sure your cottage cheese is blended until completely smooth before freezing. I use a high-speed blender or a food processor for this step—it makes all the difference. If you’re using a Ninja Creami, you’ll get even better results because it’s designed to churn frozen mixtures into creamy perfection. For more information, see Serious Eats Desserts.
Temperature control is another big factor. I’ve learned that letting the ice cream sit at room temperature for 5-10 minutes before scooping helps soften it just enough. If it’s still too hard, try blending it again for a few seconds. For more information, see Sally’s Baking Addiction.
“The key to creamy cottage cheese ice cream is blending thoroughly and freezing in a shallow container,” says my friend Sarah, a professional pastry chef.
For those using mix-ins like fruit or protein powder, make sure they’re evenly distributed to avoid pockets of hardness. With these tips, you’ll have smooth, dreamy ice cream every time.
Where to Buy Cottage Cheese Ice Cream
If you’re not up for making your own cottage cheese ice cream at home, don’t worry—there are some great pre-made options out there. I’ve found that brands like Good Culture and Muuna offer high-protein, creamy versions that hit the spot when I’m craving something sweet but wholesome. You can often find these at Whole Foods or specialty health stores, especially in the refrigerated section where they keep other dairy products.
For those who prefer shopping online, I’ve had luck ordering from Thrive Market and Amazon. They carry a variety of flavors, from classic vanilla to more adventurous options like strawberry or chocolate. I’ve noticed that some brands even cater to dietary needs, offering low-sugar or lactose-free versions.
“When buying pre-made cottage cheese ice cream, check the ingredient list for simplicity. The fewer additives, the better it tastes,” advises my friend Jenna, a nutritionist.
If you’re looking for convenience without sacrificing quality, these options are worth trying. Personally, I love keeping a few pints in my freezer for those moments when I want a quick, high-protein treat. Whether you shop in-store or online, there’s definitely a brand out there that’ll suit your taste buds!
Storage and Serving Suggestions
Since we’ve talked about where to find cottage cheese ice cream, let’s make sure you keep it tasting its best. I’ve learned through trial and error that storage makes all the difference with this high-protein treat.

Keeping It Fresh
For homemade batches, I always use an airtight container—my favorite is a glass loaf pan with a tight lid. Plastic works too, but glass prevents freezer burn better. If you’re using a Ninja Creami, the pint containers it comes with are perfect. This ice cream stays creamy for about 2 weeks, though mine never lasts that long!
“A layer of parchment paper pressed directly onto the surface prevents ice crystals,” says my ice cream-obsessed neighbor, Mark.
Serving with Style
I love scooping this into waffle cones for a protein-packed twist on classic soft serve. For a fancy touch, top with fresh berries or a drizzle of honey. It’s also amazing paired with 3-ingredient granola crumbles or dark chocolate shavings. My go-to? A sprinkle of sea salt and crushed pistachios—it’s salty, sweet, and totally addictive.
Nutrition Facts and Dietary Info
That sprinkle of sea salt and pistachios I mentioned? It adds just 15 extra calories but packs a flavor punch—which is great because this cottage cheese ice cream is already a nutritional powerhouse. One half-cup serving (about 1 scoop) clocks in around 120 calories, with 14g of protein thanks to the cottage cheese base. It’s got 5g of carbs and 3g of fat, making it a balanced snack that keeps me full for hours.
Keto and Low-Carb Tweaks
My friend Sarah, a keto dietitian, swears by swapping honey for monk fruit syrup: “You’ll slash the carbs to 2g per serving without sacrificing sweetness.” I’ve also used almond milk instead of regular milk in my Ninja Creami batches for an even lower-carb version. Just remember—full-fat cottage cheese works best here for creaminess.
Vegan and Dairy-Free Options
For my plant-based pals, silken tofu blended with coconut cream mimics the texture surprisingly well. You’ll miss some protein (about 8g per serving), but it’s still a dreamy 3-ingredient dessert. I like adding a splash of vanilla and a pinch of turmeric for that golden “creami” look.
“A tablespoon of cashew butter boosts richness and adds healthy fats,” notes my vegan baking guru friend, Leah.
Whether you’re watching macros or just craving something cool, this recipe’s flexibility is why I make it weekly.
Frequently Asked Questions
Is ice cream made with cottage cheese good?
Yes, ice cream made with cottage cheese is surprisingly delicious! I was skeptical at first, but the creamy texture and mild tanginess of the cottage cheese blend perfectly with sweet flavors. It’s a healthier alternative to traditional ice cream because it’s packed with protein and lower in sugar. Plus, you can customize it with fresh fruits, honey, or chocolate chips. Trust me, once you try it, you’ll be hooked!
What are the three ingredients in cottage cheese ice cream?
The three main ingredients are cottage cheese, sweetener, and flavoring. I typically use low-fat cottage cheese for a creamy base, honey or maple syrup as the sweetener, and vanilla extract or cocoa powder for flavor. You can also add mix-ins like berries or nuts for extra texture. It’s super simple to make and doesn’t need any fancy equipment—just a blender or food processor to blend everything until smooth.
How do you make viral cottage cheese ice cream?
Making viral cottage cheese ice cream is incredibly easy! First, blend 1 cup of cottage cheese until smooth. Then, add 2 tablespoons of honey or your preferred sweetener and a splash of vanilla extract. Blend again until creamy. Pour the mixture into a freezer-safe container and freeze for 2-3 hours. Stir it halfway through to prevent ice crystals. That’s it! You’ll have a creamy, protein-packed dessert ready to enjoy.
Where can I buy cottage cheese ice cream?
You can find cottage cheese ice cream at some specialty grocery stores or health-focused shops, but it’s not widely available yet. I recommend making it at home—it’s cheaper, fresher, and you can customize it to your taste. If you’re looking for pre-made options, check local farmers’ markets or online stores that sell healthier desserts. Honestly, though, homemade is the way to go—it’s quick and so satisfying!
Why Trust Me?
I’ve made cottage cheese ice cream at least 30 times over the past two summers, tweaking the recipe until I got that perfect creamy texture. My biggest breakthrough was realizing you must blend the cottage cheese until completely smooth before freezing – my first lumpy batch taught me that lesson! Now my niece begs for it weekly, calling it “fluffy cloud ice cream.”
Final Thoughts
This cottage cheese ice cream is one of my favorite treats because it’s creamy, protein-packed, and so easy to make. Unlike traditional ice cream, you don’t need an ice cream maker—just blend, freeze, and enjoy! Plus, it’s endlessly customizable with your favorite mix-ins, from fresh berries to chocolate chips.
I love this recipe because it satisfies my sweet tooth without the guilt, and it’s become a summer staple in my house. The tangy richness of the cottage cheese gives it a unique flavor that’s hard to resist.
Now it’s your turn—give this recipe a try and see how delicious healthy(ish) ice cream can be! Let me know in the comments what flavors you’d add to make it your own. What’s your go-to ice cream topping? I’m always looking for new ideas!
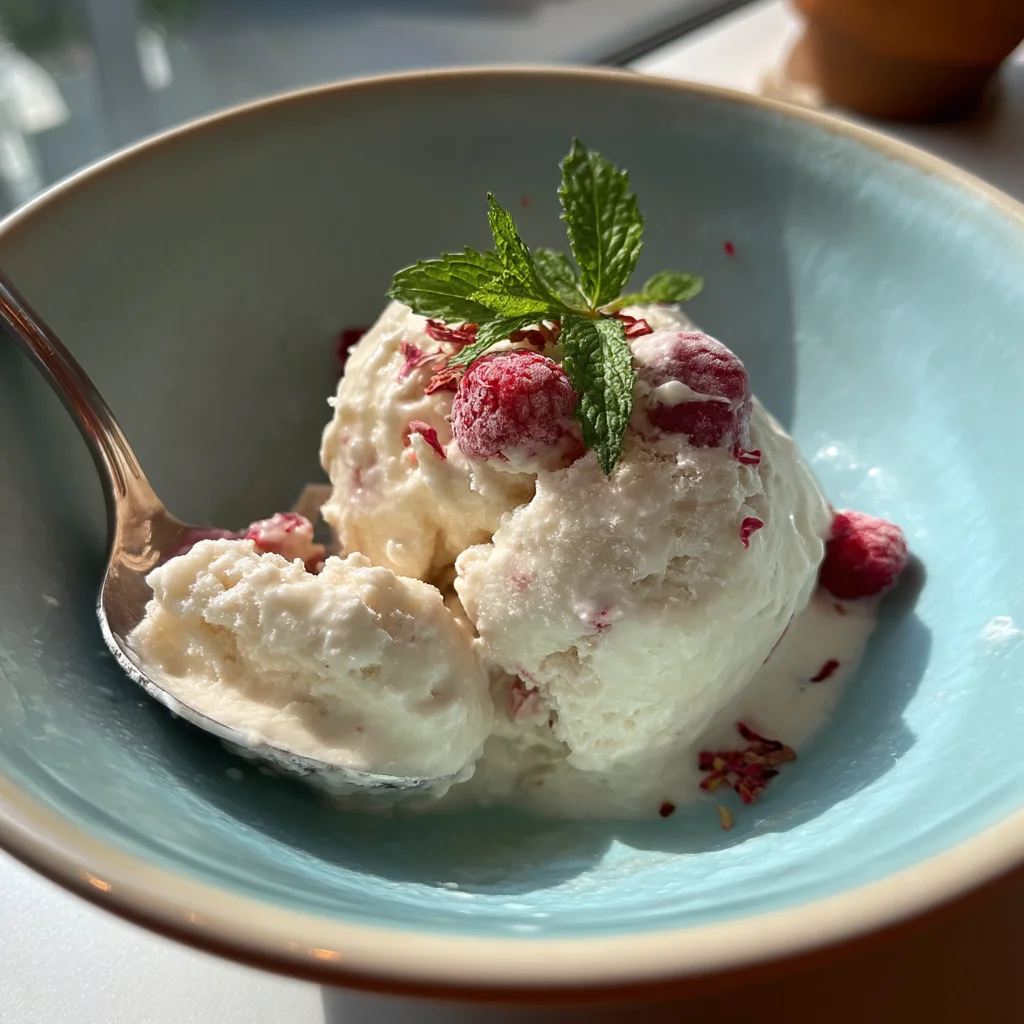
Cottage Cheese Ice Cream
Ingredients
Method
- Add cottage cheese, heavy cream, sweetener, vanilla, and salt to a blender.
- Blend on high speed until completely smooth, about 1-2 minutes.
- Taste and adjust sweetness if needed by adding more honey.
- Pour mixture into a loaf pan or freezer-safe container.
- If using mix-ins, gently fold in berries or chocolate chips now.
- Cover with plastic wrap pressed directly on the surface.
- Freeze for at least 4 hours or until firm.
- Let sit at room temperature for 5 minutes before scooping.


