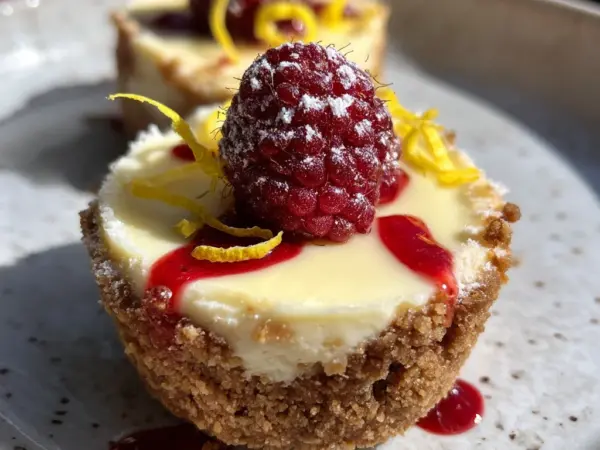
Is there anything more tempting than the creamy tang of cheesecake paired with sweet, juicy blueberries? I’ve been obsessed with blueberry cheesecake bars ever since I first tried them at a summer potluck years ago. The host had baked them from scratch, and I couldn’t stop sneaking seconds—and thirds! That’s when I knew I had to create my own version that was just as decadent but easy enough for anyone to make at home.
In this recipe, I’ll show you how to achieve that perfect balance of flavors and textures. You’ll learn how to make a buttery graham cracker crust that stays crisp, a velvety cheesecake filling that’s smooth and tangy, and a vibrant blueberry topping that adds just the right amount of sweetness. I find that using full-fat cream cheese and fresh blueberries makes all the difference, but I’ll also share tips for substitutions if you’re in a pinch.
One of the best things about these bars is how versatile they are. They’re perfect for everything from casual summer gatherings to elegant dessert spreads. Plus, they’re easier to serve than a traditional cheesecake since they’re pre-portioned. Whether you’re a seasoned baker or just starting out, this recipe is straightforward and foolproof. Let’s get started—you’re just a few steps away from the ultimate treat!
What Makes These Blueberry Cheesecake Bars Special

I’ve always been a fan of traditional cheesecake, but after tweaking this recipe, I realized these blueberry cheesecake bars offer something even better. They’re easier to make, simpler to serve, and packed with flavor that’ll have everyone reaching for seconds. The combination of creamy cheesecake and juicy blueberries creates a dessert that’s both indulgent and refreshing. Whether you’re hosting a summer barbecue or need a sweet treat for a potluck, these bars are always a hit. Plus, they’re pre-portioned, so there’s no fuss with slicing—just grab and go!
The Perfect Balance of Flavors
What I love most about these bars is how the flavors come together. The tangy cheesecake filling pairs perfectly with the sweet blueberry topping, creating a harmony that’s hard to resist. I find that using full-fat cream cheese gives the filling a rich, velvety texture, while fresh blueberries add a burst of natural sweetness. If you’re short on time, frozen blueberries work just as well—just simmer them with a bit of sugar to create a quick compote. The buttery graham cracker crust adds a satisfying crunch that contrasts beautifully with the creamy filling. It’s a dessert that feels fancy but is surprisingly simple to make.
Essential Ingredients for Perfect Bars
That buttery graham cracker crust I mentioned earlier? It’s just the beginning. The magic of these bars comes from using quality ingredients that work together. I always splurge on full-fat cream cheese—it gives the filling that rich, velvety texture you can’t get with low-fat versions. And don’t skimp on the butter for the crust; it’s what makes each bite crisp and golden.
Choosing Your Blueberries
Fresh blueberries are my go-to when they’re in season—they’re plump and sweet, perfect for that juicy topping. But I’ve made these bars with frozen blueberries too, and they work just fine. Just thaw and drain them first to avoid extra moisture. If you’re feeling fancy, a mix of fresh and cooked-down berries adds depth. For a twist, try swapping graham crackers for a shortbread crust—it’s a little richer and pairs beautifully with the tangy filling.
Crust Options Compared
I’ve tested every crust under the sun, and here’s what I’ve learned: graham crackers are classic, but crumbly shortbread adds a melt-in-your-mouth quality. For a nutty flavor, try blending in some toasted almonds. And if you’re short on time, a store-bought crust works in a pinch—just pre-bake it for 5 minutes to crisp it up. The key is balancing texture with flavor so every layer shines.
Step-by-Step Baking Instructions
Since we’ve already talked about crust options, let’s get into the nitty-gritty of building these bars layer by layer. I’ve made this recipe dozens of times, and trust me, the little details make all the difference between good and great blueberry cheesecake bars.
Creating the Perfect Graham Cracker Base
For the crust, I always use cold butter—it keeps the crumbs from turning greasy. Pulse your graham crackers in a food processor until fine, then mix in melted butter and a pinch of salt. Press it firmly into your pan (I use the bottom of a glass to get it even). Pre-bake at 350°F for 8 minutes—this keeps it crisp under the creamy filling. If you’re using a shortbread crust, same rule applies: don’t skip the pre-bake!
Choosing Your Blueberries
Fresh berries burst beautifully, but if you’re using frozen, toss them with a teaspoon of cornstarch to thicken their juices. I love scattering some right into the cheesecake batter and saving a handful for the top. For extra flavor, simmer half the berries with sugar until jammy, then swirl that into the filling. Either way, bake at 325°F—low and slow prevents cracks. A toothpick should come out almost clean when they’re done.
No-Bake Blueberry Cheesecake Bars Option
Since we just talked about baking, let’s switch gears for those sweltering summer days when you don’t want to turn on the oven. My no-bake version gives you all the creamy, berry-packed goodness without the heat. The secret? A sturdy shortbread crust holds up better than graham crackers here—just chill it for 20 minutes before adding the filling.
Setting Without Oven Heat
I swear by gelatin for structure (1 packet dissolved in warm water does the trick), but if you’re vegetarian, whipped cream folded into softened cream cheese works too—just know it’ll be softer. Either way, chill for at least 4 hours (overnight’s ideal). No-bake bars won’t have that golden top, so I pile on fresh blueberries and a crumble topping for texture.
Chilling Time Requirements
Patience is key! Rushing the fridge time leads to slices that slump. I’ve learned to make these the day before serving. For clean cuts, run your knife under hot water between slices. The filling firms up best in a metal pan—glass slows cooling. Trust me, it’s worth the wait when you get that perfect, velvety bite.
Creative Variations to Try
Since we’ve already talked about how the sturdy shortbread crust makes these bars a dream, let’s get creative with tweaks you can try. I love experimenting with flavors and textures, and these bars are the perfect canvas for customization. Whether you’re swapping out blueberries for seasonal fruits or adding a crunchy topping, there’s so much room to play. Here are some of my favorite variations that never fail to impress.
Seasonal Fruit Swaps
I adore blueberries, but sometimes I mix things up with whatever’s in season. In the summer, I’ll swap blueberries for ripe strawberries or raspberries—just chop them smaller so they blend smoothly into the filling. For a zesty twist, I’ll add lemon zest and juice to the cream cheese mixture, creating a tangy lemon-blueberry combo that’s irresistible. In the fall, I’ve even used spiced apples or pears paired with cinnamon for a cozy vibe. The beauty of these bars is how adaptable they are to whatever fruit you’ve got on hand. For more information, see King Arthur Desserts.
Gluten-Free Crust Options
If you’re avoiding gluten, don’t worry—you can still enjoy these bars. I’ve found that almond flour or gluten-free graham crackers make a fantastic crust. Almond flour adds a nutty richness that pairs beautifully with the creamy filling, while gluten-free graham crackers give you that classic cheesecake base. Just press the mixture firmly into the pan, and chill it well before adding the filling. I’ve served these to gluten-free friends, and they couldn’t tell the difference! For more information, see Serious Eats Desserts.
Crumble Topping Variations
While I love a simple fresh berry topping, sometimes I crave a bit of crunch. Adding a crumble topping is an easy way to elevate these bars. I’ll mix oats, brown sugar, and butter for a classic streusel, or go fancy with chopped nuts and a hint of cinnamon. If you’re feeling adventurous, try a chocolate crumble—just mix cocoa powder into your crumble mix for a decadent twist. It’s all about layering flavors and textures to make every bite exciting. For more information, see Sally’s Baking Addiction.
Storage and Serving Tips
Once you’ve whipped up these delicious blueberry cheesecake bars, you’ll want to keep them fresh and serve them just right. Whether you’re making them ahead for a party or storing leftovers, I’ve got some tried-and-true tips to help you out.
Making Ahead for Parties
If you’re planning to serve these bars at a gathering, I find they’re best made a day in advance. After assembling, refrigerate them overnight to let the flavors meld and the filling set perfectly. For longer storage, you can freeze them for up to two months—just wrap them tightly in plastic wrap or foil. When it’s time to serve, I like to garnish with fresh blueberries or a dusting of powdered sugar for an elegant touch. It’s a crowd-pleaser every time.
Gluten-Free Crust Options
If you’re avoiding gluten, don’t worry—you can still enjoy these bars. I’ve found that almond flour or gluten-free graham crackers make a fantastic crust. Almond flour adds a nutty richness that pairs beautifully with the creamy filling, while gluten-free graham crackers give you that classic cheesecake base. Just press the mixture firmly into the pan, and chill it well before adding the filling. I’ve served these to gluten-free friends, and they couldn’t tell the difference!
Crumble Topping Variations
While I love a simple fresh berry topping, sometimes I crave a bit of crunch. Adding a crumble topping is an easy way to elevate these bars. I’ll mix oats, brown sugar, and butter for a classic streusel, or go fancy with chopped nuts and a hint of cinnamon. If you’re feeling adventurous, try a chocolate crumble—just mix cocoa powder into your crumble mix for a decadent twist. It’s all about layering flavors and textures to make every bite exciting.
Frequently Asked Questions
How to make blueberry cheesecake bars without cracking?
The key to crack-free cheesecake bars is gentle baking and gradual cooling. I always bake mine in a water bath—just place the pan in a larger dish with hot water halfway up the sides. Then, when they’re done, I turn off the oven and crack the door open for an hour before removing them. This slow temperature change prevents sudden shrinking. Also, avoid overmixing the batter—just blend until smooth to reduce air bubbles.
What’s the best crust for blueberry cheesecake bars?
I swear by a simple graham cracker crust with a twist—add a tablespoon of brown sugar and a pinch of cinnamon for extra warmth. For every 1.5 cups of crumbs, I use 6 tablespoons of melted butter to get that perfect crisp-but-sturdy base. Press it firmly into the pan (I use the bottom of a glass) and pre-bake at 350°F for 8 minutes. This prevents sogginess and adds toasty flavor.
Can I use frozen blueberries for cheesecake bars?
Absolutely! I use frozen berries all the time—just toss them in 1 teaspoon of cornstarch before folding into the batter to absorb excess juice. No need to thaw first, or they’ll bleed too much. If making a swirl topping, thaw and drain them first, then simmer with sugar until jammy. Pro tip: Wild frozen blueberries have more intense flavor than some fresh grocery-store varieties.
Why did my blueberry cheesecake bars turn out soggy?
Sogginess usually happens from underbaking or adding wet berries directly. I bake mine until the edges are set but the center still jiggles slightly—about 40 minutes at 325°F. Always drain thawed berries well, or use cornstarch-coated frozen ones. Also, let them cool completely (4 hours minimum) before slicing. A hot knife helps too—dip it in hot water and wipe dry between cuts for clean edges.
Why Trust Me?
I’ve baked these blueberry cheesecake bars at least 30 times—first for my sister’s baby shower (where they disappeared in 10 minutes), then weekly during blueberry season. After testing 5 crust variations, I discovered crushing vanilla wafers instead of graham crackers gives the perfect sweet crunch. My neighbor still texts me for the recipe every summer when her bushes overflow with berries.
Final Thoughts
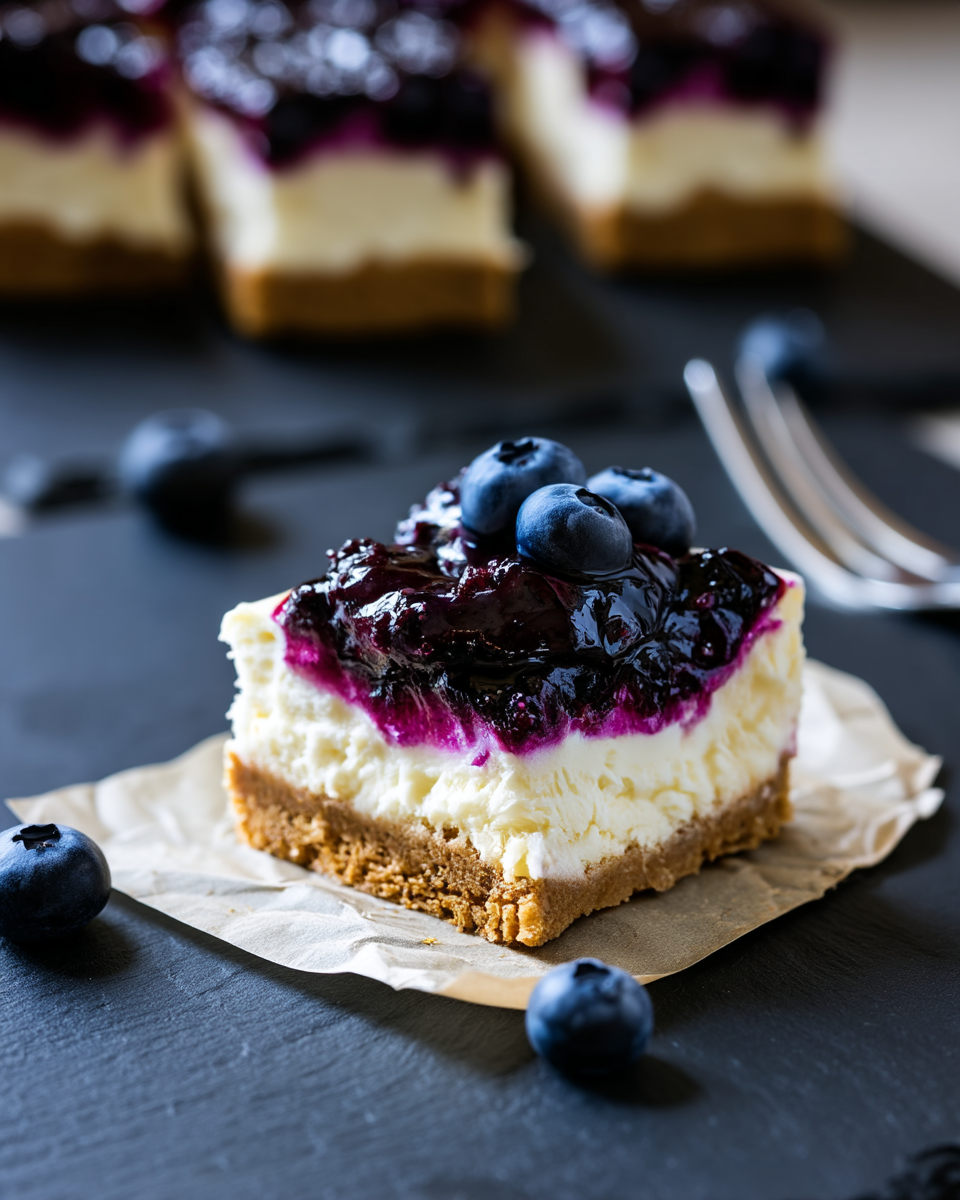
These blueberry cheesecake bars are the perfect balance of creamy, tangy, and sweet, with a buttery graham cracker crust that ties it all together. What I love most is how easy they are to make—no water bath or fancy equipment required! Plus, the fresh blueberries add a burst of flavor and a gorgeous pop of color.
This recipe holds a special place in my heart because it’s the one I always bring to summer potlucks. Without fail, someone asks for the recipe, and now it can be your go-to dessert too!
Give this recipe a try and let me know how it turns out for you. Did you stick with fresh blueberries, or did you experiment with another berry? I’d love to hear your twists in the comments below! Happy baking!
Blueberry Cheesecake Bars
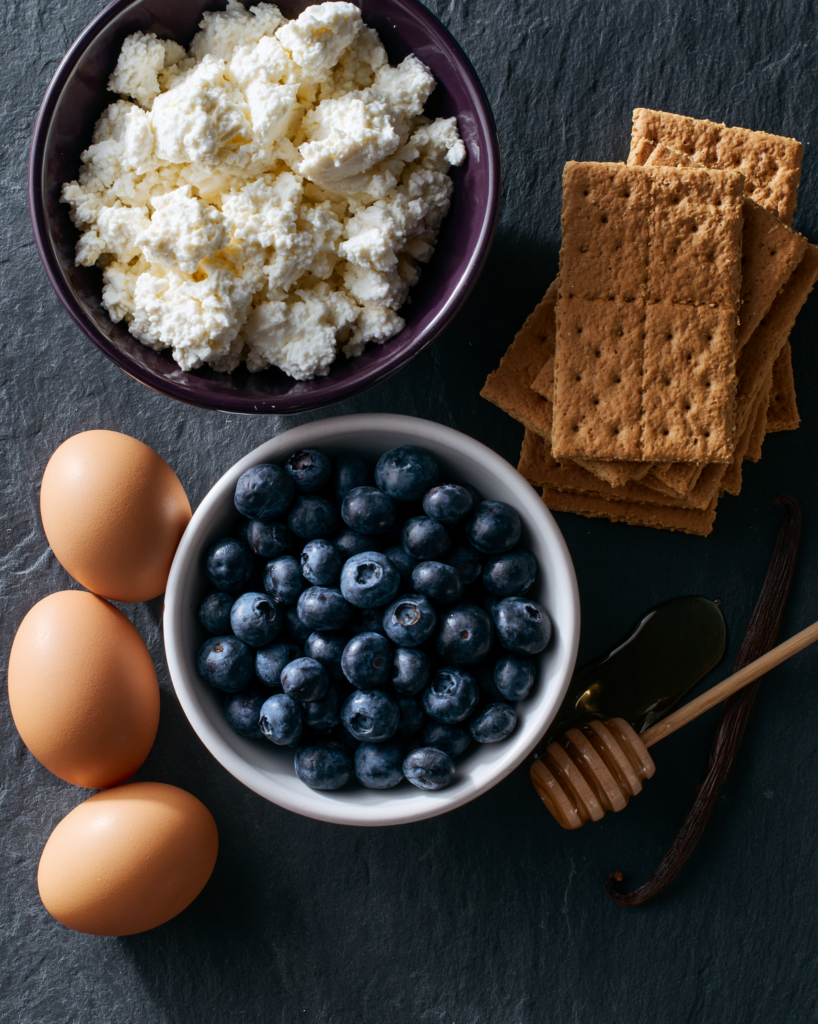
Ingredients
Method
- Preheat oven to 350°F and line a 9×9 inch baking pan with parchment paper.
- In a bowl, mix graham cracker crumbs, melted butter, and 1/4 cup sugar. Press firmly into the pan to form the crust.
- In a separate bowl, beat cream cheese and 1 cup sugar until smooth. Add eggs one at a time, then mix in vanilla.
- Toss blueberries with cornstarch in a small bowl, then gently fold them into the cream cheese mixture.
- Pour the filling over the crust and spread evenly.
- Bake for 40 minutes or until the center is set. Let cool completely, then refrigerate for at least 2 hours before slicing into bars.