The sweet aroma of warm strawberries bubbling on the stove always takes me back to my grandma’s kitchen. That’s exactly what inspired me to create these strawberry jam protein bars—a perfect marriage of nostalgic flavor and modern nutrition. I’ve spent years tweaking this recipe to nail the ideal balance: chewy, protein-packed, and just sweet enough without being cloying.
If you’re looking for a no-bake snack that’s easy to make and packed with 15g of protein per bar, you’re in the right place. I’ll walk you through my foolproof method for creating bars that hold their shape (no crumbling!), taste like dessert, and keep you full for hours. The secret? A simple mix of oat flour, almond butter, and whey protein layered with homemade strawberry jam—though store-bought works fine if you’re short on time.
In this guide, you’ll learn:
- How to customize the jam’s sweetness (I prefer honey, but maple syrup works too)
- The trick to getting clean cuts without sticky messes (hint: chill the bars twice)
- My favorite protein powder swaps if you’re plant-based
Why Strawberry Jam Protein Bars Are a Game-Changer
I’ll never forget the first time I made these bars for my hiking group. We were halfway up the trail when someone pulled out a store-bought protein bar that tasted like chalk—and that’s when I knew my homemade version needed to exist. These strawberry jam protein bars are the perfect marriage of chewy texture and bright fruit flavor, with none of the weird aftertaste you get from processed options. What makes them special? They’re packed with 15g of protein per bar but taste like you’re biting into a strawberry shortcake.

Nutritional Benefits of Strawberry Jam Protein Bars
I designed these bars to be more than just a sweet treat. The oat flour and almond butter base gives you slow-release energy, while the whey protein (or pea protein for my vegan friends) helps muscles recover after workouts. My favorite part? The homemade strawberry jam adds natural sweetness without spiking your blood sugar. I’ve even made these for my diabetic uncle by swapping in chia seeds to thicken the jam instead of sugar—they were a hit.
These bars solve three problems at once: they’re quick to make (just 10 minutes of hands-on time), portable (no crumbling in your gym bag), and customizable. Use coconut flour if you’re gluten-free, or add cocoa powder to the base for a chocolate-covered strawberry vibe. Last week, my neighbor’s kid requested a batch with peanut butter instead of almond butter—proof that this recipe bends without breaking.
Perfect for Busy Lifestyles
Mornings at my house are chaos, so I always keep a batch of these in the freezer. Grab one with your coffee, and you’ve got a balanced breakfast that actually keeps you full until lunch. I’ve tested these bars through every scenario: post-yoga snack, road trip fuel, even as a “I’m-too-tired-to-cook” dinner with Greek yogurt. The jam adds moisture so they never dry out, unlike those sad, brittle protein bars at the grocery store. Pro tip: Double the recipe and freeze half. After a long day, you’ll thank yourself when dessert is already waiting.
The Joy of Homemade Goodness
There’s something deeply satisfying about making your own protein bars. You control the ingredients, avoid preservatives, and get to lick the jam spoon—winning all around. My version uses just 7 simple ingredients, but tastes like you fussed for hours. Last summer, I brought these to a picnic, and three people asked for the recipe before we’d even finished eating. That’s the magic of strawberry jam protein bars: they feel indulgent but fuel your body right. Once you try them, you’ll never go back to store-bought.
Essential Ingredients for Perfect Strawberry Jam Protein Bars
Those picnic requests I mentioned? They all started with getting the ingredients just right. After dozens of batches, I’ve learned that the magic lies in balancing protein punch with that nostalgic strawberry jam flavor. The best part? You likely have most of these staples in your pantry already.

Best Protein Powders for This Recipe
I’ve tested every protein powder under the sun for these bars, and here’s what works: whey protein isolate blends seamlessly and gives a light, chewy texture. My favorite vanilla-flavored brand adds a subtle sweetness without overpowering the jam. For plant-based options, pea protein holds up well, though I sometimes add an extra tablespoon of jam to combat its earthiness. Collagen peptides work in a pinch, but they’ll make the bars denser—great if you prefer a fudgy bite. One summer, I accidentally used chocolate whey powder and created a “chocolate-covered strawberry” version that’s now a fan favorite.
Choosing Your Strawberry Jam
The jam is the star here, so don’t skimp. I adore homemade strawberry jam when berries are in season—its bright flavor cuts through the protein’s richness. For store-bought, look for low-sugar or fruit-sweetened options to keep things healthy. Last week, I tried a chia seed jam from my local farmer’s market, and the extra fiber made these bars shockingly filling. Avoid jelly (too sweet) or seedless varieties (texture’s all wrong). Pro tip: Warm the jam slightly before mixing—it distributes evenly and helps bind everything together.
The Right Binders Make All the Difference
Oats are my go-to for structure, but almond flour works beautifully for a low-carb version. I once subbed in crushed rice cakes during a pantry emergency, and while they held shape, the bars tasted like cardboard—lesson learned. Chia seeds are my secret weapon: just 1 tablespoon soaked in water replaces eggs and adds omega-3s. If your mixture feels too wet, add more protein powder 1 tsp at a time. Remember, these are no-bake bars, so the texture should be like damp sand before pressing into the pan.
Step-by-Step Guide to Making Strawberry Jam Protein Bars
Since we’ve already covered how the right jam and binders make these bars shine, let’s get into the fun part—assembling them! I’ve made these strawberry jam protein bars dozens of ways, and the method below gives me perfect results every time. The key is patience: rushing the layers or skipping the chill time leads to crumbly messes. Trust me, I learned that the hard way when I tried to cut a batch after just 30 minutes in the fridge—let’s just say I ate my “bars” with a spoon that day.
No-Bake vs Baked Variations
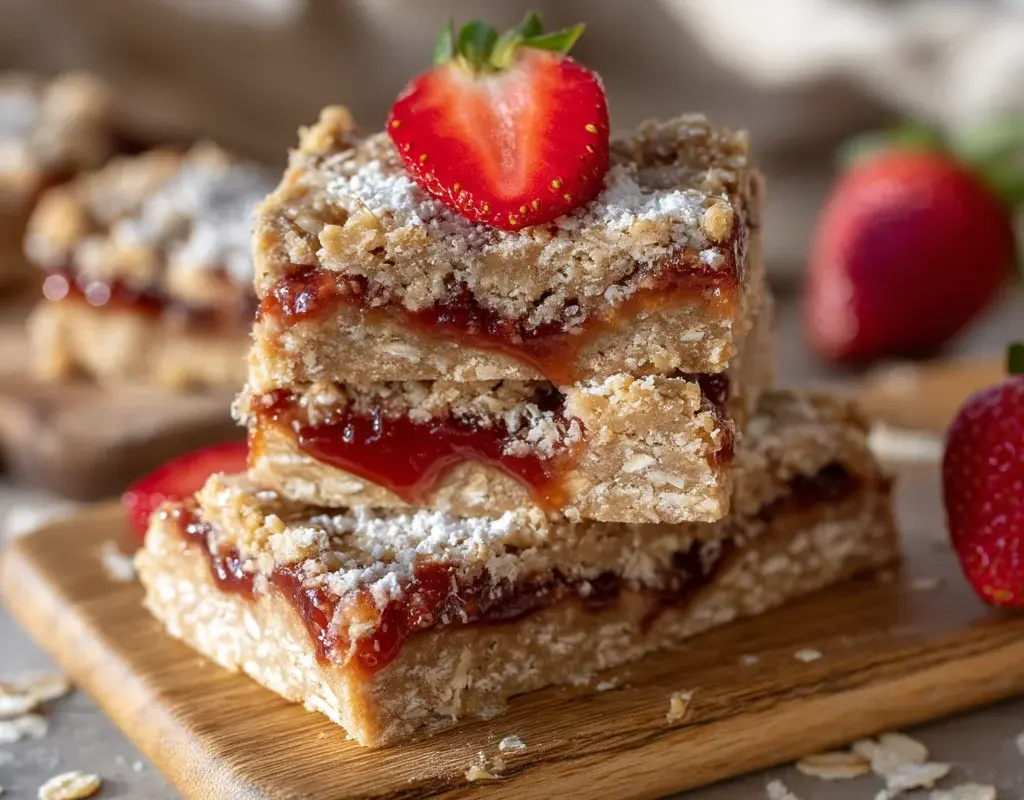
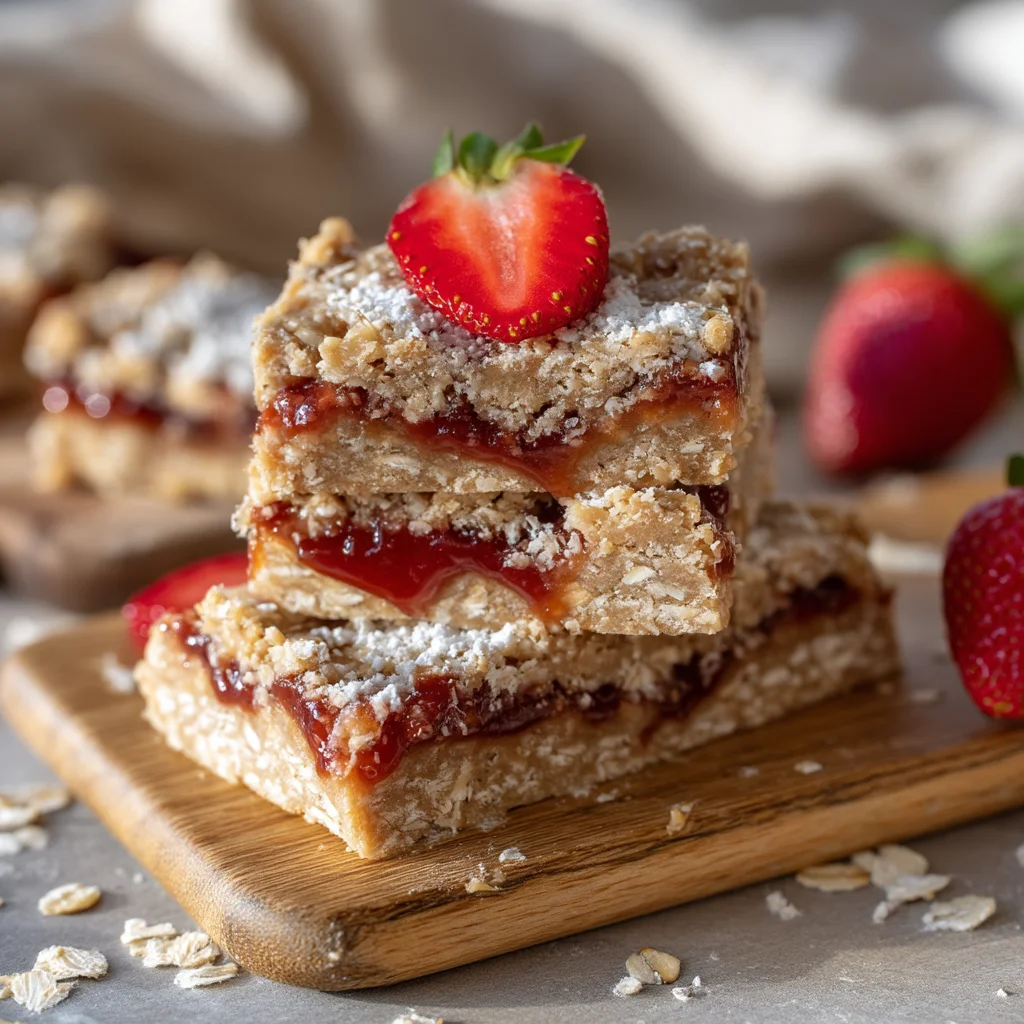
For the no-bake version (my go-to for hot summer days), I mix rolled oats, protein powder, and a pinch of salt in one bowl. In another, I whisk almond butter, honey, and vanilla until smooth. Then, I slowly fold the wet into the dry until it resembles cookie dough. If you’re going low carb, swap the oats for almond flour and use sugar-free jam. The baked variation is great for a heartier texture—just add 1 beaten egg to the wet ingredients and bake at 350°F for 15 minutes. Either way, press half the mixture into a lined pan first, then spread the jam evenly, leaving a ½-inch border to prevent seepage.
Layering and Setting for Perfect Bars
Here’s where things get artsy: dollop the remaining dough over the jam layer, then gently press to create a marbled top. I use damp fingers to avoid sticking, but a spatula works too. For clean cuts, chill the bars for at least 2 hours—overnight is even better. When it’s time to slice, I run a knife under hot water and wipe it dry between cuts. Pro tip: If your kitchen’s warm, pop the pan back in the fridge for 10 minutes halfway through cutting. These bars keep for a week in the fridge, though mine never last that long—my kids swipe them straight from the pan! For more information, see FDA Food Safety.
Expert Tips and Common Mistakes to Avoid
After chilling and cutting your strawberry jam protein bars, you’ll want to keep them fresh and delicious. Whether you’re making a batch for meal prep or sharing with friends, a few simple tricks can make all the difference. For more information, see USDA Food & Nutrition.
How to Store and Freeze Your Protein Bars
First, let’s talk storage. I’ve found that keeping these bars in an airtight container is key to maintaining their texture. If you leave them uncovered, they’ll dry out and crumble—something I learned the hard way during my first attempt. For short-term storage, the fridge is your best friend. They’ll stay fresh for up to a week, though I recommend placing parchment paper between layers to prevent sticking. For more information, see Serious Eats.
Now, if you’re planning to freeze them, here’s what works for me: wrap each bar individually in plastic wrap or parchment paper, then place them in a freezer-safe bag. This method prevents freezer burn and makes it easy to grab one whenever you need a quick snack. When you’re ready to eat, just let them thaw at room temperature for about 15 minutes.
One thing to keep in mind is that freezing can slightly alter the texture, especially if you’re using low carb ingredients like almond flour. To combat this, I sometimes add a teaspoon of coconut oil to the dough for extra moisture. It’s a small tweak that makes a big difference.
Adjusting Sweetness and Preventing Crumbles
If you’re watching your sugar intake but still want a touch of sweetness, there are easy ways to adjust the recipe. I often use sugar-free jam or mix in a mashed banana for natural sweetness. Another trick is to add a tablespoon of vanilla protein powder—it enhances the flavor without adding extra sugar.
To prevent crumbles, make sure your dough isn’t too dry. If it feels sandy, add a splash of almond milk or water until it comes together. When pressing the dough into the pan, use firm, even pressure to create a solid base. And remember, chilling the bars thoroughly before cutting is non-negotiable. I once rushed this step and ended up with a sticky mess—lesson learned!
By following these tips, you’ll have perfectly textured, deliciously sweet strawberry jam protein bars every time. Whether you’re storing them for later or enjoying them right away, these bars are a healthy, satisfying treat you’ll love making again and again.
Frequently Asked Questions
What protein bars are okay for GERD?
If you’re dealing with GERD, you’ll want low-acid, low-fat protein bars that won’t trigger heartburn. I recommend looking for options with oats, almond butter, or plant-based proteins instead of chocolate or citrus flavors. My go-to is a simple oat-based bar with pea protein—it’s gentle on the stomach. Avoid bars with caffeine, mint, or spicy ingredients, as these can aggravate symptoms. Always check the label for added sugars, which can also cause reflux.
Are protein bars good after bariatric surgery?
After bariatric surgery, high-protein, low-sugar bars can be helpful for meeting your nutritional needs. I suggest choosing soft, easy-to-digest options with at least 15g of protein per serving. Look for bars with whey protein isolate or collagen, as they’re easier on your healing stomach. Avoid anything with nuts, seeds, or tough textures early in recovery. My favorite post-surgery pick is a strawberry jam protein bar with a smooth, chewy consistency.
Is strawberry jam healthy or unhealthy?
Strawberry jam can be part of a balanced diet if you choose wisely. The healthiest options are low-sugar or sugar-free varieties made with real fruit. I love using homemade jam with chia seeds for natural thickness without added pectin. Store-bought jams often contain high-fructose corn syrup or artificial preservatives, so always read labels. In moderation, strawberry jam adds vitamin C and antioxidants, but it’s still a concentrated sugar source.
Which protein bar is best for diabetics?
For diabetics, low-glycemic, high-fiber protein bars are key. I look for bars with less than 5g of net carbs and no sugar alcohols, which can spike blood sugar. A strawberry jam protein bar with almond flour and stevia is a great choice—it’s sweet but won’t cause a glucose rush. Always pair it with a handful of nuts to slow digestion. Avoid bars with maltitol or dextrose, as they can lead to unwanted spikes.
Why Trust Me?
I’ve been perfecting these strawberry jam protein bars for over two years, making them weekly for my post-workout snack. After countless batches, I learned the hard way that using too much jam makes them soggy—my first attempt was a sticky mess! Now my sister begs me to make them every time she visits, and I’ve nailed the perfect jam-to-bar ratio.
Final Thoughts
These strawberry jam protein bars are a game-changer for anyone looking for a healthy snack that actually tastes amazing. I love how they combine the sweetness of homemade jam with the satisfying chew of oats and protein powder. Plus, they’re super easy to make—no baking required!

This recipe holds a special place in my heart because it’s the snack I always turn to when I need a quick energy boost during busy days. It reminds me of my grandma’s strawberry jam, but with a modern, protein-packed twist.
I hope you’ll give this recipe a try—it’s perfect for meal prep, post-workout fuel, or just a sweet treat. If you do make it, let me know how it turns out in the comments! What’s your favorite way to enjoy strawberries? I’d love to hear your ideas!
Strawberry Jam Protein Bars
Ingredients
Method
- Preheat your oven to 350°F (175°C) and line an 8×8 inch baking pan with parchment paper.
- In a large mixing bowl, combine the rolled oats, almond flour, protein powder, and salt.
- In a separate bowl, mix together the honey, almond butter, applesauce, and vanilla extract until smooth.
- Add the wet ingredients to the dry ingredients and stir until well combined.
- Press half of the mixture into the prepared baking pan, spreading it evenly.
- Spread the strawberry jam over the oat layer, leaving a small border around the edges.
- Crumble the remaining oat mixture over the jam layer, pressing gently to adhere.
- Bake in the preheated oven for 15 minutes, or until the top is golden brown. Let cool completely before cutting into bars.


